Guide, video e prompt gratuitiFree guides, videos and prompts

Guide, video e prompt gratuiti
per creare contenuti
mozzafiato con l'AI
Free guides, videos and prompts
to create content that's
stunning with AI

Per ogni Reel che pubblichiamo trovi qui la guida gratuita: i passaggi da seguire e i prompt pronti da copiare, in italiano e in inglese. Più tutorial video e il Prompt Mago.For every Reel we publish you'll find the free guide here: the steps to follow and ready-to-copy prompts, in Italian and English. Plus video tutorials and the Prompt Mago.

0+
Guide gratuite dai ReelFree guides from our Reels
5 min
Dal prompt al videoFrom prompt to video
100%
Metodo replicabileRepeatable method
0
Competenze tecniche richiesteTechnical skills required

🎬 Tutorial trasformazione🎬 Transformation tutorial

Tutorial su come essere il protagonista del video trasformazione di Umano + CaneTutorial on how to become the star of the Human + Dog transformation video

Nessuna guida trovataNo guide foundProva con un'altra parola o scegli «Tutto».Try another word or choose «All».
Crea immagini e video descrivendo il risultato: l'agente di Adobe Firefly e i modelli come Kling in un solo posto
Risorsa gratuita dal ReelFree resource from our Reel

Crea immagini e video descrivendo il risultato: l'agente di Adobe Firefly e i modelli come Kling in un solo postoCreate images and videos by describing the result: Adobe Firefly's agent and models like Kling in one place

Nel Reel ti mostro le novità di Adobe Firefly presentate ad Adobe MAX il 10 novembre 2026: con Firefly AI Assistant (in beta, basato sul Creative Agent di Adobe) descrivi cosa vuoi ottenere e l'agente pianifica e svolge il lavoro, mentre tu tieni il controllo creativo. Firefly riunisce anche modelli di altre aziende, tra cui Kling, Google, OpenAI e ElevenLabs, in un unico ambiente. Nota: l'assistente è in beta e i modelli partner non sono disponibili in tutte le funzioni (Kling si usa nella generazione video, nel Video Editor e in Boards); ogni generazione consuma crediti in base al tuo piano.In the Reel I show you what's new in Adobe Firefly, presented at Adobe MAX on November 10, 2026: with Firefly AI Assistant (in beta, powered by Adobe's Creative Agent) you describe what you want and the agent plans and does the work, while you keep creative control. Firefly also brings models from other companies, including Kling, Google, OpenAI and ElevenLabs, into a single workspace. Note: the assistant is in beta and partner models aren't available in every feature (Kling is used in video generation, the Video Editor and Boards); each generation uses credits based on your plan.

Strumento: Adobe FireflyTool: Adobe FireflyTempo: 15 minutiTime: 15 minutesCosto: crediti del tuo pianoCost: your plan's credits
  • Apri Adobe Firefly sul web, accedi con il tuo account Adobe e avvia Firefly AI Assistant (beta). Se disponibile attiva la modalità Piano (Plan Mode): l'agente ti mostra i passaggi prima di eseguirli.Open Adobe Firefly on the web, sign in with your Adobe account and start Firefly AI Assistant (beta). If available, turn on Plan Mode: the agent shows you the steps before running them.
  • Incolla il PROMPT 1 e descrivi il risultato finale, non i singoli comandi: formato, stile, testi e per cosa ti serve. Controlla il piano e correggilo prima di confermare.Paste PROMPT 1 and describe the end result, not individual commands: format, style, text and what you need it for. Review the plan and fix it before confirming.
  • Per il video vai nella generazione video di Firefly, scegli un modello Kling dal selettore dei modelli e usa il PROMPT 2 partendo da un'immagine creata al passo prima (da immagine a video).For video, go to Firefly video generation, pick a Kling model from the model selector and use PROMPT 2 starting from an image created in the previous step (image to video).
  • Rifinisci con il PROMPT 3: chiedi modifiche mirate invece di rigenerare tutto. Tieni d'occhio i crediti e, per usi commerciali, verifica le condizioni dei modelli partner e della beta.Refine with PROMPT 3: ask for targeted edits instead of regenerating everything. Keep an eye on credits and, for commercial use, check the terms for partner models and the beta.

Ti è piaciuta questa risorsa? Nel percorso completo The AI Creator System (14 moduli, oltre 5 ore) impari a usare le AI come un fenomeno, passo per passo.Liked this resource? In the full The AI Creator System program (14 modules, over 5 hours) you learn to use AI like a pro, step by step.

Vai al corso completo →Go to the full course →
Crea una canzone con l'AI in ElevenMusic e pubblicala su SoundCloud
Risorsa gratuita dal ReelFree resource from our Reel

Crea una canzone con l'AI in ElevenMusic e pubblicala su SoundCloudCreate a song with AI in ElevenMusic and publish it on SoundCloud

Nel Reel parliamo della novità annunciata il 5 novembre 2026: le canzoni create con ElevenMusic (l'app musicale di ElevenLabs) si possono pubblicare direttamente sul tuo profilo SoundCloud, senza scaricarle e ricaricarle a mano. SoundCloud è la prima piattaforma esterna collegata. I brani pubblicati così riportano un'indicazione che sono stati creati con ElevenMusic e devono rispettare le regole su diritti e contenuti di SoundCloud. Il pulsante carica solo sul tuo profilo SoundCloud: per Spotify e gli altri store serve la distribuzione separata.In the Reel we talk about the news announced on November 5, 2026: songs created with ElevenMusic (ElevenLabs' music app) can be published straight to your SoundCloud profile, without downloading and re-uploading them by hand. SoundCloud is the first external platform connected. Tracks published this way carry a note saying they were made with ElevenMusic and must follow SoundCloud's rights and content rules. The button only uploads to your SoundCloud profile: Spotify and other stores need separate distribution.

Strumento: ElevenMusic + SoundCloudTool: ElevenMusic + SoundCloudTempo: 20 minutiTime: 20 minutesCosto: verifica il tuo pianoCost: check your plan
  • Con il PROMPT 1 (ChatGPT o Claude) prepara l'idea della canzone: genere, atmosfera, strumenti e tema. Ne esce una descrizione pronta da incollare in ElevenMusic.Use PROMPT 1 (ChatGPT or Claude) to shape the song idea: genre, mood, instruments and theme. You get a description ready to paste into ElevenMusic.
  • In ElevenMusic incolla la descrizione e, se vuoi un testo tuo, usa il PROMPT 2 per scriverlo. Genera più versioni e tieni quella che ti convince di più.In ElevenMusic paste the description and, if you want your own lyrics, use PROMPT 2 to write them. Generate a few versions and keep the one you like best.
  • Collega SoundCloud: nelle impostazioni del profilo di ElevenMusic apri gli account collegati (Linked accounts) e connetti il tuo account SoundCloud.Connect SoundCloud: in your ElevenMusic profile settings open Linked accounts and connect your SoundCloud account.
  • Apri il tuo brano originale, aggiungi descrizione, genere e tag (usa il PROMPT 3) e premi «Save to SoundCloud». Il brano arriva sul tuo profilo con l'indicazione che è fatto con ElevenMusic.Open your original track, add a description, genre and tags (use PROMPT 3) and press "Save to SoundCloud". The track lands on your profile with a note that it was made with ElevenMusic.

Ti è piaciuta questa risorsa? Nel percorso completo The AI Creator System (14 moduli, oltre 5 ore) impari a usare le AI come un fenomeno, passo per passo.Liked this resource? In the full The AI Creator System program (14 modules, over 5 hours) you learn to use AI like a pro, step by step.

Vai al corso completo →Go to the full course →
Trasforma un prompt o una tua foto in una GIF animata con ChatGPT Images 2.6
Risorsa gratuita dal ReelFree resource from our Reel

Trasforma un prompt o una tua foto in una GIF animata con ChatGPT Images 2.6Turn a prompt or your own photo into an animated GIF with ChatGPT Images 2.6

Nel Reel ti mostro la novità di ChatGPT Images 2.6, annunciata da OpenAI a inizio novembre 2026: da un prompt o da una tua immagine ChatGPT crea una GIF animata, poi puoi cambiarne la velocità e modificare i singoli fotogrammi prima di condividerla. Il rilascio delle GIF è graduale: se non vedi ancora l'opzione nel tuo account, riprova nei giorni successivi. Nota: ChatGPT non modifica le GIF animate che carichi tu, le crea da zero.In the Reel I show you what's new in ChatGPT Images 2.6, announced by OpenAI in early November 2026: from a prompt or your own image ChatGPT creates an animated GIF, then you can change its speed and edit individual frames before sharing it. GIFs are rolling out gradually: if you don't see the option in your account yet, try again in the next few days. Note: ChatGPT doesn't edit animated GIFs you upload, it creates them from scratch.

Strumento: ChatGPT Images 2.6Tool: ChatGPT Images 2.6Tempo: 10 minutiTime: 10 minutesCosto: verifica il tuo pianoCost: check your plan
  • Scegli cosa animare: un'idea da zero (PROMPT 1) oppure una tua foto, un logo o un prodotto da caricare in chat (PROMPT 2).Pick what to animate: an idea from scratch (PROMPT 1) or your own photo, logo or product uploaded to the chat (PROMPT 2).
  • Apri ChatGPT, incolla il prompt e chiedi esplicitamente una GIF animata in loop. Descrivi un solo movimento semplice: è quello che riesce meglio.Open ChatGPT, paste the prompt and explicitly ask for a looping animated GIF. Describe one simple movement: that's what works best.
  • Quando la GIF è pronta regola la velocità e, se un fotogramma non ti convince, modificalo singolarmente (usa il PROMPT 3 per chiedere la correzione).When the GIF is ready adjust the speed and, if a frame looks off, edit it on its own (use PROMPT 3 to ask for the fix).
  • Scaricala e usala in storie, chat, newsletter o come anteprima animata di un prodotto. Se l'opzione GIF non c'è ancora, il rilascio è graduale: riprova più avanti.Download it and use it in stories, chats, newsletters or as an animated product preview. If the GIF option isn't there yet, it's rolling out gradually: try again later.

Ti è piaciuta questa risorsa? Nel percorso completo The AI Creator System (14 moduli, oltre 5 ore) impari a usare le AI come un fenomeno, passo per passo.Liked this resource? In the full The AI Creator System program (14 modules, over 5 hours) you learn to use AI like a pro, step by step.

Vai al corso completo →Go to the full course →
Monta i tuoi Reel sul Mac con Edits: timeline multitraccia, colore e sottotitoli
Risorsa gratuita dal ReelFree resource from our Reel

Monta i tuoi Reel sul Mac con Edits: timeline multitraccia, colore e sottotitoliEdit your Reels on Mac with Edits: multi-track timeline, color and captions

Nel Reel parliamo di Edits, l'app di montaggio di Instagram, arrivata su Mac il 5 novembre 2026. È gratuita e si scarica da edits.instagram.com/desktop. Ha timeline multitraccia, keyframe, forme d'onda audio, correzione colore (ruote, curve, LUT), sottotitoli automatici in più lingue, formati verticale e orizzontale, export 4K senza filigrana e pubblicazione diretta su Instagram (anche come Reel di prova). Stili di testo e audio salvati sul telefono si sincronizzano. Attenzione: per ora non puoi aprire lo stesso progetto sia sul telefono sia sul Mac; Instagram dice che ci sta lavorando.In the Reel we talk about Edits, Instagram's editing app, which arrived on Mac on November 5, 2026. It's free and you download it from edits.instagram.com/desktop. It has a multi-track timeline, keyframes, audio waveforms, color grading (wheels, curves, LUTs), automatic captions in multiple languages, vertical and horizontal formats, watermark-free 4K exports and direct publishing to Instagram (trial reels included). Text and audio styles saved on your phone sync over. Note: you can't yet open the same project on both phone and Mac; Instagram says it's working on it.

Strumento: Edits per MacTool: Edits for MacTempo: 30 minutiTime: 30 minutesCosto: app gratuitaCost: free app
  • Scarica Edits per Mac da edits.instagram.com/desktop e accedi con il tuo account Instagram. I tuoi stili di testo e audio salvati sul telefono arrivano anche sul Mac.Download Edits for Mac from edits.instagram.com/desktop and sign in with your Instagram account. Text and audio styles saved on your phone also show up on your Mac.
  • Prima di montare, usa il PROMPT 1 con ChatGPT o Claude per avere la scaletta del Reel divisa in tracce: video, testi a schermo, musica ed effetti.Before editing, use PROMPT 1 with ChatGPT or Claude to get the Reel plan split into tracks: video, on-screen text, music and effects.
  • Monta sulla timeline multitraccia, aggiungi i sottotitoli automatici e sistema il colore con ruote e curve (o una tua LUT). Usa il PROMPT 2 per scegliere il look del colore.Edit on the multi-track timeline, add automatic captions and fix the color with wheels and curves (or your own LUT). Use PROMPT 2 to pick the color look.
  • Esporta in 4K senza filigrana o pubblica direttamente su Instagram con tag e luogo. Scrivi la descrizione con il PROMPT 3. Ricorda: il progetto del Mac non si apre ancora sul telefono, quindi finisci il montaggio sullo stesso dispositivo.Export in 4K without watermark or publish straight to Instagram with tags and location. Write the caption with PROMPT 3. Remember: Mac projects don't open on the phone yet, so finish editing on the same device.

Ti è piaciuta questa risorsa? Nel percorso completo The AI Creator System (14 moduli, oltre 5 ore) impari a usare le AI come un fenomeno, passo per passo.Liked this resource? In the full The AI Creator System program (14 modules, over 5 hours) you learn to use AI like a pro, step by step.

Vai al corso completo →Go to the full course →
Meta Muse: parlare con un avatar AI in tempo reale
Risorsa gratuita dal ReelFree resource from our Reel

Meta Muse: parlare con un avatar AI in tempo realeMeta Muse: talking to an AI avatar in real time

Nel Reel parliamo di Muse, l'assistente AI di Meta, che ora ha conversazioni a voce e avatar animati: secondo Meta l'avatar risponde in circa 870 millisecondi dalla fine della tua frase, con voce e labiale sincronizzati. Il rilascio nell'app Muse è iniziato il 5 novembre 2026 e per ora è solo negli Stati Uniti. Qui trovi come prepararti e i prompt per scrivere conversazioni vocali che funzionano, da usare con qualsiasi assistente a voce. Fonte: blog Meta AI «Bringing Your Muse to Life».In the Reel we talk about Muse, Meta's AI assistant, which now has voice conversations and animated avatars: according to Meta the avatar replies about 870 milliseconds after you finish talking, with voice and lip movement in sync. The rollout in the Muse app started on November 5, 2026 and is US-only for now. Here's how to get ready and prompts to write voice conversations that work, to use with any voice assistant. Source: Meta AI blog «Bringing Your Muse to Life».

Strumento: app Muse (solo USA per ora)Tool: Muse app (US only for now)Tempo: 10 minutiTime: 10 minutesCosto: vedi condizioni MetaCost: see Meta's terms
  • Controlla se l'app Muse con voce e avatar è disponibile nel tuo Paese: il rilascio è partito negli USA il 5 novembre 2026. Se non c'è, prova lo stesso flusso con la modalità vocale del tuo assistente AI.Check whether the Muse app with voice and avatar is available in your country: the rollout started in the US on November 5, 2026. If not, try the same flow with your AI assistant's voice mode.
  • Usa il PROMPT 1 per dare all'assistente un ruolo chiaro prima di iniziare a parlare: risposte brevi, una domanda alla volta.Use PROMPT 1 to give the assistant a clear role before you start talking: short answers, one question at a time.
  • Con il PROMPT 2 allenati su una situazione reale (colloquio, vendita, lingua straniera) e chiedi un voto alla fine.With PROMPT 2 practise a real situation (interview, sales call, foreign language) and ask for a score at the end.
  • Se crei contenuti, usa il PROMPT 3 per scrivere un dialogo da far recitare a un avatar. Ricorda: i video di Muse contengono una filigrana invisibile (Meta Video Seal).If you create content, use PROMPT 3 to write a dialogue for an avatar to perform. Remember: Muse videos carry an invisible watermark (Meta Video Seal).

Ti è piaciuta questa risorsa? Nel percorso completo The AI Creator System (14 moduli, oltre 5 ore) impari a usare le AI come un fenomeno, passo per passo.Liked this resource? In the full The AI Creator System program (14 modules, over 5 hours) you learn to use AI like a pro, step by step.

Vai al corso completo →Go to the full course →

Claude Code e le password finite su GitHub: controlla i tuoi progetti
Risorsa gratuita dal ReelFree resource from our Reel

Claude Code e le password finite su GitHub: controlla i tuoi progettiClaude Code and passwords leaked on GitHub: check your projects

Nel Reel parliamo della ricerca di Apiiro (novembre 2026): quando in Claude Code scegli «Sì, e non chiedere più» su un comando, la regola viene salvata in .claude/settings.local.json, compresa l'eventuale password scritta nel comando. Su GitHub pubblico sono state trovate migliaia di copie di quel file e oltre 1.300 segreti distinti. Claude Code esclude il file da git quando lo crea lui, ma se il file è stato creato a mano o finisce in .claude/settings.json può essere pubblicato. Qui trovi la guida per controllare i tuoi progetti. Fonti: Apiiro, The Hacker News, documentazione ufficiale Claude Code.In the Reel we talk about Apiiro's research (November 2026): when you choose «Yes, and don't ask again» on a command in Claude Code, the rule is saved in .claude/settings.local.json, including any password typed in the command. Thousands of copies of that file and more than 1,300 distinct secrets were found on public GitHub. Claude Code keeps the file out of git when it creates it, but if the file was created by hand or the rule ends up in .claude/settings.json it can be published. Here's the guide to check your projects. Sources: Apiiro, The Hacker News, official Claude Code documentation.

Strumento: Claude Code + GitTool: Claude Code + GitTempo: 15 minutiTime: 15 minutesCosto: gratisCost: free
  • Apri .claude/settings.local.json e .claude/settings.json in ogni progetto e cerca password, token o chiavi dentro le regole «allow». Se ne trovi, cancella la regola.Open .claude/settings.local.json and .claude/settings.json in each project and look for passwords, tokens or keys inside the «allow» rules. If you find any, delete the rule.
  • Controlla se il file è mai finito su git con il PROMPT 1. Se una password è stata pubblicata, cambiala subito (ruotala): cancellare il file non basta, resta nella cronologia e nei fork.Check whether the file ever ended up in git with PROMPT 1. If a password was published, change (rotate) it right away: deleting the file isn't enough, it stays in history and forks.
  • Non scrivere più password nei comandi: usa variabili d'ambiente o un gestore di segreti, e aggiungi .claude/settings.local.json al .gitignore se l'hai creato a mano.Stop typing passwords into commands: use environment variables or a secret manager, and add .claude/settings.local.json to .gitignore if you created it by hand.
  • Blocca la lettura dei file segreti con le regole «deny» (PROMPT 3) e attiva uno strumento di secret scanning sul repository.Block reading of secret files with «deny» rules (PROMPT 3) and turn on a secret-scanning tool on the repository.

Ti è piaciuta questa risorsa? Nel percorso completo The AI Creator System (14 moduli, oltre 5 ore) impari a usare le AI come un fenomeno, passo per passo.Liked this resource? In the full The AI Creator System program (14 modules, over 5 hours) you learn to use AI like a pro, step by step.

Vai al corso completo →Go to the full course →
Fatti trovare dentro ChatGPT: rivendica la tua scheda nel Business Hub
Risorsa gratuita dal ReelFree resource from our Reel

Fatti trovare dentro ChatGPT: rivendica la tua scheda nel Business HubGet found inside ChatGPT: claim your profile in Business Hub

Nel Reel parliamo di Businesses in ChatGPT, lanciato da OpenAI in beta il 10 novembre 2026: con il Business Hub (chatgpt.com/business-hub) un'attività con un sito può rivendicare e verificare la sua scheda, aggiornare le informazioni e caricare un catalogo con prezzi e disponibilità; poi vede quante volte viene citata nelle risposte di ChatGPT e quanti clic arrivano al sito (ultimi 28 giorni). Il Business Hub è aperto nei Paesi dove c'è ChatGPT, Europa compresa; i Business Agents per ora solo negli USA. OpenAI dichiara 1,2 miliardi di utenti a settimana.In the Reel we talk about Businesses in ChatGPT, launched by OpenAI in beta on November 10, 2026: with Business Hub (chatgpt.com/business-hub) a business with a website can claim and verify its profile, update its information and upload a product feed with prices and availability; then it sees how many times it is mentioned in ChatGPT answers and how many clicks reach its site (last 28 days). Business Hub is open in countries where ChatGPT is offered, Europe included; Business Agents are US-only for now. OpenAI reports 1.2 billion weekly users.

Strumento: ChatGPT Business HubTool: ChatGPT Business HubTempo: 20 minutiTime: 20 minutesCosto: rivendicare la scheda non richiede annunciCost: claiming the profile doesn't require ads
  • Vai su chatgpt.com/business-hub e rivendica la scheda della tua attività: serve un sito e devi essere titolare o autorizzato a rappresentarla; OpenAI fa dei controlli di verifica.Go to chatgpt.com/business-hub and claim your business profile: you need a website and must own or be authorized to represent the business; OpenAI runs verification checks.
  • Completa le informazioni con il PROMPT 1: descrizione chiara, servizi, zona, orari, contatti, uguali a quelli del sito.Complete the information with PROMPT 1: clear description, services, area, hours, contacts, matching your website.
  • Carica prodotti, prezzi e disponibilità (feed prodotti). Se usi Shopify puoi collegare il negozio dal Business Hub o dall'admin di Shopify. Usa il PROMPT 2 per sistemare i testi dei prodotti.Upload products, prices and availability (product feed). If you use Shopify you can connect the store from Business Hub or the Shopify admin. Use PROMPT 2 to polish product texts.
  • Ogni settimana guarda menzioni, clic e argomenti delle conversazioni (ultimi 28 giorni) e usa il PROMPT 3 per decidere cosa migliorare sul sito.Every week check mentions, clicks and conversation topics (last 28 days) and use PROMPT 3 to decide what to improve on your site.

Ti è piaciuta questa risorsa? Nel percorso completo The AI Creator System (14 moduli, oltre 5 ore) impari a usare le AI come un fenomeno, passo per passo.Liked this resource? In the full The AI Creator System program (14 modules, over 5 hours) you learn to use AI like a pro, step by step.

Vai al corso completo →Go to the full course →
Siri dentro tutte le app: cosa cambia e cosa preparare
Risorsa gratuita dal ReelFree resource from our Reel

Siri dentro tutte le app: cosa cambia e cosa preparareSiri inside every app: what changes and what to prepare

Nel Reel parliamo di Siri AI che entra nelle app: dal 3 novembre 2026 Apple ha aperto a tutti gli sviluppatori la Siri AI Developer Preview (beta di iOS 27.3), con gli App Intents e le nuove «skills» in Markdown che insegnano a Siri azioni in più passaggi. Le app potranno essere pubblicate sull'App Store con Siri AI in primavera. Il dettaglio per l'Europa: secondo Apple, Siri AI per ora non è disponibile nell'UE su iPhone, iPad e Apple Watch (su Mac e Vision Pro sì). Qui trovi cosa fare già oggi.In the Reel we talk about Siri AI coming into apps: since November 3, 2026 Apple has opened the Siri AI Developer Preview (iOS 27.3 beta) to all developers, with App Intents and new Markdown «skills» that teach Siri multi-step actions. Apps with Siri AI can be submitted to the App Store in spring. The detail for Europe: according to Apple, Siri AI is currently unavailable in the EU on iPhone, iPad and Apple Watch (it is available on Mac and Vision Pro). Here's what you can do today.

Strumento: Siri AI / Comandi rapidiTool: Siri AI / ShortcutsTempo: 15 minutiTime: 15 minutesCosto: gratisCost: free
  • Controlla dove sei: in UE su iPhone Siri AI per ora non c'è; su Mac (con lingua supportata) sì. Intanto puoi già usare l'app Comandi rapidi per far fare a Siri azioni in più passaggi.Check where you are: in the EU Siri AI isn't on iPhone for now; on Mac (with a supported language) it is. Meanwhile you can already use the Shortcuts app to make Siri run multi-step actions.
  • Usa il PROMPT 1 con il tuo assistente AI per scegliere le 5 azioni ripetitive del tuo telefono da trasformare in comandi vocali.Use PROMPT 1 with your AI assistant to pick the 5 repetitive phone actions to turn into voice commands.
  • Con il PROMPT 2 fatti scrivere i passaggi esatti del Comando rapido e crealo a mano nell'app Comandi.With PROMPT 2 get the exact steps of the Shortcut written out and build it by hand in the Shortcuts app.
  • Se hai un'app o lavori con uno sviluppatore, usa il PROMPT 3 per preparare la lista di azioni (App Intents) e la prima «skill» da proporre a Siri AI.If you have an app or work with a developer, use PROMPT 3 to prepare the list of actions (App Intents) and the first «skill» to offer Siri AI.

Ti è piaciuta questa risorsa? Nel percorso completo The AI Creator System (14 moduli, oltre 5 ore) impari a usare le AI come un fenomeno, passo per passo.Liked this resource? In the full The AI Creator System program (14 modules, over 5 hours) you learn to use AI like a pro, step by step.

Vai al corso completo →Go to the full course →
Prova Mistral Large 4: documenti lunghissimi e immagini in un'unica chat
Risorsa gratuita dal ReelFree resource from our Reel

Prova Mistral Large 4: documenti lunghissimi e immagini in un'unica chatTry Mistral Large 4: very long documents and images in a single chat

Nel Reel parliamo di Mistral Large 4, il nuovo modello di Mistral AI: fino a 1 milione di token di contesto, testo e immagini in ingresso, dati di addestramento in oltre 160 lingue (italiano compreso) e pesi aperti. Qui trovi dove provarlo e i prompt pronti per sfruttare subito il contesto lungo e la lettura delle immagini. Fonte: annuncio ufficiale mistral.ai (6 ottobre 2026) e documentazione docs.mistral.ai.In the Reel we talk about Mistral Large 4, Mistral AI's new model: up to 1 million tokens of context, text and image input, training data in more than 160 languages and open weights. Here you'll find where to try it and ready-made prompts to use the long context and image understanding right away. Source: official mistral.ai announcement (October 6, 2026) and docs.mistral.ai documentation.

Strumento: Mistral Studio (playground)Tool: Mistral Studio (playground)Tempo: 10 minutiTime: 10 minutesCosto: a consumo, vedi listino MistralCost: pay-as-you-go, see Mistral pricing
  • Apri Mistral Studio (console.mistral.ai), accedi e vai nel playground: scegli il modello Mistral Large 4 (nell'API si chiama mistral-large-4).Open Mistral Studio (console.mistral.ai), sign in and go to the playground: pick the Mistral Large 4 model (in the API it is called mistral-large-4).
  • Sfrutta il contesto fino a 1 milione di token: incolla un documento lungo (contratto, manuale, trascrizione) e usa il PROMPT 1.Use the context of up to 1 million tokens: paste a long document (contract, manual, transcript) and use PROMPT 1.
  • Carica un'immagine (grafico, screenshot, foto di un documento) e usa il PROMPT 2: il modello legge anche le immagini.Upload an image (chart, screenshot, photo of a document) and use PROMPT 2: the model also reads images.
  • Usa il PROMPT 3 per lavorare in più lingue. Se vuoi usarlo sul tuo computer, i pesi sono pubblicati con licenza Mistral: leggi le condizioni prima di usarli per lavoro.Use PROMPT 3 to work across languages. If you want to run it yourself, the weights are published under a Mistral license: read the terms before using them for business.

Ti è piaciuta questa risorsa? Nel percorso completo The AI Creator System (14 moduli, oltre 5 ore) impari a usare le AI come un fenomeno, passo per passo.Liked this resource? In the full The AI Creator System program (14 modules, over 5 hours) you learn to use AI like a pro, step by step.

Vai al corso completo →Go to the full course →
Apple sceglie Qwen in Cina: prova anche tu l'AI di Alibaba
Risorsa gratuita dal ReelFree resource from our Reel

Apple sceglie Qwen in Cina: prova anche tu l'AI di AlibabaApple picks Qwen in China: try Alibaba's AI yourself

Nel Reel parliamo dell'accordo tra Apple e Alibaba: in Cina Apple Intelligence userà il modello Qwen per Siri, Strumenti di scrittura e Visual Intelligence. I test sono partiti con la beta di iOS 27.3 (4 novembre 2026) e l'arrivo per gli utenti cinesi è previsto con iOS 27.3 a dicembre; in Italia Apple Intelligence non usa Qwen. Qui trovi come provare Qwen gratis dal browser e i prompt per confrontarlo con l'assistente che usi già. Fonti: annuncio Alibaba del 31 ottobre 2026 e articoli del 2-4 novembre 2026.In the Reel we talk about the Apple-Alibaba deal: in China, Apple Intelligence will use the Qwen model for Siri, Writing Tools and Visual Intelligence. Testing started with the iOS 27.3 beta (November 4, 2026) and the rollout to Chinese users is expected with iOS 27.3 in December; outside China Apple Intelligence does not use Qwen. Here you'll find how to try Qwen from your browser and prompts to compare it with the assistant you already use. Sources: Alibaba announcement of October 31, 2026 and reports from November 2-4, 2026.

Strumento: Qwen Chat (chat.qwen.ai)Tool: Qwen Chat (chat.qwen.ai)Tempo: 10 minutiTime: 10 minutesCosto: piano gratuito disponibileCost: free plan available
  • Apri chat.qwen.ai dal browser e accedi: è la chat ufficiale dei modelli Qwen di Alibaba.Open chat.qwen.ai in your browser and sign in: it's the official chat for Alibaba's Qwen models.
  • Usa il PROMPT 1 per fare lo stesso compito a Qwen e al tuo assistente abituale (ChatGPT, Gemini, Claude) e confronta le risposte.Use PROMPT 1 to give the same task to Qwen and to your usual assistant (ChatGPT, Gemini, Claude) and compare the answers.
  • Prova il PROMPT 2 con una foto: è il tipo di uso (capire testo e immagini) che Apple porta su Visual Intelligence in Cina.Try PROMPT 2 with a photo: it's the kind of use (understanding text and images) Apple brings to Visual Intelligence in China.
  • Con il PROMPT 3 riscrivi un testo come fanno gli Strumenti di scrittura. Non incollare dati personali o aziendali riservati in nessuna chat AI.With PROMPT 3 rewrite a text like Writing Tools do. Don't paste personal or confidential business data into any AI chat.

Ti è piaciuta questa risorsa? Nel percorso completo The AI Creator System (14 moduli, oltre 5 ore) impari a usare le AI come un fenomeno, passo per passo.Liked this resource? In the full The AI Creator System program (14 modules, over 5 hours) you learn to use AI like a pro, step by step.

Vai al corso completo →Go to the full course →
Crea il tuo clone digitale che parla al posto tuo
Risorsa gratuita dal ReelFree resource from our Reel

Crea il tuo clone digitale che parla al posto tuoCreate your digital clone that talks for you

Nel Reel parliamo di come un clone digitale (un avatar AI con il tuo volto e la tua voce) possa creare contenuti e mantenere attiva la tua presenza online mentre fai altro. Qui trovi i passaggi per registrare il video di partenza nel modo giusto, creare l'avatar con uno strumento di avatar AI (per esempio HeyGen) e i prompt per scrivere i copioni. Usa solo il tuo volto e la tua voce, o quelli di chi ti ha dato il consenso.In the Reel we talk about how a digital clone (an AI avatar with your face and voice) can create content and keep your online presence active while you do something else. Here you'll find the steps to record the source video the right way, create the avatar with an AI avatar tool (for example HeyGen) and prompts to write the scripts. Only use your own face and voice, or those of someone who gave consent.

Strumento: un tool di avatar AI (es. HeyGen)Tool: an AI avatar tool (e.g. HeyGen)Tempo: 30 minutiTime: 30 minutesCosto: dipende dal piano dello strumentoCost: depends on the tool's plan
  • Registra 2-3 minuti di video di te che parli guardando in camera: luce frontale, sfondo pulito, audio senza eco, poche pause e gesti naturali.Record 2-3 minutes of video of yourself talking to camera: front light, clean background, echo-free audio, few pauses and natural gestures.
  • Carica il video nello strumento di avatar che scegli (es. HeyGen) e segui la verifica del consenso che ti chiede: così nasce il tuo avatar con la tua voce.Upload the video to the avatar tool you choose (e.g. HeyGen) and complete the consent check it asks for: that creates your avatar with your voice.
  • Scrivi i copioni con il PROMPT 1 e il PROMPT 2: frasi brevi, un'idea per video, durata 30-45 secondi.Write the scripts with PROMPT 1 and PROMPT 2: short sentences, one idea per video, 30-45 seconds long.
  • Genera i video, guardali sempre prima di pubblicarli e scrivi nella descrizione che il video è fatto con un avatar AI (PROMPT 3).Generate the videos, always watch them before publishing and state in the caption that the video uses an AI avatar (PROMPT 3).

Ti è piaciuta questa risorsa? Nel percorso completo The AI Creator System (14 moduli, oltre 5 ore) impari a usare le AI come un fenomeno, passo per passo.Liked this resource? In the full The AI Creator System program (14 modules, over 5 hours) you learn to use AI like a pro, step by step.

Vai al corso completo →Go to the full course →
Pika o Kling? Come provare Pika H3 Flex: video AI con audio e dialoghi
Risorsa gratuita dal ReelFree resource from our Reel

Pika o Kling? Come provare Pika H3 Flex: video AI con audio e dialoghiPika or Kling? How to try Pika H3 Flex: AI video with audio and dialogue

Nel Reel: arriva Pika H3 Flex, il nuovo modello di Pika che crea video con audio sincronizzato, dialoghi e riferimenti multipli (immagini, video e audio insieme). Il confronto con Kling si gioca su qualità, limiti e prezzo: qui trovi i passaggi per fare un test giusto tra i due e 3 prompt pronti, uguali per entrambi i modelli. È un modello appena uscito: prezzi e limiti controllali sempre sul sito ufficiale di Pika prima di generare.In the Reel: Pika H3 Flex is here, Pika's new model that creates video with synchronized audio, dialogue and multiple references (images, video and audio together). The comparison with Kling comes down to quality, limits and price: here are the steps for a fair test between the two and 3 ready prompts, the same for both models. It's a brand-new model: always check prices and limits on Pika's official site before generating.

Strumento: Pika H3 Flex / KlingTool: Pika H3 Flex / KlingTempo: 20 minutiTime: 20 minutesCosto: crediti Pika e KlingCost: Pika and Kling credits
  • Apri Pika e scegli il modello H3 Flex; in un'altra scheda apri Kling. Prima di generare guarda quanti crediti costa ogni video e la durata massima su entrambi.Open Pika and pick the H3 Flex model; open Kling in another tab. Before generating, check how many credits each video costs and the maximum length on both.
  • Usa il PROMPT 1 identico sui due modelli, stessa durata e stesso formato (9:16 per i Reel): così il confronto è giusto.Use PROMPT 1 identically on both models, same length and same format (9:16 for Reels): that keeps the comparison fair.
  • Prova i punti forti di H3 Flex: il PROMPT 2 per una scena con dialogo e audio sincronizzato, il PROMPT 3 caricando come riferimento una foto del tuo personaggio o prodotto.Test H3 Flex's strengths: PROMPT 2 for a scene with dialogue and synchronized audio, PROMPT 3 uploading a photo of your character or product as a reference.
  • Metti i risultati fianco a fianco e dai un voto da 1 a 5 a: realismo, labiale e audio, coerenza del personaggio, costo per video. Usa il modello che vince per il tuo tipo di contenuto.Put the results side by side and score 1 to 5: realism, lip sync and audio, character consistency, cost per video. Use the winning model for your type of content.

Ti è piaciuta questa risorsa? Nel percorso completo The AI Creator System (14 moduli, oltre 5 ore) impari a usare le AI come un fenomeno, passo per passo.Liked this resource? In the full The AI Creator System program (14 modules, over 5 hours) you learn to use AI like a pro, step by step.

Vai al corso completo →Go to the full course →

Gemini analizza le risposte del tuo Google Modulo: tendenze e prossimi passi
Risorsa gratuita dal ReelFree resource from our Reel

Gemini analizza le risposte del tuo Google Modulo: tendenze e prossimi passiGemini analyzes your Google Form responses: trends and next steps

Nel Reel: in Google Moduli, dalla scheda Risposte, Gemini analizza le risposte per te: trova le tendenze, collega le domande tra loro e ti suggerisce i prossimi passi, calcolando i numeri sulle risposte vere. Perfetto per sondaggi clienti, feedback sugli eventi e moduli di iscrizione. La funzione sta arrivando in queste settimane con alcuni piani Google Workspace e Google AI, quindi potresti non vederla ancora. Qui trovi i passaggi e 3 prompt pronti.In the Reel: in Google Forms, from the Responses tab, Gemini analyzes the answers for you: it finds trends, connects questions to each other and suggests next steps, calculating the numbers on the real responses. Perfect for customer surveys, event feedback and sign-up forms. The feature is rolling out in the coming weeks with some Google Workspace and Google AI plans, so you may not see it yet. Here are the steps and 3 ready prompts.

Strumento: Gemini in Google ModuliTool: Gemini in Google FormsTempo: 10 minutiTime: 10 minutesCosto: piano Workspace o Google AI idoneoCost: eligible Workspace or Google AI plan
  • Apri il tuo Google Modulo e vai nella scheda Risposte. Se vedi l'opzione di Gemini per analizzare le risposte, la funzione è attiva sul tuo account (arriva in queste settimane, solo con alcuni piani).Open your Google Form and go to the Responses tab. If you see the Gemini option to analyze responses, the feature is active on your account (rolling out in the coming weeks, only with some plans).
  • Chiedi prima il quadro generale con il PROMPT 1: tendenze principali e numeri chiave, calcolati sulle risposte vere.First ask for the big picture with PROMPT 1: main trends and key numbers, calculated on the real responses.
  • Usa il PROMPT 2 per collegare le domande tra loro (per esempio chi è più soddisfatto e perché) e il PROMPT 3 per avere i prossimi passi concreti.Use PROMPT 2 to connect questions to each other (for example who is most satisfied and why) and PROMPT 3 to get concrete next steps.
  • Controlla i numeri su qualche risposta a caso, poi trasforma i suggerimenti in 3 azioni con una scadenza. Ripeti l'analisi quando arrivano nuove risposte.Check the numbers against a few random responses, then turn the suggestions into 3 actions with a deadline. Repeat the analysis when new responses come in.

Ti è piaciuta questa risorsa? Nel percorso completo The AI Creator System (14 moduli, oltre 5 ore) impari a usare le AI come un fenomeno, passo per passo.Liked this resource? In the full The AI Creator System program (14 modules, over 5 hours) you learn to use AI like a pro, step by step.

Vai al corso completo →Go to the full course →
AI senza internet: usa LFM3 di Liquid AI sul tuo computer in 4 passaggi
Risorsa gratuita dal ReelFree resource from our Reel

AI senza internet: usa LFM3 di Liquid AI sul tuo computer in 4 passaggiAI without internet: run Liquid AI's LFM3 on your computer in 4 steps

Nel Reel: Liquid AI ha presentato LFM3, una famiglia di 6 modelli aperti da circa 2 miliardi di parametri (testo, immagini, audio e versioni omni), pensati per girare in locale sui tuoi dispositivi. Secondo Liquid AI il modello di testo occupa circa 1 GB a 4 bit, quindi gira anche su un portatile normale, e l'italiano è tra le lingue supportate. Qui trovi come installarlo con LM Studio o Ollama e 3 prompt pronti per usarlo offline sui tuoi dati.In the Reel: Liquid AI introduced LFM3, a family of 6 open models of about 2 billion parameters (text, vision, audio and omni versions), built to run locally on your devices. According to Liquid AI the text model takes about 1 GB at 4-bit, so it runs even on an ordinary laptop, and Italian is among the supported languages. Here is how to install it with LM Studio or Ollama, plus 3 ready prompts to use it offline on your own data.

Strumento: LM Studio o OllamaTool: LM Studio or OllamaTempo: 15 minutiTime: 15 minutesCosto: pesi gratisCost: free weights
  • Installa LM Studio (oppure Ollama) sul computer. Il modello di testo LFM3-1.7B in versione 4 bit pesa circa 1 GB: basta un portatile recente.Install LM Studio (or Ollama) on your computer. The 4-bit LFM3-1.7B text model is about 1 GB: a recent laptop is enough.
  • Cerca e scarica LiquidAI/LFM3-1.7B-GGUF (su Mac con chip Apple c'è anche la versione MLX 4 bit). Quando è scaricato puoi staccare il Wi-Fi: la chat funziona in locale.Search for and download LiquidAI/LFM3-1.7B-GGUF (on Apple-chip Macs there is also an MLX 4-bit version). Once downloaded you can turn off Wi-Fi: the chat runs locally.
  • Dagli compiti brevi e concreti con i prompt qui sotto: riassunti, estrazione di dati, risposte ai clienti. Liquid AI stessa lo sconsiglia per programmare agenti o ragionamenti lunghi e complessi.Give it short, concrete tasks with the prompts below: summaries, data extraction, customer replies. Liquid AI itself does not recommend it for agentic coding or long, complex reasoning.
  • Prima di usarlo in un progetto commerciale leggi la LFM Open License v1.0: l'uso commerciale è consentito solo se la tua azienda resta sotto i 10 milioni di dollari di fatturato annuo.Before using it in a commercial project, read the LFM Open License v1.0: commercial use is allowed only if your company stays under 10 million dollars in annual revenue.

Ti è piaciuta questa risorsa? Nel percorso completo The AI Creator System (14 moduli, oltre 5 ore) impari a usare le AI come un fenomeno, passo per passo.Liked this resource? In the full The AI Creator System program (14 modules, over 5 hours) you learn to use AI like a pro, step by step.

Vai al corso completo →Go to the full course →

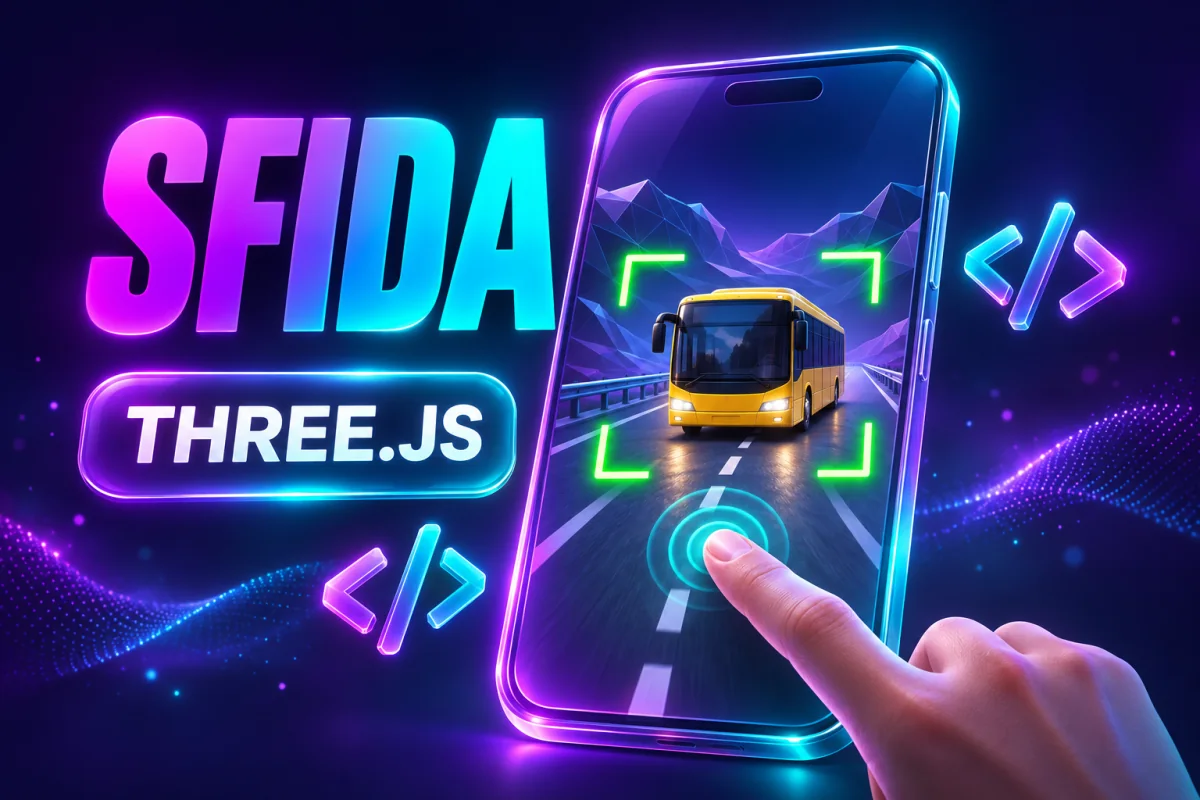
Crea il tuo Reel gioco «Ferma il bus nel riquadro» con l'AI e il codice
Risorsa gratuita dal ReelFree resource from our Reel

Crea il tuo Reel gioco «Ferma il bus nel riquadro» con l'AI e il codiceMake your own "Stop the bus in the box" game Reel with AI and code

Nel Reel: un bus arriva verso la telecamera e chi guarda deve toccare lo schermo (su Instagram il tocco mette in pausa) per fermarlo nel riquadro verde. La scena 3D è creata da zero con il codice. Qui trovi come farti scrivere la scena da un'AI in una pagina web con Three.js, registrarla in verticale e pubblicarla come sfida, con 3 prompt pronti.In the Reel: a bus drives toward the camera and viewers must tap the screen (on Instagram a tap pauses the video) to stop it inside the green box. The 3D scene is built from scratch with code. Here is how to have an AI write the scene as a web page with Three.js, record it vertically and post it as a challenge, with 3 ready prompts.

Strumento: Claude o ChatGPT + browserTool: Claude or ChatGPT + browserTempo: 30 minutiTime: 30 minutesCosto: gratisCost: free
  • Con il PROMPT 1 fatti scrivere da Claude o ChatGPT un unico file HTML con la scena 3D (Three.js): strada, veicolo che arriva verso la telecamera e riquadro verde fisso. Salvalo come gioco.html e aprilo nel browser.With PROMPT 1 have Claude or ChatGPT write a single HTML file with the 3D scene (Three.js): road, vehicle driving toward the camera and a fixed green box. Save it as game.html and open it in the browser.
  • Sistema la scena con il PROMPT 2: durata di circa 4 secondi, il veicolo deve passare nel riquadro solo per un istante, così la sfida è difficile ma giusta.Tune the scene with PROMPT 2: about 4 seconds long, and the vehicle must be inside the box only for an instant, so the challenge is hard but fair.
  • Registra lo schermo in verticale 9:16 (finestra stretta, o registrazione dello schermo del telefono) e aggiungi in alto il titolo della sfida, per esempio «FERMA IL BUS NEL RIQUADRO VERDE», più un rumore del motore.Record the screen vertically at 9:16 (narrow window, or the phone's screen recording) and add the challenge title on top, for example "STOP THE BUS IN THE GREEN BOX", plus an engine sound.
  • Pubblica con la caption del PROMPT 3: spiega di toccare lo schermo per fermare il video e chiedi di commentare una parola se ci sono riusciti al primo colpo. Cambia veicolo ogni giorno (moto, treno, aereo, animali).Post it with the caption from PROMPT 3: tell people to tap the screen to stop the video and ask them to comment a word if they nailed it on the first try. Change the vehicle every day (motorbike, train, plane, animals).

Ti è piaciuta questa risorsa? Nel percorso completo The AI Creator System (14 moduli, oltre 5 ore) impari a usare le AI come un fenomeno, passo per passo.Liked this resource? In the full The AI Creator System program (14 modules, over 5 hours) you learn to use AI like a pro, step by step.

Vai al corso completo →Go to the full course →

Un prompt, un videogioco: crea il tuo gioco mobile con Higgsfield Playable
Risorsa gratuita dal ReelFree resource from our Reel

Un prompt, un videogioco: crea il tuo gioco mobile con Higgsfield PlayableOne prompt, one video game: build your mobile game with Higgsfield Playable

Nel Reel: con Higgsfield Playable descrivi un'idea e l'AI la trasforma in un gioco interattivo, senza scrivere codice. Qui trovi i passaggi della guida ufficiale (descrizione, 2D o 3D, genere, riferimenti, test) e 3 prompt pronti: un runner a tema col tuo brand, un puzzle e il prompt per migliorare il gioco dopo averlo provato. Playable Games è disponibile su tutti i piani Higgsfield; ogni generazione consuma crediti e la pagina ufficiale non indica un prezzo fisso per gioco.In the Reel: with Higgsfield Playable you describe an idea and AI turns it into an interactive game, with no code. Here are the steps from the official guide (description, 2D or 3D, genre, references, testing) and 3 ready prompts: a branded runner, a puzzle game and a prompt to improve the game after playing it. Playable Games is available on all Higgsfield plans; each generation uses credits and the official page doesn't state a fixed price per game.

Strumento: Higgsfield PlayableTool: Higgsfield PlayableTempo: 15 minutiTime: 15 minutesCosto: crediti Higgsfield (tutti i piani)Cost: Higgsfield credits (all plans)
  • Apri Higgsfield, vai su Playable e scegli «Generate here» (oppure «Generate in Claude» se hai collegato Higgsfield MCP).Open Higgsfield, go to Playable and choose "Generate here" (or "Generate in Claude" if you connected Higgsfield MCP).
  • Incolla il PROMPT 1 o 2: deve dire obiettivo, comandi (tap, swipe, trascinamento), ostacoli e come si vince o si perde. Parti da una sola meccanica.Paste PROMPT 1 or 2: it must state the goal, controls (tap, swipe, drag), obstacles and how you win or lose. Start with a single mechanic.
  • Scegli 2D o 3D e il genere (Runner, Puzzle, Shooter, Adventure, Action, Strategy, Maze, Simulation). Con «Add reference» carica l'immagine del personaggio o del prodotto: solo immagini di cui hai i diritti.Pick 2D or 3D and the genre (Runner, Puzzle, Shooter, Adventure, Action, Strategy, Maze, Simulation). With "Add reference" upload the character or product image: only images you own the rights to.
  • Clicca «Generate», gioca e controlla comandi, punteggio, ostacoli e riavvio. Poi usa il PROMPT 3 per la versione successiva: la trovi in «My playables».Click "Generate", play it and check controls, score, obstacles and restart. Then use PROMPT 3 for the next version: you'll find it in "My playables".

Ti è piaciuta questa risorsa? Nel percorso completo The AI Creator System (14 moduli, oltre 5 ore) impari a usare le AI come un fenomeno, passo per passo.Liked this resource? In the full The AI Creator System program (14 modules, over 5 hours) you learn to use AI like a pro, step by step.

Vai al corso completo →Go to the full course →
Entra in un mondo creato dall'AI: come scrivere i prompt per Genie 4
Risorsa gratuita dal ReelFree resource from our Reel

Entra in un mondo creato dall'AI: come scrivere i prompt per Genie 4Step into an AI-made world: how to write prompts for Genie 4

Nel Reel: Google DeepMind ha presentato Genie 4, un modello che trasforma un prompt in un mondo virtuale da esplorare e modificare in tempo reale, con audio, musica e dialoghi generati insieme. Oggi è un'anteprima di ricerca per tester selezionati: Google ha annunciato l'accesso anticipato per gli abbonati Google AI Ultra in Project Genie e per alcuni partner via Gemini API, senza una data. Qui trovi come preparare i tuoi mondi e 3 prompt pronti da usare appena hai accesso.In the Reel: Google DeepMind unveiled Genie 4, a model that turns a prompt into a virtual world you can explore and change in real time, with audio, music and dialogue generated together. Right now it's a research preview for selected testers: Google announced early access for Google AI Ultra subscribers in Project Genie and for some partners via the Gemini API, with no date. Here's how to prepare your worlds and 3 ready prompts to use as soon as you get access.

Strumento: Google Genie 4Tool: Google Genie 4Tempo: 10 minutiTime: 10 minutesAccesso: anteprima, non ancora aperto a tuttiAccess: preview, not open to everyone yet
  • Controlla l'accesso: Genie 4 è in anteprima di ricerca. L'accesso anticipato annunciato passa da Project Genie (abbonati Google AI Ultra) e dalla Gemini API per alcuni partner.Check access: Genie 4 is a research preview. The announced early access goes through Project Genie (Google AI Ultra subscribers) and the Gemini API for some partners.
  • Scrivi il mondo in 4 parti: ambientazione, personaggio che controlli, stile visivo e audio (suoni, musica, voci). Usa il PROMPT 1.Describe the world in 4 parts: setting, the character you control, visual style and audio (sounds, music, voices). Use PROMPT 1.
  • Mentre esplori, cambia la scena a parole: meteo, ora del giorno, nuovi personaggi. Il PROMPT 2 ti dà i comandi pronti.While exploring, change the scene with words: weather, time of day, new characters. PROMPT 2 gives you ready commands.
  • Tieni le sessioni brevi: i mondi restano coerenti per pochi minuti di controllo continuo. Usa il PROMPT 3 per trasformare il mondo in un'idea per il tuo brand o i tuoi contenuti.Keep sessions short: worlds stay consistent for a few minutes of continuous control. Use PROMPT 3 to turn the world into an idea for your brand or content.

Ti è piaciuta questa risorsa? Nel percorso completo The AI Creator System (14 moduli, oltre 5 ore) impari a usare le AI come un fenomeno, passo per passo.Liked this resource? In the full The AI Creator System program (14 modules, over 5 hours) you learn to use AI like a pro, step by step.

Vai al corso completo →Go to the full course →

Keynote, Pages e Numbers con un agente AI: le novità di Apple Creator Studio
Risorsa gratuita dal ReelFree resource from our Reel

Keynote, Pages e Numbers con un agente AI: le novità di Apple Creator StudioKeynote, Pages and Numbers with an AI agent: what's new in Apple Creator Studio

Nel Reel: Apple porta l'AI dentro Creator Studio. Secondo l'annuncio Apple del 27 ottobre 2026, Keynote, Pages e Numbers ricevono un assistente AI in beta e il supporto MCP, che permette ad agenti AI esterni di leggere, modificare e automatizzare i documenti; Final Cut Pro integra MotionVFX e nuove opzioni di montaggio. Le funzioni AI arrivano a novembre, sono legate all'abbonamento Creator Studio, l'assistente per ora è solo in inglese (USA) e MCP richiede macOS 27. Qui trovi i passaggi e 3 prompt pronti per far lavorare un agente sui tuoi file.In the Reel: Apple brings AI into Creator Studio. According to Apple's October 27, 2026 announcement, Keynote, Pages and Numbers get a beta AI assistant and MCP support, letting external AI agents read, edit and automate documents; Final Cut Pro integrates MotionVFX and new editing options. The AI features roll out in November, are tied to the Creator Studio subscription, the assistant is US English only for now and MCP requires macOS 27. Here are the steps and 3 ready prompts to get an agent working on your files.

Strumento: Apple Creator StudioTool: Apple Creator StudioTempo: 15 minutiTime: 15 minutesCosto: abbonamento Creator StudioCost: Creator Studio subscription
  • Controlla i requisiti: abbonamento Apple Creator Studio, Keynote/Pages/Numbers aggiornati e macOS 27 per MCP. L'assistente integrato per ora funziona solo in inglese (USA).Check requirements: Apple Creator Studio subscription, updated Keynote/Pages/Numbers and macOS 27 for MCP. The built-in assistant currently works in US English only.
  • Collega il tuo agente AI (per esempio un'app desktop che supporta MCP) seguendo le istruzioni Apple, e dagli accesso solo ai documenti che vuoi fargli modificare.Connect your AI agent (for example a desktop app that supports MCP) following Apple's instructions, and give it access only to the documents you want it to edit.
  • Usa il PROMPT 1 per una presentazione Keynote e il PROMPT 2 per trasformare un foglio Numbers in un report Pages. Controlla sempre il risultato prima di inviarlo.Use PROMPT 1 for a Keynote presentation and PROMPT 2 to turn a Numbers sheet into a Pages report. Always check the result before sending it.
  • In Final Cut Pro prova MotionVFX (titoli, transizioni, grafiche) e le nuove curve dei keyframe; usa il PROMPT 3 per farti preparare la scaletta del montaggio.In Final Cut Pro try MotionVFX (titles, transitions, graphics) and the new keyframe easing; use PROMPT 3 to get your edit outline ready.

Ti è piaciuta questa risorsa? Nel percorso completo The AI Creator System (14 moduli, oltre 5 ore) impari a usare le AI come un fenomeno, passo per passo.Liked this resource? In the full The AI Creator System program (14 modules, over 5 hours) you learn to use AI like a pro, step by step.

Vai al corso completo →Go to the full course →
Trasforma le tue conversazioni in riassunti e promemoria con l'AI (anche senza Bee)
Risorsa gratuita dal ReelFree resource from our Reel

Trasforma le tue conversazioni in riassunti e promemoria con l'AI (anche senza Bee)Turn your conversations into summaries and reminders with AI (even without Bee)

Nel Reel: Bee è il dispositivo indossabile di Amazon che ascolta le conversazioni e le trasforma in riassunti, promemoria e cose da fare. La domanda vera è quanta privacy sei disposto a cedere. Qui trovi un metodo per ottenere lo stesso risultato oggi, quando decidi tu: registri (solo con il consenso di chi parla), trascrivi e fai lavorare l'AI con prompt pronti per riassunto, attività e promemoria.In the Reel: Bee is Amazon's wearable device that listens to conversations and turns them into summaries, reminders and to-dos. The real question is how much privacy you're willing to give up. Here is a method to get the same result today, only when you choose: you record (only with the consent of the people speaking), transcribe and let AI work with ready prompts for summary, tasks and reminders.

Strumento: telefono + ChatGPT o ClaudeTool: phone + ChatGPT or ClaudeTempo: 10 minutiTime: 10 minutesCosto: gratis con i piani baseCost: free with basic plans
  • Registra la riunione, la chiamata o il tuo vocale con l'app registratore del telefono. Prima chiedi il consenso a tutte le persone presenti: è una questione di rispetto e, in molti casi, di legge.Record the meeting, the call or your voice note with your phone's recorder app. First ask everyone present for consent: it's a matter of respect and, in many cases, of law.
  • Ottieni il testo: usa la trascrizione del registratore se ce l'ha, oppure carica l'audio in ChatGPT o Claude e chiedi la trascrizione. Togli nomi e dati sensibili che non servono.Get the text: use the recorder's transcription if it has one, or upload the audio to ChatGPT or Claude and ask for a transcript. Remove names and sensitive data you don't need.
  • Incolla la trascrizione con il PROMPT 1: ricevi riassunto, decisioni e lista di cose da fare con chi e quando.Paste the transcript with PROMPT 1: you get a summary, decisions and a to-do list with who and when.
  • Con il PROMPT 2 trasforma le attività in promemoria pronti per il calendario; con il PROMPT 3 fai la tua scelta consapevole sul dispositivo indossabile.With PROMPT 2 turn the tasks into calendar-ready reminders; with PROMPT 3 make your informed choice about the wearable.

Ti è piaciuta questa risorsa? Nel percorso completo The AI Creator System (14 moduli, oltre 5 ore) impari a usare le AI come un fenomeno, passo per passo.Liked this resource? In the full The AI Creator System program (14 modules, over 5 hours) you learn to use AI like a pro, step by step.

Vai al corso completo →Go to the full course →
Trasforma poche istruzioni in un progetto completo con GPT-6 Astra
Risorsa gratuita dal ReelFree resource from our Reel

Trasforma poche istruzioni in un progetto completo con GPT-6 AstraTurn a few instructions into a complete project with GPT-6 Astra

Nel Reel: GPT-6 Astra promette di trasformare semplici istruzioni in progetti complessi, disegni tecnici e video, ma tra annunci e capacità dimostrate c'è differenza. OpenAI l'ha presentato a settembre 2026 come nuovo modello di punta, con accesso all'inizio limitato. Il vantaggio è saperlo usare bene: qui trovi i passaggi e i prompt per farti costruire un progetto vero a partire da poche righe e per controllare con le tue prove cosa fa davvero nel tuo account.In the Reel: GPT-6 Astra promises to turn simple instructions into complex projects, technical drawings and videos, but there is a gap between announcements and proven abilities. OpenAI presented it in September 2026 as its new flagship model, with limited access at first. The edge is knowing how to use it well: here are the steps and prompts to have it build a real project from a few lines and to check with your own tests what it really does in your account.

Strumento: ChatGPT (GPT-6 Astra, se disponibile nel tuo piano)Tool: ChatGPT (GPT-6 Astra, if available on your plan)Tempo: 20 minutiTime: 20 minutesCosto: dipende dal tuo piano ChatGPTCost: depends on your ChatGPT plan
  • Controlla nel selettore dei modelli di ChatGPT se GPT-6 Astra è disponibile nel tuo account: l'accesso è partito in modo limitato, quindi se non c'è usa il modello migliore che hai.Check the ChatGPT model picker to see whether GPT-6 Astra is available in your account: access started out limited, so if it isn't there use the best model you have.
  • Con il PROMPT 1 dai poche righe sulla tua idea e fatti restituire un progetto completo: obiettivo, fasi, materiali, tempi e rischi.With PROMPT 1 give a few lines about your idea and get back a complete project: goal, phases, materials, timing and risks.
  • Con il PROMPT 2 trasforma il progetto in una scheda tecnica e nello storyboard di un video di presentazione, da passare poi al tuo strumento di immagini o video.With PROMPT 2 turn the project into a technical sheet and the storyboard of a presentation video, to pass on to your image or video tool.
  • Con il PROMPT 3 metti alla prova il modello sullo stesso compito che usi oggi: conta solo come va sul tuo lavoro, non le promesse.With PROMPT 3 test the model on the same task you use today: only how it performs on your work counts, not the promises.

Ti è piaciuta questa risorsa? Nel percorso completo The AI Creator System (14 moduli, oltre 5 ore) impari a usare le AI come un fenomeno, passo per passo.Liked this resource? In the full The AI Creator System program (14 modules, over 5 hours) you learn to use AI like a pro, step by step.

Vai al corso completo →Go to the full course →
Fatti creare slide, fogli di calcolo e PDF da Gemini direttamente in chat
Risorsa gratuita dal ReelFree resource from our Reel

Fatti creare slide, fogli di calcolo e PDF da Gemini direttamente in chatHave Gemini create slides, spreadsheets and PDFs right in the chat

Nel Reel: Gemini ora crea i file direttamente in chat. Gli chiedi una presentazione, un foglio di calcolo o un PDF: lo genera, te lo mostra in anteprima e lo modifichi lì dentro, anche evidenziando una frase da riscrivere. Le slide si aprono in Google Slides o si scaricano in PowerPoint; i PDF funzionano anche da telefono, gli altri file da computer. Qui trovi i passaggi e i prompt pronti, compreso quello per il preventivo in PDF da mandare al cliente.In the Reel: Gemini now creates files right in the chat. You ask for a presentation, a spreadsheet or a PDF: it generates it, shows you a preview and you edit it there, even by highlighting a sentence to rewrite. Slides open in Google Slides or download as PowerPoint; PDFs also work on your phone, the other files on a computer. Here are the steps and ready-made prompts, including the one for a PDF quote to send to a client.

Strumento: Google GeminiTool: Google GeminiTempo: 1-5 minuti a fileTime: 1-5 minutes per fileCosto: secondo il tuo piano GeminiCost: according to your Gemini plan
  • Apri Gemini: per slide e fogli di calcolo usa il computer, per i PDF va bene anche il telefono.Open Gemini: use a computer for slides and spreadsheets, a phone is fine for PDFs.
  • Scegli il prompt del file che ti serve (preventivo PDF, presentazione o foglio di calcolo) e sostituisci le parti tra parentesi quadre con i tuoi dati veri.Pick the prompt for the file you need (PDF quote, presentation or spreadsheet) and replace the parts in square brackets with your real data.
  • Controlla l'anteprima: se una frase non va, evidenziala e chiedi a Gemini di riscriverla, senza rifare tutto il file.Check the preview: if a sentence is off, highlight it and ask Gemini to rewrite it, without redoing the whole file.
  • Apri le slide in Google Slides o scaricale in PowerPoint; ricontrolla sempre cifre e dati prima di mandare il file a un cliente.Open the slides in Google Slides or download them as PowerPoint; always double-check figures and data before sending the file to a client.

Ti è piaciuta questa risorsa? Nel percorso completo The AI Creator System (14 moduli, oltre 5 ore) impari a usare le AI come un fenomeno, passo per passo.Liked this resource? In the full The AI Creator System program (14 modules, over 5 hours) you learn to use AI like a pro, step by step.

Vai al corso completo →Go to the full course →
Prepara il lavoro per un agente AI che collabora con te, come Claude Duet
Risorsa gratuita dal ReelFree resource from our Reel

Prepara il lavoro per un agente AI che collabora con te, come Claude DuetPrepare your work for an AI agent that works alongside you, like Claude Duet

Nel Reel: con Claude Duet l'AI punta a lavorare insieme a te invece di limitarsi a rispondere, togliendoti attività ripetitive. Anthropic l'ha presentato il 21 ottobre 2026 come anteprima di ricerca: un agente che lavora in background sulle app collegate e chiede il permesso prima delle azioni che non si possono annullare. Al lancio si accede con lista d'attesa, per gli abbonati Pro e Max negli Stati Uniti. Qui trovi i passaggi e i prompt per scegliere cosa delegare e provarlo subito con Claude.In the Reel: with Claude Duet the AI aims to work alongside you instead of just answering, taking repetitive tasks off your plate. Anthropic presented it on 21 October 2026 as a research preview: an agent that works in the background on connected apps and asks permission before actions that can't be undone. At launch access is through a waitlist, for Pro and Max subscribers in the United States. Here are the steps and prompts to choose what to delegate and try it right away with Claude.

Strumento: Claude (Duet in anteprima)Tool: Claude (Duet in preview)Tempo: 20 minutiTime: 20 minutesCosto: incluso in Claude Pro/Max (lista d'attesa)Cost: included in Claude Pro/Max (waitlist)
  • Scrivi per una settimana le attività ripetitive che fai (email, appuntamenti, promemoria, report): sono quelle da affidare a un agente.For one week write down the repetitive tasks you do (emails, appointments, reminders, reports): those are the ones to hand to an agent.
  • Con il PROMPT 1 fatti dividere la lista in: cosa può fare l'agente da solo, cosa deve prepararti e cosa resta solo tuo.With PROMPT 1 have the list split into: what the agent can do alone, what it should prepare for you and what stays yours only.
  • Con il PROMPT 2 scrivi le regole del tuo agente, compreso cosa deve sempre chiederti prima di fare (inviare, pagare, cancellare).With PROMPT 2 write your agent's rules, including what it must always ask you before doing (sending, paying, deleting).
  • Usa il PROMPT 3 in Claude per il riepilogo del mattino già da oggi; se Duet arriva nel tuo account, ci incolli le stesse regole. È un'anteprima: controlla sempre quello che propone.Use PROMPT 3 in Claude for your morning summary starting today; if Duet reaches your account, paste the same rules in. It's a preview: always check what it suggests.

Ti è piaciuta questa risorsa? Nel percorso completo The AI Creator System (14 moduli, oltre 5 ore) impari a usare le AI come un fenomeno, passo per passo.Liked this resource? In the full The AI Creator System program (14 modules, over 5 hours) you learn to use AI like a pro, step by step.

Vai al corso completo →Go to the full course →
Crea il tuo assistente vocale AI che risponde ai clienti
Risorsa gratuita dal ReelFree resource from our Reel

Crea il tuo assistente vocale AI che risponde ai clientiBuild your AI voice assistant that answers your customers

Nel Reel: il 20 ottobre ElevenLabs ha lanciato Eleven Realtime, modelli che ascoltano, ragionano e rispondono a voce in tempo reale in un solo agente vocale. v1 Mini è l'opzione a basso costo per assistenti, tutor e personaggi; v1 Max è per servizio clienti e procedure in più passaggi, anche con strumenti come il calendario. Parla più di 90 lingue e si usa in ElevenAgents (telefono, WhatsApp, widget del sito) o con una Realtime API compatibile con quella di OpenAI. Al lancio non c'è un prezzo al minuto indicato e i benchmark sono dichiarati da ElevenLabs: qui trovi i passaggi e i prompt per preparare il tuo agente e provarlo sulle tue conversazioni vere, in italiano.In the Reel: on 20 October ElevenLabs launched Eleven Realtime, models that listen, reason and answer by voice in real time inside a single voice agent. v1 Mini is the low-cost option for assistants, tutors and characters; v1 Max is for customer service and multi-step procedures, also with tools like a calendar. It speaks 90+ languages and runs in ElevenAgents (phone, WhatsApp, website widget) or through a Realtime API compatible with OpenAI's. At launch no per-minute price is given and the benchmarks are ElevenLabs' own: here are the steps and prompts to prepare your agent and test it on your real conversations.

Strumento: ElevenLabs ElevenAgents (Eleven Realtime)Tool: ElevenLabs ElevenAgents (Eleven Realtime)Tempo: 30 minutiTime: 30 minutesCosto: prezzo al minuto non indicato al lancioCost: no per-minute price given at launch
  • Scegli UN compito preciso per l'agente (es. rispondere alle domande frequenti, prendere appuntamenti) e scegli il modello: v1 Mini per assistenti semplici, v1 Max se deve seguire procedure in più passaggi o usare il calendario.Pick ONE precise job for the agent (e.g. answering FAQs, booking appointments) and choose the model: v1 Mini for simple assistants, v1 Max if it must follow multi-step procedures or use the calendar.
  • Con il PROMPT 1 fatti scrivere da ChatGPT o Claude le istruzioni dell'agente, poi incollale nel tuo agente in ElevenAgents.Use PROMPT 1 to have ChatGPT or Claude write the agent's instructions, then paste them into your agent in ElevenAgents.
  • Con il PROMPT 2 trasforma le tue informazioni (orari, servizi, regole) in un documento di domande e risposte da dare all'agente come base di conoscenza.Use PROMPT 2 to turn your information (hours, services, rules) into a Q&A document to give the agent as its knowledge base.
  • Prima di collegarlo a telefono, WhatsApp o sito, provalo con le chiamate di prova del PROMPT 3, in italiano: i benchmark sono dichiarati da ElevenLabs, quindi conta solo come va con i tuoi clienti.Before connecting it to phone, WhatsApp or your site, test it with the PROMPT 3 test calls: the benchmarks are ElevenLabs' own, so only how it works with your customers counts.

Ti è piaciuta questa risorsa? Nel percorso completo The AI Creator System (14 moduli, oltre 5 ore) impari a usare le AI come un fenomeno, passo per passo.Liked this resource? In the full The AI Creator System program (14 modules, over 5 hours) you learn to use AI like a pro, step by step.

Vai al corso completo →Go to the full course →
Crea l'atmosfera sonora del tuo Reel con una frase
Risorsa gratuita dal ReelFree resource from our Reel

Crea l'atmosfera sonora del tuo Reel con una fraseCreate your Reel's soundscape with one sentence

Nel Reel: ElevenLabs ha lanciato Sound Effects v3, il modello che crea effetti sonori da una semplice frase. La novità è che capisce più suoni nella stessa richiesta e li unisce in un'unica traccia, con un audio più pulito e naturale: scrivi «pioggia sul vetro, tazza di caffè, tastiera che batte» e in pochi secondi hai l'atmosfera per il tuo Reel. È disponibile nell'app e nelle API di ElevenLabs. Qui trovi i passaggi e i prompt pronti per Reel, video e podcast.In the Reel: ElevenLabs launched Sound Effects v3, the model that creates sound effects from a simple sentence. What's new is that it understands several sounds in the same request and blends them into a single track, with cleaner, more natural audio: write "rain on the window, cup of coffee, keyboard typing" and in seconds you have the atmosphere for your Reel. It's available in the ElevenLabs app and API. Here are the steps and ready-made prompts for Reels, videos and podcasts.

Strumento: ElevenLabs Sound Effects v3Tool: ElevenLabs Sound Effects v3Tempo: 5 minutiTime: 5 minutesCosto: crediti del tuo piano ElevenLabsCost: credits on your ElevenLabs plan
  • Apri ElevenLabs (sito o app) e vai su Sound Effects; controlla che sia selezionato il modello v3.Open ElevenLabs (website or app) and go to Sound Effects; make sure the v3 model is selected.
  • Descrivi la scena con 2-4 suoni nella stessa frase, in inglese per risultati più precisi: luogo, suoni in primo piano, sottofondo, ritmo.Describe the scene with 2-4 sounds in one sentence: place, foreground sounds, background, pace.
  • Imposta la durata uguale al tuo video (o lasciala automatica), genera qualche variante e scegli quella più pulita.Set the duration to match your video (or leave it automatic), generate a few variations and pick the cleanest one.
  • Scarica la traccia, mettila sotto il video nel tuo editor e abbassala sotto la voce se c'è un parlato.Download the track, place it under the video in your editor and lower it under the voice if there is speech.

Ti è piaciuta questa risorsa? Nel percorso completo The AI Creator System (14 moduli, oltre 5 ore) impari a usare le AI come un fenomeno, passo per passo.Liked this resource? In the full The AI Creator System program (14 modules, over 5 hours) you learn to use AI like a pro, step by step.

Vai al corso completo →Go to the full course →
Crea la tua prima Agent Skill: insegna all'AI a lavorare come vuoi tu
Risorsa gratuita dal ReelFree resource from our Reel

Crea la tua prima Agent Skill: insegna all'AI a lavorare come vuoi tuCreate your first Agent Skill: teach AI to work your way

Nel Reel: le Agent Skills, lo standard nato da Anthropic che nel video passa alla Linux Foundation (Agentic AI Foundation). Una skill è una cartella con un file SKILL.md: dentro scrivi una volta sola le tue istruzioni e l'AI le usa da sola quando servono. Qui trovi i passaggi e i prompt per farti scrivere la tua prima skill e provarla.In the Reel: Agent Skills, the standard created by Anthropic that the video shows moving to the Linux Foundation (Agentic AI Foundation). A skill is a folder with a SKILL.md file: you write your instructions once and the AI uses them on its own when needed. Here are the steps and prompts to have your first skill written and to test it.

Strumento: Agent Skills (file SKILL.md)Tool: Agent Skills (SKILL.md file)Tempo: 15 minutiTime: 15 minutesMateriale: un compito che ripeti spessoMaterial: a task you repeat often
  • Scegli un compito che ripeti sempre con le stesse istruzioni (es. scrivere le didascalie dei tuoi post, rispondere ai clienti, preparare un report).Pick a task you always repeat with the same instructions (e.g. writing your post captions, replying to clients, preparing a report).
  • Incolla il PROMPT 1 in Claude (o in un altro assistente AI) compilando le parti tra parentesi quadre: ti scrive il file SKILL.md completo.Paste PROMPT 1 into Claude (or another AI assistant), filling in the parts in square brackets: it writes the complete SKILL.md file.
  • Crea una cartella col nome della skill (es. didascalie-instagram) e salva dentro il testo come SKILL.md. In Claude puoi caricarla come skill dalle impostazioni (cartella compressa in .zip); in Claude Code mettila in ~/.claude/skills/.Create a folder named after the skill (e.g. instagram-captions) and save the text inside it as SKILL.md. In Claude you can upload it as a skill from the settings (folder zipped); in Claude Code put it in ~/.claude/skills/.
  • Provala con il PROMPT 2: chiedi il compito senza ripetere le istruzioni e controlla che l'AI attivi la skill. Se sbaglia qualcosa, correggi il file e riprova.Test it with PROMPT 2: ask for the task without repeating the instructions and check that the AI activates the skill. If something is off, fix the file and try again.

Ti è piaciuta questa risorsa? Nel percorso completo The AI Creator System (14 moduli, oltre 5 ore) impari a usare le AI come un fenomeno, passo per passo.Liked this resource? In the full The AI Creator System program (14 modules, over 5 hours) you learn to use AI like a pro, step by step.

Vai al corso completo →Go to the full course →
Gemini 4 Carbon: come iniziare a offrire siti e controlli di sicurezza con l'AI
Risorsa gratuita dal ReelFree resource from our Reel

Gemini 4 Carbon: come iniziare a offrire siti e controlli di sicurezza con l'AIGemini 4 Carbon: how to start offering websites and security checks with AI

Nel Reel parliamo di Gemini 4 Carbon, la nuova AI di Google costruita per scrivere codice e difendere i sistemi: prima nell'Artificial Analysis Intelligence Index (59 punti), trova le vulnerabilità nell'88% dei casi nei test e scrive codice sicuro più del doppio delle volte rispetto ad Argon. Per ora è riservata ai team di sicurezza informatica (Google ha detto che arriverà anche a sviluppatori e aziende). Intanto puoi iniziare oggi con l'assistente AI che già usi: con questi passaggi e prompt crei un sito per una piccola azienda e fai un controllo di sicurezza di base, così sei pronto quando Carbon sarà disponibile.In the Reel we talk about Gemini 4 Carbon, Google's new AI built to write code and defend systems: first in the Artificial Analysis Intelligence Index (59 points), it finds vulnerabilities in 88% of cases in tests and writes secure code more than twice as often as Argon. For now it is reserved for cybersecurity teams (Google said it will also come to developers and businesses). Meanwhile you can start today with the AI assistant you already use: with these steps and prompts you build a website for a small business and run a basic security check, so you are ready when Carbon becomes available.

Strumento: Gemini / assistente AITool: Gemini / AI assistantTempo: 30 minutiTime: 30 minutesCosto: Carbon 2$ / 10$ per milione di tokenCost: Carbon $2 / $10 per million tokens
  • Scegli una piccola azienda (anche la tua o quella di un amico) e chiedi il permesso di lavorare sul suo sito: i controlli di sicurezza si fanno solo su siti tuoi o con autorizzazione scritta.Pick a small business (yours or a friend's) and ask permission to work on its website: security checks are only done on your own sites or with written authorization.
  • Con il PROMPT 1 fai creare all'AI una landing page semplice e sicura per quell'attività, poi pubblicala su un hosting gratuito o di prova.With PROMPT 1 have the AI build a simple, secure landing page for that business, then publish it on a free or trial hosting.
  • Con il PROMPT 2 incolla il codice e fatti fare una revisione di sicurezza: l'AI ti segnala i problemi e ti propone la versione corretta. Controlla sempre tu le modifiche prima di pubblicarle.With PROMPT 2 paste the code and get a security review: the AI flags the problems and proposes the fixed version. Always check the changes yourself before publishing.
  • Con il PROMPT 3 trasforma il lavoro in un'offerta (sito + controllo periodico) da proporre ad altre attività. Quando Gemini 4 Carbon arriverà a sviluppatori e aziende, potrai usarlo nello stesso flusso: oggi è solo per team di sicurezza, quindi verifica disponibilità e prezzo ufficiali di Google.With PROMPT 3 turn the work into an offer (website + periodic check) to pitch to other businesses. When Gemini 4 Carbon reaches developers and businesses, you can use it in the same workflow: today it is only for security teams, so check Google's official availability and pricing.

Ti è piaciuta questa risorsa? Nel percorso completo The AI Creator System (14 moduli, oltre 5 ore) impari a usare le AI come un fenomeno, passo per passo.Liked this resource? In the full The AI Creator System program (14 modules, over 5 hours) you learn to use AI like a pro, step by step.

Vai al corso completo →Go to the full course →

Canva Craft e Magic Layers: grafiche social modificabili con 3 prompt
Risorsa gratuita dal ReelFree resource from our Reel

Canva Craft e Magic Layers: grafiche social modificabili con 3 promptCanva Craft and Magic Layers: editable social graphics with 3 prompts

Nel Reel parliamo di Craft, la nuova AI per le immagini di Canva: è addestrata su design fatti da persone (poster, post social, infografiche), crea immagini fino a 2K in 30 proporzioni diverse e con Magic Layers trasforma l'immagine in un design a livelli, con testo, sfondo e oggetti separati e modificabili. Con questi passaggi e prompt crei una grafica e ne cambi il testo in un click, senza rifarla da zero.In the Reel we talk about Craft, Canva's new image AI: it is trained on designs made by people (posters, social posts, infographics), creates images up to 2K in 30 different aspect ratios and with Magic Layers turns the image into a layered design, with text, background and objects separate and editable. With these steps and prompts you create a graphic and change its text in one click, without starting over.

Strumento: Canva CraftTool: Canva CraftTempo: 15 minutiTime: 15 minutesCosto: dipende dal tuo piano CanvaCost: depends on your Canva plan
  • Apri Canva e cerca la generazione di immagini con Craft; scegli la proporzione giusta per il canale (es. 4:5 per il feed, 9:16 per le storie).Open Canva and look for image generation with Craft; pick the right aspect ratio for the channel (e.g. 4:5 for the feed, 9:16 for stories).
  • Genera la grafica con uno dei prompt qui sotto, descrivendo il tipo di design (poster, post social, infografica): Craft è addestrata proprio su questi.Generate the graphic with one of the prompts below, describing the type of design (poster, social post, infographic): Craft is trained on exactly these.
  • Usa Magic Layers per separare testo, sfondo e oggetti in livelli modificabili.Use Magic Layers to split text, background and objects into editable layers.
  • Cambia testo, colori o oggetti direttamente sui livelli e duplica il design per creare più varianti senza rifarlo da zero. Disponibilità e limiti dipendono dal tuo piano: controllali in Canva.Change text, colors or objects directly on the layers and duplicate the design to make more variants without starting over. Availability and limits depend on your plan: check them in Canva.

Ti è piaciuta questa risorsa? Nel percorso completo The AI Creator System (14 moduli, oltre 5 ore) impari a usare le AI come un fenomeno, passo per passo.Liked this resource? In the full The AI Creator System program (14 modules, over 5 hours) you learn to use AI like a pro, step by step.

Vai al corso completo →Go to the full course →
Un agente AI sul tuo PC con Nemotron 3.5: 3 prompt per provarlo
Risorsa gratuita dal ReelFree resource from our Reel

Un agente AI sul tuo PC con Nemotron 3.5: 3 prompt per provarloAn AI agent on your PC with Nemotron 3.5: 3 prompts to try it

Nel Reel parliamo di Nemotron 3.5, i modelli aperti per agenti AI lanciati da Nvidia il 15 ottobre. La versione Bolt 74B-A9B è compressa per stare in 24 GB e gira in locale con Ollama, LM Studio o llama.cpp, anche in italiano. Con questi passaggi e prompt la provi su compiti veri, senza mandare i tuoi dati nel cloud.In the Reel we talk about Nemotron 3.5, the open models for AI agents Nvidia launched on October 15. The Bolt 74B-A9B version is compressed to fit in 24 GB and runs locally with Ollama, LM Studio or llama.cpp, Italian included. With these steps and prompts you try it on real tasks, without sending your data to the cloud.

Strumento: LM Studio o OllamaTool: LM Studio or OllamaTempo: 30 minutiTime: 30 minutesCosto: pesi gratisCost: free weights
  • Controlla la memoria del computer: Unsloth consiglia circa 32 GB di RAM (è una stima, non una misura).Check your computer's memory: Unsloth suggests about 32 GB of RAM (an estimate, not a measurement).
  • Scarica Nemotron 3.5 Bolt con LM Studio o Ollama (oppure llama.cpp) e avvia la chat in locale.Download Nemotron 3.5 Bolt with LM Studio or Ollama (or llama.cpp) and start the chat locally.
  • Dagli un compito vero con i prompt qui sotto: riassunto di un PDF, dati da una tabella, bozza di un'email.Give it a real task with the prompts below: summarize a PDF, extract data from a table, draft an email.
  • Prima di usarlo in un prodotto leggi la licenza OpenMDW 1.1 (consente l'uso commerciale). Le promesse sulla velocità sono dichiarate da Nvidia, non ancora verificate in modo indipendente.Before using it in a product, read the OpenMDW 1.1 license (it allows commercial use). Speed claims come from Nvidia and are not yet independently verified.

Ti è piaciuta questa risorsa? Nel percorso completo The AI Creator System (14 moduli, oltre 5 ore) impari a usare le AI come un fenomeno, passo per passo.Liked this resource? In the full The AI Creator System program (14 modules, over 5 hours) you learn to use AI like a pro, step by step.

Vai al corso completo →Go to the full course →

Il video del tuo brand con l'AI: 3 prompt per partire
Risorsa gratuita dal ReelFree resource from our Reel

Il video del tuo brand con l'AI: 3 prompt per partireYour brand video with AI: 3 prompts to get started

Nel Reel ti mostriamo un video fatto con l'intelligenza artificiale: prodotti in 3D, animazioni, volto e voce, senza set, troupe o giorni di riprese. Con questi prompt prepari in pochi minuti l'idea, lo script e le scene del video per il tuo prodotto, servizio o personal brand.In the Reel we show a video made with artificial intelligence: 3D products, animations, face and voice, with no set, crew or days of shooting. With these prompts you prepare the idea, the script and the scenes of the video for your product, service or personal brand in a few minutes.

Strumento: ChatGPTTool: ChatGPTTempo: 15 minutiTime: 15 minutesCosto: anche gratisCost: free plan works too
  • Scegli il tipo di video: prodotto, lancio di un servizio o personal brand.Pick the type of video: product, service launch or personal brand.
  • Con il prompt 1 ottieni uno script di 30 secondi con gancio iniziale e invito all'azione.With prompt 1 you get a 30-second script with an opening hook and a call to action.
  • Con il prompt 2 trasformi lo script in scene, ognuna con il prompt per il tuo strumento AI di immagini o video.With prompt 2 you turn the script into scenes, each with a prompt for your AI image or video tool.
  • Con il prompt 3 scrivi la descrizione del post. Vuoi che lo realizziamo noi? Scrivi VIDEO in direct a @theaicreatorsystem.With prompt 3 you write the post caption. Want us to make it for you? DM VIDEO to @theaicreatorsystem.

Ti è piaciuta questa risorsa? Nel percorso completo The AI Creator System (14 moduli, oltre 5 ore) impari a usare le AI come un fenomeno, passo per passo.Liked this resource? In the full The AI Creator System program (14 modules, over 5 hours) you learn to use AI like a pro, step by step.

Vai al corso completo →Go to the full course →
ChatGPT crea app: 3 prompt per strumenti interattivi
Risorsa gratuita dal ReelFree resource from our Reel

ChatGPT crea app: 3 prompt per strumenti interattiviChatGPT builds apps: 3 prompts for interactive tools

Con GPT-6 ChatGPT non risponde più solo con il testo: dentro la chat crea grafici, pulsanti, moduli e piccoli calcolatori interattivi, anche nel piano gratuito. Copia questi prompt e costruisci in due minuti gli strumenti che usi con i clienti.With GPT-6, ChatGPT no longer answers only with text: inside the chat it builds charts, buttons, forms and small interactive calculators, even on the free plan. Copy these prompts and build the tools you use with clients in two minutes.

Strumento: ChatGPTTool: ChatGPTTempo: 2 minutiTime: 2 minutesCosto: anche gratisCost: free plan works too
  • Apri una nuova chat e incolla il prompt 1: ottieni un calcolatore di preventivi con ore, tariffa e IVA.Open a new chat and paste prompt 1: you get a quote calculator with hours, rate and VAT.
  • Cambia i numeri direttamente nello strumento: il totale si aggiorna da solo.Change the numbers right inside the tool: the total updates by itself.
  • Con i prompt 2 e 3 crei un modulo per le richieste dei clienti e un grafico delle tue entrate.With prompts 2 and 3 you build a client request form and a chart of your income.
  • Controlla sempre i calcoli prima di mandare un preventivo a un cliente.Always double-check the numbers before sending a quote to a client.

Ti è piaciuta questa risorsa? Nel percorso completo The AI Creator System (14 moduli, oltre 5 ore) impari a usare le AI come un fenomeno, passo per passo.Liked this resource? In the full The AI Creator System program (14 modules, over 5 hours) you learn to use AI like a pro, step by step.

Vai al corso completo →Go to the full course →
Il workflow dei video da 600 €: 4 strumenti e i prompt pronti
Risorsa gratuita dal ReelFree resource from our Reel

Il workflow dei video da 600 €: 4 strumenti e i prompt prontiThe €600 video workflow: 4 tools and ready-made prompts

Il metodo del Reel: Claude fa da regista, ChatGPT crea le immagini realistiche, HeyGen dà voce e volto al tuo avatar, Blender aggiunge le animazioni 3D. Qui trovi i passaggi in ordine e i prompt da copiare.The method from the Reel: Claude is the director, ChatGPT creates realistic images, HeyGen gives your avatar your face and voice, Blender adds 3D animations. Here are the steps in order and the prompts to copy.

Strumenti: 4Tools: 4Tempo: un pomeriggioTime: one afternoonLivello: principianteLevel: beginner
  • Claude: incolla un articolo e il prompt 1, ottieni il copione da 30-40 secondi e la scaletta del montaggio scena per scena.Claude: paste an article and prompt 1 to get a 30-40 second script and a scene-by-scene edit plan.
  • ChatGPT: per ogni scena crea un'immagine che sembra scattata con un iPhone (prompt 2).ChatGPT: for each scene create an image that looks shot on an iPhone (prompt 2).
  • HeyGen: incolla il copione nel tuo avatar con la voce clonata ed esporta il video verticale in 1080p. Zero riprese.HeyGen: paste the script into your avatar with your cloned voice and export the vertical video in 1080p. No filming.
  • Blender (gratis): fatti scrivere da Claude lo script dell'animazione 3D (prompt 3), poi unisci tutto con testi animati, musica ed effetti sonori.Blender (free): have Claude write the 3D animation script (prompt 3), then put it all together with animated text, music and sound effects.

Ti è piaciuta questa risorsa? Nel percorso completo The AI Creator System (14 moduli, oltre 5 ore) impari a usare le AI come un fenomeno, passo per passo.Liked this resource? In the full The AI Creator System program (14 modules, over 5 hours) you learn to use AI like a pro, step by step.

Vai al corso completo →Go to the full course →
ChatGPT regista vocale: prova il copione prima di registrare
Risorsa gratuita dal ReelFree resource from our Reel

ChatGPT regista vocale: prova il copione prima di registrareChatGPT as voice director: rehearse your script before recording

Con GPT-Live-1.1 la voce dal vivo di ChatGPT ascolta e risponde nello stesso momento: la puoi interrompere quando vuoi. Usala come regista per provare ad alta voce il copione dei tuoi Reel, invece di rifare le riprese.With GPT-Live-1.1, ChatGPT's live voice listens and answers at the same time, and you can interrupt it whenever you want. Use it as a director to rehearse your Reel scripts out loud instead of reshooting.

Strumento: ChatGPT voceTool: ChatGPT voiceTempo: 10 minutiTime: 10 minutesPlus: 3 ore ogni 24 orePlus: 3 hours every 24 hours
  • Imposta la lingua in Impostazioni → Voce → Lingua (non ci sono voci nuove dedicate all'italiano).Set the language in Settings → Voice → Language (there are no new voices dedicated to Italian).
  • Scrivi il prompt qui sotto nella chat, poi avvia la modalità voce.Type the prompt below in the chat, then start voice mode.
  • Leggi il copione ad alta voce: dove ti interrompe, il ritmo cala. Riscrivi quei punti e rileggi.Read your script out loud: wherever it interrupts you, the pace drops. Rewrite those parts and read again.
  • Con Free e Go usi la versione ridotta Quip. Nelle API GPT-Live-1.1 non c'è ancora: OpenAI dice solo «in arrivo».Free and Go use the lighter Quip version. GPT-Live-1.1 is not in the API yet: OpenAI only says "coming soon".

Ti è piaciuta questa risorsa? Nel percorso completo The AI Creator System (14 moduli, oltre 5 ore) impari a usare le AI come un fenomeno, passo per passo.Liked this resource? In the full The AI Creator System program (14 modules, over 5 hours) you learn to use AI like a pro, step by step.

Vai al corso completo →Go to the full course →
Kling 4.0: kit di riferimenti e scaletta per uno spot da 30 secondi
Risorsa gratuita dal ReelFree resource from our Reel

Kling 4.0: kit di riferimenti e scaletta per uno spot da 30 secondiKling 4.0: reference kit and outline for a 30-second ad

Kling 4.0 genera video fino a 30 secondi in una sola generazione e accetta fino a 15 riferimenti tra immagini, video e voce. Con questo modello di prompt costruisci uno spot completo con lo stesso personaggio e lo stesso prodotto dall'inizio alla fine.Kling 4.0 generates videos up to 30 seconds in a single generation and accepts up to 15 references across images, video and voice. With this prompt template you build a complete ad with the same character and product from start to finish.

Strumento: Kling 4.0Tool: Kling 4.0Durata: fino a 30 sLength: up to 30 sPrezzi: non ancora pubblicatiPricing: not yet published
  • Prepara il kit di riferimenti: volto, prodotto, luogo. Così personaggio e prodotto restano uguali per tutta la clip.Prepare your reference kit: face, product, location. This keeps character and product consistent through the whole clip.
  • Ragiona per keyframe (fino a 10): apertura, problema, prodotto, risultato, chiusura. Il prompt qui sotto ne usa 5.Think in keyframes (up to 10): opening, problem, product, result, closing. The prompt below uses 5.
  • Fai le prove con Kling 4.0 Flash (più veloce ed economico, ma 720p e massimo 20 s) e usa il modello completo solo per la versione finale.Test with Kling 4.0 Flash (faster and cheaper, but 720p and 20 s max) and use the full model only for the final version.
  • Estensione a 2 minuti, 4K HDR e API sono solo annunciati: controlla nel tuo account prima di prometterli a un cliente.2-minute extension, 4K HDR and API are only announced: check your account before promising them to a client.

Ti è piaciuta questa risorsa? Nel percorso completo The AI Creator System (14 moduli, oltre 5 ore) impari a usare le AI come un fenomeno, passo per passo.Liked this resource? In the full The AI Creator System program (14 modules, over 5 hours) you learn to use AI like a pro, step by step.

Vai al corso completo →Go to the full course →
Diventa l'eroe di un film fantasy: 1 foto, 5 passaggi
Risorsa gratuita dal ReelFree resource from our Reel

Diventa l'eroe di un film fantasy: 1 foto, 5 passaggiBecome the hero of a fantasy movie: 1 photo, 5 steps

Nel Reel una sola foto diventa una scena da kolossal fantasy con mostri ed effetti visivi, creata con Higgsfield e Seedance. Qui trovi i passaggi e i prompt per rifarla con il tuo volto.In the Reel a single photo becomes a fantasy blockbuster scene with monsters and visual effects, made with Higgsfield and Seedance. Here are the steps and prompts to recreate it with your own face.

Strumento: Higgsfield + SeedanceTool: Higgsfield + SeedanceTempo: circa 20 minutiTime: about 20 minutesCosto: secondo il tuo piano/creditiCost: depends on your plan/credits
  • Scegli una foto nitida di te, viso ben illuminato e frontale: è l'unico materiale che serve.Pick a sharp photo of yourself, face well lit and front-facing: it's the only material you need.
  • Con il PROMPT 1 crea il fotogramma iniziale: tu come eroe fantasy, stesso volto, ambientazione epica.Use PROMPT 1 to create the opening frame: you as a fantasy hero, same face, epic setting.
  • Carica il fotogramma su Higgsfield, scegli il modello Seedance in modalità immagine-video e incolla il PROMPT 2.Upload the frame to Higgsfield, pick the Seedance model in image-to-video mode and paste PROMPT 2.
  • Genera 2-3 varianti, tieni la migliore e aggiungi musica epica nel montaggio finale.Generate 2-3 variations, keep the best one and add epic music in the final edit.

Ti è piaciuta questa risorsa? Nel percorso completo The AI Creator System (14 moduli, oltre 5 ore) impari a usare le AI come un fenomeno, passo per passo.Liked this resource? In the full The AI Creator System program (14 modules, over 5 hours) you learn to use AI like a pro, step by step.

Vai al corso completo →Go to the full course →

Inseguito da un orso (finto): la scena cinematografica in 6 passaggi
Risorsa gratuita dal ReelFree resource from our Reel

Inseguito da un orso (finto): la scena cinematografica in 6 passaggiChased by a (fake) bear: the cinematic scene in 6 steps

Nel Reel un orso e una scena d'inseguimento creati al 100% con l'AI, partendo da 3 foto e senza telecamere né controfigure. Qui trovi i 6 passaggi e i prompt pronti.In the Reel a bear and a chase scene made 100% with AI, starting from 3 photos with no cameras or stunt doubles. Here are the 6 steps and ready prompts.

Materiale: 3 fotoMaterial: 3 photosPassaggi: 6Steps: 6Costo: secondo il tuo piano/creditiCost: depends on your plan/credits
  • Prepara 3 foto: il tuo volto, il tuo corpo intero e il luogo (un bosco o un sentiero).Prepare 3 photos: your face, your full body and the location (a forest or a trail).
  • Con il PROMPT 1 crea i fotogrammi: tu che corri nel bosco e l'orso alle tue spalle.Use PROMPT 1 to create the frames: you running in the forest with the bear behind you.
  • Anima ogni fotogramma in un generatore immagine-video con il PROMPT 2 (clip brevi da pochi secondi).Animate each frame in an image-to-video generator with PROMPT 2 (short clips of a few seconds).
  • Monta le clip alternando campo largo e primo piano, poi aggiungi respiro affannoso e ruggito come effetti sonori.Edit the clips alternating wide shots and close-ups, then add heavy breathing and a roar as sound effects.

Ti è piaciuta questa risorsa? Nel percorso completo The AI Creator System (14 moduli, oltre 5 ore) impari a usare le AI come un fenomeno, passo per passo.Liked this resource? In the full The AI Creator System program (14 modules, over 5 hours) you learn to use AI like a pro, step by step.

Vai al corso completo →Go to the full course →
Il tuo gol leggendario davanti a 90.000 tifosi
Risorsa gratuita dal ReelFree resource from our Reel

Il tuo gol leggendario davanti a 90.000 tifosiYour legendary goal in front of 90,000 fans

Nel Reel entri in campo e segni un gol da film in uno stadio pieno, tutto creato con l'AI partendo da poche foto e 6 passaggi. Qui trovi la scaletta e i prompt.In the Reel you walk onto the pitch and score a movie-style goal in a packed stadium, all made with AI from a few photos and 6 steps. Here are the outline and the prompts.

Materiale: poche foto tueMaterial: a few photos of youPassaggi: 6Steps: 6Costo: secondo il tuo piano/creditiCost: depends on your plan/credits
  • Scegli 2-3 foto: volto frontale e figura intera, meglio con una maglia sportiva.Pick 2-3 photos: front-facing face and full body, ideally in a sports shirt.
  • Crea 3 fotogrammi con il PROMPT 1: ingresso in campo, tiro, esultanza.Create 3 frames with PROMPT 1: walking onto the pitch, the shot, the celebration.
  • Anima ogni fotogramma con il PROMPT 2 in un generatore immagine-video.Animate each frame with PROMPT 2 in an image-to-video generator.
  • Monta le 3 clip in sequenza e aggiungi il boato della folla: è l'audio che vende la scena.Edit the 3 clips in sequence and add the crowd roar: the audio sells the scene.

Ti è piaciuta questa risorsa? Nel percorso completo The AI Creator System (14 moduli, oltre 5 ore) impari a usare le AI come un fenomeno, passo per passo.Liked this resource? In the full The AI Creator System program (14 modules, over 5 hours) you learn to use AI like a pro, step by step.

Vai al corso completo →Go to the full course →
Trasformati in supereroe con Seedance 2.5: 5 passaggi
Risorsa gratuita dal ReelFree resource from our Reel

Trasformati in supereroe con Seedance 2.5: 5 passaggiTurn into a superhero with Seedance 2.5: 5 steps

Nel Reel una semplice foto diventa una trasformazione da film di fantascienza, creata con Seedance 2.5 in 5 passaggi. Qui trovi i passaggi, il riferimento da preparare e i prompt.In the Reel a simple photo becomes a sci-fi movie transformation, made with Seedance 2.5 in 5 steps. Here are the steps, the reference to prepare and the prompts.

Strumento: Seedance 2.5Tool: Seedance 2.5Passaggi: 5Steps: 5Costo: secondo il tuo piano/creditiCost: depends on your plan/credits
  • Parti da una tua foto a mezzo busto, sfondo semplice e luce uniforme.Start from a half-body photo of yourself, plain background and even lighting.
  • Con il PROMPT 1 crea il riferimento del costume: la tua versione da supereroe, stesso volto.Use PROMPT 1 to create the suit reference: your superhero version, same face.
  • Usa la foto originale come inizio e il riferimento del costume come fine, poi incolla il PROMPT 2 in Seedance 2.5 (se il tuo piano consente fotogramma iniziale e finale).Use the original photo as the start and the suit reference as the end, then paste PROMPT 2 into Seedance 2.5 (if your plan allows start and end frames).
  • Genera più varianti e scegli quella in cui il volto resta più fedele.Generate several variations and pick the one where the face stays most faithful.

Ti è piaciuta questa risorsa? Nel percorso completo The AI Creator System (14 moduli, oltre 5 ore) impari a usare le AI come un fenomeno, passo per passo.Liked this resource? In the full The AI Creator System program (14 modules, over 5 hours) you learn to use AI like a pro, step by step.

Vai al corso completo →Go to the full course →
La casa era vuota… o no? Scena horror da una foto
Risorsa gratuita dal ReelFree resource from our Reel

La casa era vuota… o no? Scena horror da una fotoThe house was empty… or was it? Horror scene from one photo

Nel Reel una foto e un prompt diventano una scena horror da brivido, creata con Higgsfield e Seedance 2.5, senza troupe né montaggio complicato. Qui trovi i passaggi e i prompt.In the Reel one photo and one prompt become a chilling horror scene, made with Higgsfield and Seedance 2.5, with no film crew or complex editing. Here are the steps and prompts.

Strumento: Higgsfield + Seedance 2.5Tool: Higgsfield + Seedance 2.5Materiale: 1 fotoMaterial: 1 photoCosto: secondo il tuo piano/creditiCost: depends on your plan/credits
  • Scegli una foto di una stanza o di un corridoio (anche di casa tua) oppure una tua foto in un ambiente interno.Pick a photo of a room or hallway (even your home) or a photo of yourself indoors.
  • Rendila inquietante con il PROMPT 1: luce bassa, colori freddi, dettagli fuori posto.Make it eerie with PROMPT 1: low light, cold colours, things out of place.
  • Carica il fotogramma su Higgsfield, scegli Seedance 2.5 in modalità immagine-video e incolla il PROMPT 2.Upload the frame to Higgsfield, pick Seedance 2.5 in image-to-video mode and paste PROMPT 2.
  • Il segreto è l'audio: silenzio, un cigolio, poi un colpo forte quando appare la figura.The secret is audio: silence, a creak, then a loud hit when the figure appears.

Ti è piaciuta questa risorsa? Nel percorso completo The AI Creator System (14 moduli, oltre 5 ore) impari a usare le AI come un fenomeno, passo per passo.Liked this resource? In the full The AI Creator System program (14 modules, over 5 hours) you learn to use AI like a pro, step by step.

Vai al corso completo →Go to the full course →
Abbraccia il bambino che eri: 2 foto e 1 prompt
Risorsa gratuita dal ReelFree resource from our Reel

Abbraccia il bambino che eri: 2 foto e 1 promptHug the child you used to be: 2 photos and 1 prompt

Nel Reel due fotografie, una di oggi e una da bambino, diventano un abbraccio realistico tra passato e presente. Qui trovi come preparare le foto e il prompt da copiare.In the Reel two photos, one from today and one from childhood, become a realistic hug between past and present. Here's how to prepare the photos and the prompt to copy.

Materiale: 2 fotoMaterial: 2 photosPrompt: 1 (+1 per animarla)Prompts: 1 (+1 to animate)Costo: secondo il tuo piano/creditiCost: depends on your plan/credits
  • Scegli una foto di te oggi e una foto di te da bambino, entrambe con il viso ben visibile.Pick a photo of you today and one of you as a child, both with the face clearly visible.
  • Carica le 2 foto in ChatGPT nella stessa chat e incolla il PROMPT 1.Upload the 2 photos to ChatGPT in the same chat and paste PROMPT 1.
  • Se i volti non somigliano abbastanza, chiedi: "mantieni più fedeli i tratti del viso di entrambe le foto".If the faces don't look similar enough, ask: "keep the facial features of both photos more faithful".
  • Vuoi il video? Porta l'immagine in un generatore immagine-video con il PROMPT 2.Want a video? Take the image to an image-to-video generator with PROMPT 2.

Ti è piaciuta questa risorsa? Nel percorso completo The AI Creator System (14 moduli, oltre 5 ore) impari a usare le AI come un fenomeno, passo per passo.Liked this resource? In the full The AI Creator System program (14 modules, over 5 hours) you learn to use AI like a pro, step by step.

Vai al corso completo →Go to the full course →
Diventa il protagonista del tuo anime: 3 foto e una chat AI
Risorsa gratuita dal ReelFree resource from our Reel

Diventa il protagonista del tuo anime: 3 foto e una chat AIBecome the main character of your anime: 3 photos and one AI chat

Nel Reel 3 foto e una sola chat AI diventano un'avventura anime con scene di calcio epiche, senza saper animare. Qui trovi i passaggi e i prompt per creare la tua storia.In the Reel 3 photos and one AI chat become an anime adventure with epic football scenes, no animation skills needed. Here are the steps and prompts to create your story.

Materiale: 3 fotoMaterial: 3 photosStrumenti: chat AI + videoTools: AI chat + videoCosto: secondo il tuo piano/creditiCost: depends on your plan/credits
  • Scegli 3 foto: volto frontale, figura intera e una foto in movimento.Pick 3 photos: front face, full body and a photo in motion.
  • In una chat AI che crea immagini, carica le foto e incolla il PROMPT 1: ottieni il tuo personaggio anime.In an AI chat that creates images, upload the photos and paste PROMPT 1: you get your anime character.
  • Nella stessa chat chiedi le scene con il PROMPT 2: restando nella stessa chat il personaggio resta coerente.In the same chat ask for the scenes with PROMPT 2: staying in the same chat keeps the character consistent.
  • Anima le scene in un generatore immagine-video e montale con musica in stile sigla anime.Animate the scenes in an image-to-video generator and edit them with anime-opening-style music.

Ti è piaciuta questa risorsa? Nel percorso completo The AI Creator System (14 moduli, oltre 5 ore) impari a usare le AI come un fenomeno, passo per passo.Liked this resource? In the full The AI Creator System program (14 modules, over 5 hours) you learn to use AI like a pro, step by step.

Vai al corso completo →Go to the full course →

Il tuo primo ebook con l'AI: dall'idea all'indice ai capitoli
Risorsa gratuita dal ReelFree resource from our Reel

Il tuo primo ebook con l'AI: dall'idea all'indice ai capitoliYour first ebook with AI: from idea to outline to chapters

Nel Reel l'AI aiuta a passare dall'idea alla struttura fino ai contenuti di un ebook in una frazione del tempo. Qui trovi il metodo in 4 passaggi e i prompt da usare in ordine.In the Reel AI helps go from idea to structure to content of an ebook in a fraction of the time. Here's the 4-step method and the prompts to use in order.

Strumento: ChatGPTTool: ChatGPTMetodo: 4 passaggiMethod: 4 stepsCosto: secondo il tuo piano/creditiCost: depends on your plan/credits
  • Definisci argomento, lettore ideale e risultato che otterrà leggendo: senza questo l'AI scrive testo generico.Define topic, ideal reader and the result they'll get: without this AI writes generic text.
  • Fatti proporre l'indice con il PROMPT 1 e correggilo tu prima di andare avanti.Have it propose the outline with PROMPT 1 and fix it yourself before moving on.
  • Scrivi un capitolo alla volta con il PROMPT 2: capitoli brevi danno testi più curati.Write one chapter at a time with PROMPT 2: short chapters give better text.
  • Rileggi tutto, aggiungi esempi tuoi e controlla dati e fatti: la revisione umana è ciò che rende l'ebook vendibile.Reread everything, add your own examples and check data and facts: human review is what makes the ebook sellable.

Ti è piaciuta questa risorsa? Nel percorso completo The AI Creator System (14 moduli, oltre 5 ore) impari a usare le AI come un fenomeno, passo per passo.Liked this resource? In the full The AI Creator System program (14 modules, over 5 hours) you learn to use AI like a pro, step by step.

Vai al corso completo →Go to the full course →
Diventa un supereroe ragno con l'AI: 1 foto, 2 passaggi
Risorsa gratuita dal ReelFree resource from our Reel

Diventa un supereroe ragno con l'AI: 1 foto, 2 passaggiBecome a spider superhero with AI: 1 photo, 2 steps

Nel Reel una foto normale diventa una scena da film di supereroi: maschera a metà sul volto, salto tra i grattacieli, tutto con l'intelligenza artificiale. Qui trovi i due prompt: uno per l'immagine, uno per animarla.In the Reel an ordinary photo becomes a superhero movie scene: half-mask on the face, a leap between skyscrapers, all made with artificial intelligence. Here are the two prompts: one for the image, one to animate it.

Materiale: 1 foto del voltoMaterial: 1 face photoPassaggi: 2Steps: 2Costo: secondo il tuo piano/creditiCost: depends on your plan/credits
  • Scegli una foto con il volto ben illuminato e frontale: più è nitida, più il risultato ti somiglia.Pick a well-lit, front-facing photo: the sharper it is, the more the result looks like you.
  • Con il PROMPT 1 crei l'immagine: metà volto tuo e metà maschera da supereroe ragno.With PROMPT 1 you create the image: half your face, half spider-superhero mask.
  • Con il PROMPT 2 la animi in un generatore immagine-video (Kling, Seedance o simili).With PROMPT 2 you animate it in an image-to-video generator (Kling, Seedance or similar).
  • Usa un costume di tua invenzione: i personaggi famosi sono marchi registrati e spesso i generatori li bloccano.Use a costume you design yourself: famous characters are trademarks and generators often block them.

Ti è piaciuta questa risorsa? Nel percorso completo The AI Creator System (14 moduli, oltre 5 ore) impari a usare le AI come un fenomeno, passo per passo.Liked this resource? In the full The AI Creator System program (14 modules, over 5 hours) you learn to use AI like a pro, step by step.

Vai al corso completo →Go to the full course →
Davide contro Golia sul ring: la tua scena di combattimento con l'AI
Risorsa gratuita dal ReelFree resource from our Reel

Davide contro Golia sul ring: la tua scena di combattimento con l'AIDavid vs Goliath in the ring: your AI fight scene

Nel Reel un incontro impossibile sul ring, girato come un film d'azione ma creato tutto con l'AI: niente set, troupe o combattimenti veri. Con questi prompt prepari i fotogrammi e l'animazione della tua sfida.In the Reel an impossible fight in the ring, shot like an action movie but made entirely with AI: no set, crew or real fighting. With these prompts you prepare the frames and the animation of your own showdown.

Materiale: 1-2 foto tueMaterial: 1-2 photos of youPassaggi: 4Steps: 4Costo: secondo il tuo piano/creditiCost: depends on your plan/credits
  • Decidi i due sfidanti: tu e un avversario gigante (inventato, non una persona reale).Choose the two fighters: you and a giant opponent (made up, not a real person).
  • Crea 3 fotogrammi con il PROMPT 1: faccia a faccia, colpo decisivo, vittoria.Create 3 frames with PROMPT 1: face-off, decisive punch, victory.
  • Anima ogni fotogramma con il PROMPT 2 in un generatore immagine-video.Animate each frame with PROMPT 2 in an image-to-video generator.
  • Monta le clip con rallentatori e il boato del pubblico: il ritmo del montaggio fa sembrare vero il combattimento.Edit the clips with slow motion and the crowd roar: the editing rhythm makes the fight feel real.

Ti è piaciuta questa risorsa? Nel percorso completo The AI Creator System (14 moduli, oltre 5 ore) impari a usare le AI come un fenomeno, passo per passo.Liked this resource? In the full The AI Creator System program (14 modules, over 5 hours) you learn to use AI like a pro, step by step.

Vai al corso completo →Go to the full course →
Lo spot di un'auto sportiva senza auto né telecamera
Risorsa gratuita dal ReelFree resource from our Reel

Lo spot di un'auto sportiva senza auto né telecameraA sports car commercial with no car and no camera

Nel Reel uno spot automobilistico da grande produzione, fatto senza toccare un'auto vera: partendo da una foto si ottengono inquadrature in movimento, riflessi e montaggio da pubblicità. Qui trovi la scaletta e i prompt per farlo con la tua auto o con quella dei tuoi sogni.In the Reel a big-budget car commercial, made without touching a real car: from one photo you get moving shots, reflections and ad-style editing. Here are the outline and the prompts to do it with your car or your dream car.

Materiale: 1 foto dell'autoMaterial: 1 car photoInquadrature: 4Shots: 4Costo: secondo il tuo piano/creditiCost: depends on your plan/credits
  • Parti da una foto dell'auto di tre quarti, ben illuminata, oppure creala con il PROMPT 1.Start from a well-lit three-quarter photo of the car, or create it with PROMPT 1.
  • Genera 4 inquadrature diverse: dettaglio dei fari, ruota in corsa, vista dall'alto, auto che sfreccia.Generate 4 different shots: headlight detail, wheel in motion, top view, car speeding past.
  • Anima le inquadrature con il PROMPT 2: la camera deve muoversi, non solo l'auto.Animate them with PROMPT 2: the camera has to move, not just the car.
  • Monta a tempo di musica con tagli veloci e suono del motore: il montaggio fa lo spot.Edit to the beat with fast cuts and engine sound: the edit makes the commercial.

Ti è piaciuta questa risorsa? Nel percorso completo The AI Creator System (14 moduli, oltre 5 ore) impari a usare le AI come un fenomeno, passo per passo.Liked this resource? In the full The AI Creator System program (14 modules, over 5 hours) you learn to use AI like a pro, step by step.

Vai al corso completo →Go to the full course →

Ferma il tempo: tutto immobile tranne te
Risorsa gratuita dal ReelFree resource from our Reel

Ferma il tempo: tutto immobile tranne teFreeze time: everything stops except you

Nel Reel sei in una stazione affollata: un attimo dopo le persone restano congelate a metà passo, i fogli sospesi in aria, e solo tu continui a camminare. Qui trovi i passaggi e i prompt per rifare la scena con la tua foto.In the Reel you are in a crowded train station: a moment later people freeze mid-step, sheets of paper hang in the air, and only you keep walking. Here are the steps and prompts to recreate the scene with your own photo.

Materiale: 1 tua fotoMaterial: 1 photo of youTempo: 10 minutiTime: 10 minutesCosto: secondo il tuo piano/creditiCost: depends on your plan/credits
  • Crea l'immagine di partenza con il PROMPT 1: tu in primo piano in un luogo pieno di gente in movimento (stazione, piazza, strada).Create the starting image with PROMPT 1: you in the foreground in a place full of moving people (station, square, street).
  • Carica l'immagine in un generatore immagine-video e usa il PROMPT 2: la folla si blocca di colpo e solo tu cammini verso la camera.Upload the image to an image-to-video generator and use PROMPT 2: the crowd suddenly freezes and only you walk towards the camera.
  • Se anche le persone sullo sfondo continuano a muoversi, ripeti nel prompt che sono «completamente immobili, come statue» e accorcia la clip a 5 secondi.If background people keep moving, repeat in the prompt that they are "completely still, like statues" and shorten the clip to 5 seconds.
  • In montaggio metti prima 1-2 secondi di folla normale, poi lo stacco sul tempo fermo con un colore più freddo e desaturato, e il testo «Il tempo si ferma».In the edit, show 1-2 seconds of normal crowd first, then cut to the frozen moment with a colder, desaturated grade and the text "Time stops".

Ti è piaciuta questa risorsa? Nel percorso completo The AI Creator System (14 moduli, oltre 5 ore) impari a usare le AI come un fenomeno, passo per passo.Liked this resource? In the full The AI Creator System program (14 modules, over 5 hours) you learn to use AI like a pro, step by step.

Vai al corso completo →Go to the full course →
Una scena d'azione da film con personaggi che non esistono
Risorsa gratuita dal ReelFree resource from our Reel

Una scena d'azione da film con personaggi che non esistonoAn action movie scene with characters that don't exist

Nel Reel nessuna di quelle persone esiste: attori, stuntman e combattimenti sono tutti generati con l'AI. Qui trovi come creare un cast coerente e i prompt per la tua sequenza d'azione.In the Reel none of those people exist: actors, stunt doubles and fights are all generated with AI. Here is how to create a consistent cast and the prompts for your action sequence.

Materiale: nessunoMaterial: nonePassaggi: 4Steps: 4Costo: secondo il tuo piano/creditiCost: depends on your plan/credits
  • Crea prima il cast con il PROMPT 1: un'immagine per personaggio, sempre con la stessa descrizione.Create the cast first with PROMPT 1: one image per character, always with the same description.
  • Scrivi la scena in 4-5 momenti: inseguimento, scontro, colpo di scena, finale.Write the scene in 4-5 beats: chase, clash, twist, ending.
  • Per ogni momento usa il PROMPT 2 caricando le immagini dei personaggi come riferimento.For each beat use PROMPT 2, uploading the character images as references.
  • Unisci le clip e aggiungi musica ed effetti sonori: il suono rende credibile l'azione.Join the clips and add music and sound effects: sound makes the action believable.

Ti è piaciuta questa risorsa? Nel percorso completo The AI Creator System (14 moduli, oltre 5 ore) impari a usare le AI come un fenomeno, passo per passo.Liked this resource? In the full The AI Creator System program (14 modules, over 5 hours) you learn to use AI like a pro, step by step.

Vai al corso completo →Go to the full course →
Il tuo videoclip rap con l'AI, con il tuo volto
Risorsa gratuita dal ReelFree resource from our Reel

Il tuo videoclip rap con l'AI, con il tuo voltoYour AI rap music video, with your own face

Nel Reel due soci si trasferiscono in Thailandia e diventano star del rap, senza troupe né studio: canzone, scene e labiale sono fatti con l'AI. Qui trovi i passaggi e i prompt per il tuo videoclip.In the Reel two business partners move to Thailand and become rap stars, with no crew or studio: song, scenes and lip sync are made with AI. Here are the steps and prompts for your own music video.

Materiale: 1 foto per personaMaterial: 1 photo per personPassaggi: 4Steps: 4Costo: secondo il tuo piano/creditiCost: depends on your plan/credits
  • Scrivi il testo con il PROMPT 1 e generalo come canzone in un'app di musica AI (Suno o simili).Write the lyrics with PROMPT 1 and turn them into a song in an AI music app (Suno or similar).
  • Crea 3-4 scene con il PROMPT 2 partendo dalle vostre foto.Create 3-4 scenes with PROMPT 2 starting from your photos.
  • Usa uno strumento di lip sync per far cantare le scene sulla traccia audio.Use a lip-sync tool to make the scenes sing over the audio track.
  • Monta le clip a tempo sul ritornello e tieni il video sotto i 40 secondi.Edit the clips to the beat of the chorus and keep the video under 40 seconds.

Ti è piaciuta questa risorsa? Nel percorso completo The AI Creator System (14 moduli, oltre 5 ore) impari a usare le AI come un fenomeno, passo per passo.Liked this resource? In the full The AI Creator System program (14 modules, over 5 hours) you learn to use AI like a pro, step by step.

Vai al corso completo →Go to the full course →
Fai ballare il tuo animale preferito con l'AI
Risorsa gratuita dal ReelFree resource from our Reel

Fai ballare il tuo animale preferito con l'AIMake your favourite animal dance with AI

Nel Reel gli animali ballano come superstar. Ti basta una foto del tuo animale (o di uno inventato) e un prompt di movimento: qui trovi entrambi.In the Reel animals dance like superstars. All you need is a photo of your pet (or a made-up one) and a motion prompt: here are both.

Materiale: 1 foto dell'animaleMaterial: 1 animal photoTempo: 10 minutiTime: 10 minutesCosto: secondo il tuo piano/creditiCost: depends on your plan/credits
  • Scegli una foto dell'animale a figura intera, su sfondo semplice: le zampe devono vedersi.Pick a full-body photo of the animal on a simple background: the paws must be visible.
  • Se non hai la foto, creala con il PROMPT 1.If you don't have a photo, create it with PROMPT 1.
  • Animala con il PROMPT 2 indicando un passo di danza preciso: più è specifico, meglio funziona.Animate it with PROMPT 2 naming a precise dance move: the more specific, the better it works.
  • Aggiungi una canzone famosa nell'editor di Instagram, non nel video: così resta nella libreria musicale con i diritti a posto.Add a popular song in the Instagram editor, not in the video: that way it stays in the licensed music library.

Ti è piaciuta questa risorsa? Nel percorso completo The AI Creator System (14 moduli, oltre 5 ore) impari a usare le AI come un fenomeno, passo per passo.Liked this resource? In the full The AI Creator System program (14 modules, over 5 hours) you learn to use AI like a pro, step by step.

Vai al corso completo →Go to the full course →
Spacchetta la tua auto dei sogni con l'AI
Risorsa gratuita dal ReelFree resource from our Reel

Spacchetta la tua auto dei sogni con l'AIUnbox your dream car with AI

Nel Reel una GT-R bianca esce da un container in uno showroom di lusso, avvolta nella pellicola: la tagli, sali, togli il cellophane dai sedili e poi guidi di notte tra le luci della città. Qui trovi i passaggi e i prompt per rifare la scena con il tuo volto e l'auto che vuoi.In the Reel a white GT-R comes out of a shipping container in a luxury showroom, wrapped in film: you cut it open, get in, peel the plastic off the seats and then drive at night through the city lights. Here are the steps and prompts to recreate the scene with your face and the car you want.

Materiale: 3 tue foto + foto dell'autoMaterial: 3 photos of you + car photosInquadrature: 4-6Shots: 4-6Costo: secondo il tuo piano/creditiCost: depends on your plan/credits
  • Prepara le foto di riferimento: tu (viso, profilo, figura intera) e l'auto da più lati, interni compresi. Più sono nitide, più l'auto resta uguale in ogni scena.Prepare your reference photos: you (face, profile, full body) and the car from several sides, interior included. The sharper they are, the more the car stays the same in every shot.
  • Crea i fotogrammi chiave con il PROMPT 1: il container che si apre nello showroom, tu al volante, il dettaglio della ruota, la guida in città.Create the keyframes with PROMPT 1: the container opening in the showroom, you at the wheel, the wheel close-up, the night drive.
  • Anima ogni fotogramma con il PROMPT 2 (una clip da 3-5 secondi per scena) in un generatore immagine-video.Animate each keyframe with PROMPT 2 (one 3-5 second clip per shot) in an image-to-video generator.
  • Monta in ordine: rivelazione, taglio della pellicola, interni, ruota, guida notturna. Aggiungi il suono del motore e tagli a tempo di musica.Edit in order: reveal, cutting the film, interior, wheel, night drive. Add engine sound and cuts on the beat.

Ti è piaciuta questa risorsa? Nel percorso completo The AI Creator System (14 moduli, oltre 5 ore) impari a usare le AI come un fenomeno, passo per passo.Liked this resource? In the full The AI Creator System program (14 modules, over 5 hours) you learn to use AI like a pro, step by step.

Vai al corso completo →Go to the full course →
Ricrea un Reel virale con te protagonista: il metodo in 5 passi
Risorsa gratuita dal ReelFree resource from our Reel

Ricrea un Reel virale con te protagonista: il metodo in 5 passiRecreate a viral Reel starring you: the 5-step method

Nel Reel ti mostriamo il dietro le quinte del video della GT-R a Bangkok: Claude analizza il Reel di partenza e lo divide in inquadrature, usa le tue foto e quelle dell'auto come riferimento, crea i fotogrammi chiave con ChatGPT Images e scrive il prompt a tempi per Seedance 2.5. Qui trovi i 5 passi e i prompt da copiare.In the Reel we show the behind the scenes of the GT-R video in Bangkok: Claude analyses the original Reel and splits it into shots, uses your photos and the car's as references, creates the keyframes with ChatGPT Images and writes the timed prompt for Seedance 2.5. Here are the 5 steps and the prompts to copy.

Strumenti: Claude + immagini + video AITools: Claude + image + video AIPassaggi: 5Steps: 5Costo: secondo il tuo piano/creditiCost: depends on your plan/credits
  • Analisi: dai a Claude il Reel che vuoi rifare e chiedigli di dividerlo in inquadrature con i tempi (PROMPT 1). Nel nostro caso: 17 inquadrature.Analysis: give Claude the Reel you want to recreate and ask it to split it into timed shots (PROMPT 1). In our case: 17 shots.
  • Riferimenti: 3 tue foto (viso, profilo, figura intera) e alcune foto del soggetto (per noi 6 della GT-R: esterni e interni), ritagliate e nominate @Image1, @Image2…References: 3 photos of you (face, profile, full body) and a few photos of the subject (for us 6 of the GT-R: exterior and interior), cropped and named @Image1, @Image2…
  • Fotogrammi chiave: per le inquadrature più importanti crea un'immagine con ChatGPT Images partendo dai riferimenti (PROMPT 2).Keyframes: for the most important shots create an image with ChatGPT Images from the references (PROMPT 2).
  • Prompt video e montaggio: fai scrivere a Claude un prompt a tempi (0-2 s, 2-3,4 s…) che richiama i riferimenti (PROMPT 3), genera una bozza, correggi le inquadrature sbagliate e passa alla versione finale.Video prompt and edit: have Claude write a timed prompt (0-2 s, 2-3.4 s…) that calls the references (PROMPT 3), generate a draft, fix the wrong shots and move to the final version.

Ti è piaciuta questa risorsa? Nel percorso completo The AI Creator System (14 moduli, oltre 5 ore) impari a usare le AI come un fenomeno, passo per passo.Liked this resource? In the full The AI Creator System program (14 modules, over 5 hours) you learn to use AI like a pro, step by step.

Vai al corso completo →Go to the full course →

Immagini apocalittiche con l'AI: tu, il tuo cane e la città in rovina
Risorsa gratuita dal ReelFree resource from our Reel

Immagini apocalittiche con l'AI: tu, il tuo cane e la città in rovinaApocalyptic AI images: you, your dog and a ruined city

Nel Reel una serie di immagini in stile film post-apocalittico: un sopravvissuto armato con il suo pastore tedesco, una città distrutta al tramonto, fumo, mezzi blindati e un'orda di zombie sullo sfondo. Qui trovi i passaggi e i prompt per crearle con ChatGPT, anche con la tua foto.In the Reel, a series of images in post-apocalyptic movie style: an armed survivor with his German shepherd, a destroyed city at sunset, smoke, armoured vehicles and a zombie horde in the background. Here are the steps and prompts to create them with ChatGPT, even with your own photo.

Strumento: ChatGPT (immagini)Tool: ChatGPT (images)Tempo: 5 minutiTime: 5 minutesCosto: secondo il tuo pianoCost: depends on your plan
  • Apri ChatGPT, carica una tua foto ben illuminata (o salta questo passo per un personaggio inventato) e incolla il PROMPT 1.Open ChatGPT, upload a well-lit photo of yourself (or skip this step for an invented character) and paste PROMPT 1.
  • Cambia le parti tra [parentesi quadre]: animale, vestiti, arma o attrezzo, città. Più dettagli concreti dai, più l'immagine sembra la locandina di un film.Change the parts in [square brackets]: animal, clothes, weapon or gear, city. The more concrete details you give, the more the image looks like a movie poster.
  • Usa il PROMPT 2 per la versione con gli zombie e i cartelli, oppure il PROMPT 3 per trasformarla in locandina con titolo.Use PROMPT 2 for the version with zombies and signs, or PROMPT 3 to turn it into a poster with a title.
  • Per il Reel metti 4-6 immagini in fila, 2-3 secondi ciascuna, con una musica epica e un leggero zoom su ogni foto.For the Reel, line up 4-6 images, 2-3 seconds each, with epic music and a slight zoom on every photo.

Ti è piaciuta questa risorsa? Nel percorso completo The AI Creator System (14 moduli, oltre 5 ore) impari a usare le AI come un fenomeno, passo per passo.Liked this resource? In the full The AI Creator System program (14 modules, over 5 hours) you learn to use AI like a pro, step by step.

Vai al corso completo →Go to the full course →
Immagini "luxury life" con l'AI: villa, supercar e tramonto sul mare
Risorsa gratuita dal ReelFree resource from our Reel

Immagini "luxury life" con l'AI: villa, supercar e tramonto sul mare"Luxury life" AI images: villa, supercar and sunset over the sea

Nei Reel una serie di immagini in stile vita di lusso: un uomo in lino bianco appoggiato a una supercar nera davanti a una villa con piscina sul mare, una festa elegante al tramonto con una supercar bianca, e frasi come «Questa è la tua vita» e «Vivi oltre i limiti». Qui trovi i passaggi e i prompt per crearle con ChatGPT, anche con la tua foto.In the Reels, a series of luxury-life images: a man in white linen leaning on a black supercar in front of a villa with a sea-view pool, an elegant sunset party with a white supercar, and lines like "This is your life" and "Live beyond limits". Here are the steps and prompts to create them with ChatGPT, even with your own photo.

Strumento: ChatGPT (immagini)Tool: ChatGPT (images)Tempo: 5 minutiTime: 5 minutesCosto: secondo il tuo pianoCost: depends on your plan
  • Apri ChatGPT, carica una tua foto ben illuminata (o salta questo passo per un personaggio inventato) e incolla il PROMPT 1.Open ChatGPT, upload a well-lit photo of yourself (or skip this step for an invented character) and paste PROMPT 1.
  • Cambia le parti tra [parentesi quadre]: luogo, auto, vestiti, ora del giorno. Luce dorata del tramonto e dettagli concreti fanno sembrare la foto una pubblicità.Change the parts in [square brackets]: place, car, clothes, time of day. Golden sunset light and concrete details make the photo look like an ad.
  • Usa il PROMPT 2 per la scena della festa e il PROMPT 3 per aggiungere la frase elegante sull'immagine.Use PROMPT 2 for the party scene and PROMPT 3 to add the elegant quote on the image.
  • Per il Reel metti 4-6 immagini in fila, 2-3 secondi ciascuna, con una musica rilassata (chitarra, lounge) e un leggero zoom su ogni foto.For the Reel, line up 4-6 images, 2-3 seconds each, with relaxed music (guitar, lounge) and a slight zoom on every photo.

Ti è piaciuta questa risorsa? Nel percorso completo The AI Creator System (14 moduli, oltre 5 ore) impari a usare le AI come un fenomeno, passo per passo.Liked this resource? In the full The AI Creator System program (14 modules, over 5 hours) you learn to use AI like a pro, step by step.

Vai al corso completo →Go to the full course →
Lo spot premium di un orologio, senza studio né riprese
Risorsa gratuita dal ReelFree resource from our Reel

Lo spot premium di un orologio, senza studio né ripreseA premium watch commercial, with no studio and no shoot

Nel Reel uno spot da pubblicità di lusso per un orologio: macro sul meccanismo, riflessi dorati, scie di luce su sfondo nero e la scritta «Carattere e bellezza». Non è stato girato in studio: concept, scene e animazioni sono fatti con l'AI. Qui trovi la scaletta e i prompt per farlo con il tuo prodotto.In the Reel, a luxury-style commercial for a watch: macro shots of the movement, golden reflections, light streaks on a black background and the line "Character and beauty". It wasn't shot in a studio: concept, scenes and animation are made with AI. Here are the outline and the prompts to do it with your own product.

Materiale: 1 foto del prodotto (o nessuna)Material: 1 product photo (or none)Inquadrature: 4Shots: 4Costo: secondo il tuo piano/creditiCost: depends on your plan/credits
  • Scrivi il concept in una riga: prodotto, emozione, frase finale (es. «Carattere e bellezza»). Poi crea la foto del prodotto con il PROMPT 1, o parti da una tua foto su sfondo neutro.Write the concept in one line: product, emotion, closing line (e.g. "Character and beauty"). Then create the product photo with PROMPT 1, or start from your own photo on a plain background.
  • Genera 4 inquadrature: macro del meccanismo, quadrante con riflessi, orologio che ruota, inquadratura finale con spazio per la frase.Generate 4 shots: macro of the movement, dial with reflections, rotating watch, final shot with room for the line.
  • Anima ogni inquadratura con il PROMPT 2 in uno strumento Image-to-Video: movimenti lenti, la luce deve scorrere sul metallo.Animate each shot with PROMPT 2 in an Image-to-Video tool: slow moves, light must glide over the metal.
  • Monta su sfondo nero con musica elegante e un suono di ticchettio; aggiungi la frase finale in oro nell'ultima scena.Edit on a black background with elegant music and a ticking sound; add the closing line in gold in the last scene.

Ti è piaciuta questa risorsa? Nel percorso completo The AI Creator System (14 moduli, oltre 5 ore) impari a usare le AI come un fenomeno, passo per passo.Liked this resource? In the full The AI Creator System program (14 modules, over 5 hours) you learn to use AI like a pro, step by step.

Vai al corso completo →Go to the full course →
Samurai e draghi con l'AI: il guerriero bianco e quello nero sotto l'eclissi
Risorsa gratuita dal ReelFree resource from our Reel

Samurai e draghi con l'AI: il guerriero bianco e quello nero sotto l'eclissiSamurai and dragons with AI: the white and the black warrior under the eclipse

Nel Reel due samurai, uno in armatura bianca e oro e uno in armatura nera, camminano tra neve e rocce vulcaniche, seguiti da un drago bianco e un drago nero giganti sotto un'eclissi di sole. Qui trovi i passaggi e i prompt per creare la scena con ChatGPT, anche usando il tuo volto.In the Reel two samurai, one in white-and-gold armour and one in black armour, walk through snow and volcanic rocks, followed by a giant white dragon and a giant black dragon under a solar eclipse. Here are the steps and prompts to create the scene with ChatGPT, even using your own face.

Strumento: ChatGPT (immagini)Tool: ChatGPT (images)Tempo: 5 minutiTime: 5 minutesCosto: secondo il tuo pianoCost: depends on your plan
  • Apri ChatGPT e incolla il PROMPT 1 per la scena completa dei due samurai con i draghi.Open ChatGPT and paste PROMPT 1 for the full scene of the two samurai with the dragons.
  • Vuoi essere tu uno dei samurai? Carica una tua foto ben illuminata e usa il PROMPT 2: il volto resta il tuo, l'armatura cambia.Want to be one of the samurai? Upload a well-lit photo of yourself and use PROMPT 2: your face stays, the armour changes.
  • Cambia le parti tra [parentesi quadre]: colori delle armature, tipo di drago, paesaggio (neve, vulcano, tempio, foresta di bambù).Change the parts in [square brackets]: armour colours, dragon type, landscape (snow, volcano, temple, bamboo forest).
  • Per il Reel usa il PROMPT 3 in uno strumento Image-to-Video per far camminare i samurai e muovere i draghi, oppure monta 4-5 immagini con musica epica giapponese.For the Reel use PROMPT 3 in an Image-to-Video tool to make the samurai walk and the dragons move, or edit 4-5 images with epic Japanese music.

Ti è piaciuta questa risorsa? Nel percorso completo The AI Creator System (14 moduli, oltre 5 ore) impari a usare le AI come un fenomeno, passo per passo.Liked this resource? In the full The AI Creator System program (14 modules, over 5 hours) you learn to use AI like a pro, step by step.

Vai al corso completo →Go to the full course →
Metà volto, metà armatura hi-tech: il ritratto con un solo prompt
Risorsa gratuita dal ReelFree resource from our Reel

Metà volto, metà armatura hi-tech: il ritratto con un solo promptHalf face, half high-tech armour: the portrait with a single prompt

Nel Reel una foto normale diventa un ritratto da film di supereroi: metà del volto resta la tua, l'altra metà è un elmo d'armatura rossa e oro con l'occhio luminoso, come se si stesse aprendo a pezzi. Qui trovi il prompt per l'immagine e uno per animarla.In the Reel an ordinary photo becomes a superhero-movie portrait: half the face stays yours, the other half is a red and gold armour helmet with a glowing eye, as if it were opening piece by piece. Here are the prompt for the image and one to animate it.

Materiale: 1 foto del voltoMaterial: 1 face photoPassaggi: 2Steps: 2Costo: secondo il tuo pianoCost: depends on your plan
  • Scegli una foto frontale con il volto ben illuminato: più è nitida, più il ritratto ti somiglia.Pick a front-facing photo with a well-lit face: the sharper it is, the more the portrait looks like you.
  • Apri ChatGPT (o un altro generatore di immagini), carica la foto e incolla il PROMPT 1. Cambia le parti tra [parentesi quadre].Open ChatGPT (or another image generator), upload the photo and paste PROMPT 1. Change the parts in [square brackets].
  • Se vuoi il video, porta l'immagine in un generatore immagine-video (Kling, Seedance o simili) con il PROMPT 2.If you want the video, take the image into an image-to-video generator (Kling, Seedance or similar) with PROMPT 2.
  • Descrivi un'armatura di tua invenzione senza nominare personaggi famosi: sono marchi registrati e spesso i generatori li bloccano.Describe an armour of your own design without naming famous characters: they are trademarks and generators often block them.

Ti è piaciuta questa risorsa? Nel percorso completo The AI Creator System (14 moduli, oltre 5 ore) impari a usare le AI come un fenomeno, passo per passo.Liked this resource? In the full The AI Creator System program (14 modules, over 5 hours) you learn to use AI like a pro, step by step.

Vai al corso completo →Go to the full course →
Metà volto, metà creatura nera liquida: il ritratto con un solo prompt
Risorsa gratuita dal ReelFree resource from our Reel

Metà volto, metà creatura nera liquida: il ritratto con un solo promptHalf face, half liquid black creature: the portrait with a single prompt

Nel Reel un volto si trasforma per metà in una creatura nera e lucida, con occhi bianchi e denti affilati, come se una sostanza liquida lo stesse ricoprendo. Qui trovi il prompt per creare il ritratto con la tua foto e uno per animarlo.In the Reel a face turns halfway into a glossy black creature with white eyes and sharp teeth, as if a liquid substance were covering it. Here are the prompt to create the portrait with your photo and one to animate it.

Materiale: 1 foto del voltoMaterial: 1 face photoPassaggi: 2Steps: 2Costo: secondo il tuo pianoCost: depends on your plan
  • Scegli una foto frontale con il volto ben illuminato e lo sfondo semplice.Pick a front-facing photo with a well-lit face and a simple background.
  • Apri ChatGPT (o un altro generatore di immagini), carica la foto e incolla il PROMPT 1. Cambia le parti tra [parentesi quadre].Open ChatGPT (or another image generator), upload the photo and paste PROMPT 1. Change the parts in [square brackets].
  • Per il video usa il PROMPT 2 in un generatore immagine-video (Kling, Seedance o simili): la sostanza nera che si espande è l'effetto che colpisce.For the video use PROMPT 2 in an image-to-video generator (Kling, Seedance or similar): the spreading black substance is the eye-catching effect.
  • Descrivi la creatura con parole tue senza nominare personaggi famosi: sono marchi registrati e spesso i generatori li bloccano.Describe the creature in your own words without naming famous characters: they are trademarks and generators often block them.

Ti è piaciuta questa risorsa? Nel percorso completo The AI Creator System (14 moduli, oltre 5 ore) impari a usare le AI come un fenomeno, passo per passo.Liked this resource? In the full The AI Creator System program (14 modules, over 5 hours) you learn to use AI like a pro, step by step.

Vai al corso completo →Go to the full course →
Mini lottatori sul tuo viso: il ritratto ironico con un solo prompt
Risorsa gratuita dal ReelFree resource from our Reel

Mini lottatori sul tuo viso: il ritratto ironico con un solo promptTiny wrestlers on your face: the funny portrait with a single prompt

Nel Reel tante piccole copie di un lottatore si arrampicano su un volto gigante: tirano la guancia, si siedono sulla testa, si appendono all'orecchio. Qui trovi il prompt per rifare la scena con la tua foto e uno per animarla.In the Reel many tiny copies of a wrestler climb over a giant face: they pull the cheek, sit on the head, hang from the ear. Here are the prompt to recreate the scene with your photo and one to animate it.

Materiale: 1 foto del voltoMaterial: 1 face photoPassaggi: 2Steps: 2Costo: secondo il tuo pianoCost: depends on your plan
  • Scegli una foto frontale, volto e spalle ben illuminati, sfondo semplice.Pick a front-facing photo, well-lit face and shoulders, simple background.
  • Apri ChatGPT (o un altro generatore di immagini), carica la foto e incolla il PROMPT 1. Cambia le parti tra [parentesi quadre].Open ChatGPT (or another image generator), upload the photo and paste PROMPT 1. Change the parts in [square brackets].
  • L'effetto funziona quando le mini figure hanno la tua stessa faccia e interagiscono davvero con il volto (tirano, spingono, si aggrappano).The effect works when the tiny figures share your face and really interact with it (pulling, pushing, hanging on).
  • Per il video usa il PROMPT 2 in un generatore immagine-video (Kling, Seedance o simili). Evita nomi di lottatori famosi: descrivi l'aspetto con parole tue.For the video use PROMPT 2 in an image-to-video generator (Kling, Seedance or similar). Avoid famous wrestlers' names: describe the look in your own words.

Ti è piaciuta questa risorsa? Nel percorso completo The AI Creator System (14 moduli, oltre 5 ore) impari a usare le AI come un fenomeno, passo per passo.Liked this resource? In the full The AI Creator System program (14 modules, over 5 hours) you learn to use AI like a pro, step by step.

Vai al corso completo →Go to the full course →
Grafica promo per un prodotto e ritocchi mirati direttamente in ChatGPT
Risorsa gratuita dal ReelFree resource from our Reel

Grafica promo per un prodotto e ritocchi mirati direttamente in ChatGPTPromo graphic for a product and targeted edits right inside ChatGPT

Nel Reel si crea in ChatGPT la locandina di una promo per due profumi e poi la si ritocca con gli strumenti dell'immagine: si cerchia una zona, si scrive cosa cambiare e si chiedono altre varianti. Qui trovi i prompt per farlo con il tuo prodotto.In the Reel a promo poster for two perfumes is created in ChatGPT and then refined with the image tools: you circle an area, write what to change and ask for more variants. Here are the prompts to do it with your product.

Materiale: foto del prodottoMaterial: product photoPassaggi: 3Steps: 3Costo: secondo il tuo pianoCost: depends on your plan
  • Carica in ChatGPT una o più foto del tuo prodotto e incolla il PROMPT 1 per creare la locandina della promo.Upload one or more photos of your product to ChatGPT and paste PROMPT 1 to create the promo poster.
  • Apri l'immagine creata: con gli strumenti di modifica puoi selezionare o cerchiare una zona, annotare, commentare o rimuovere lo sfondo.Open the generated image: with the editing tools you can select or circle an area, annotate, comment or remove the background.
  • Cerchia solo la parte da cambiare e scrivi il PROMPT 2: il resto della grafica resta com'è.Circle only the part to change and write PROMPT 2: the rest of the graphic stays as it is.
  • Con il PROMPT 3 chiedi altre varianti, poi controlla sempre prezzo, nome e testi prima di pubblicare.With PROMPT 3 ask for more variants, then always check price, name and text before publishing.

Ti è piaciuta questa risorsa? Nel percorso completo The AI Creator System (14 moduli, oltre 5 ore) impari a usare le AI come un fenomeno, passo per passo.Liked this resource? In the full The AI Creator System program (14 modules, over 5 hours) you learn to use AI like a pro, step by step.

Vai al corso completo →Go to the full course →
Il tuo lottatore mascherato con il mini te dentro una sfera di vetro
Risorsa gratuita dal ReelFree resource from our Reel

Il tuo lottatore mascherato con il mini te dentro una sfera di vetroYour masked wrestler with a tiny you inside a glass sphere

Nel Reel un lottatore con maschera colorata, seduto a gambe incrociate in un'arena futuristica, tiene in mano una sfera di vetro con dentro una sua piccola copia, mentre fa una bolla con la gomma. Qui trovi il prompt per creare la tua versione e uno per animarla.In the Reel a wrestler with a colourful mask, sitting cross-legged in a futuristic arena, holds a glass sphere with a tiny copy of himself inside while blowing a bubble-gum bubble. Here are the prompt to create your version and one to animate it.

Materiale: 1 foto (facoltativa)Material: 1 photo (optional)Passaggi: 2Steps: 2Costo: secondo il tuo pianoCost: depends on your plan
  • Decidi colori della maschera e del costume del tuo lottatore: è il tuo personaggio, inventalo tu.Choose the colours of your wrestler's mask and outfit: it's your character, make it up.
  • Apri ChatGPT (o un altro generatore di immagini), carica una tua foto se vuoi usare il tuo fisico e incolla il PROMPT 1.Open ChatGPT (or another image generator), upload a photo of yourself if you want to use your build and paste PROMPT 1.
  • Il dettaglio che diverte è la sfera: la mini copia dentro deve avere lo stesso costume e una posa buffa.The fun detail is the sphere: the tiny copy inside must wear the same outfit and strike a funny pose.
  • Per il video usa il PROMPT 2 in un generatore immagine-video (Kling, Seedance o simili). Non copiare maschere di lottatori reali: sono personaggi protetti.For the video use PROMPT 2 in an image-to-video generator (Kling, Seedance or similar). Don't copy real wrestlers' masks: they are protected characters.

Ti è piaciuta questa risorsa? Nel percorso completo The AI Creator System (14 moduli, oltre 5 ore) impari a usare le AI come un fenomeno, passo per passo.Liked this resource? In the full The AI Creator System program (14 modules, over 5 hours) you learn to use AI like a pro, step by step.

Vai al corso completo →Go to the full course →
La tua squadra trasformata in cartoon 3D, come la locandina di una serie TV
Risorsa gratuita dal ReelFree resource from our Reel

La tua squadra trasformata in cartoon 3D, come la locandina di una serie TVYour team turned into 3D cartoons, like a TV series poster

Nel Reel una foto di gruppo diventa una squadra di personaggi cartoon 3D in divisa nera, in posa davanti a un furgone in una strada di città, come nella locandina di una serie TV. Qui trovi il prompt per farlo con la tua foto di gruppo e uno per animarla.In the Reel a group photo becomes a team of 3D cartoon characters in black uniforms, posing in front of a van on a city street, like a TV series poster. Here are the prompt to do it with your group photo and one to animate it.

Materiale: 1 foto di gruppoMaterial: 1 group photoPassaggi: 2Steps: 2Costo: secondo il tuo pianoCost: depends on your plan
  • Scegli una foto di gruppo in cui tutti i volti si vedano bene, meglio se in piedi e in fila.Pick a group photo where every face is clearly visible, ideally standing in a row.
  • Apri ChatGPT (o un altro generatore di immagini), carica la foto e incolla il PROMPT 1. Cambia le parti tra [parentesi quadre].Open ChatGPT (or another image generator), upload the photo and paste PROMPT 1. Change the parts in [square brackets].
  • Controlla che ogni persona sia riconoscibile (capelli, barba, corporatura): se qualcuno non torna, chiedi di correggere solo lui.Check that each person is recognisable (hair, beard, build): if someone looks off, ask to fix only that person.
  • Per il video usa il PROMPT 2 in un generatore immagine-video (Kling, Seedance o simili).For the video use PROMPT 2 in an image-to-video generator (Kling, Seedance or similar).

Ti è piaciuta questa risorsa? Nel percorso completo The AI Creator System (14 moduli, oltre 5 ore) impari a usare le AI come un fenomeno, passo per passo.Liked this resource? In the full The AI Creator System program (14 modules, over 5 hours) you learn to use AI like a pro, step by step.

Vai al corso completo →Go to the full course →
Ricrea una scena da film epico con te protagonista
Risorsa gratuita dal ReelFree resource from our Reel

Ricrea una scena da film epico con te protagonistaRecreate an epic movie scene starring you

Nel Reel una scena da cinecomic: il supereroe in costume a ragnatela disteso nell'erba alta al tramonto, con la maschera sollevata a metà, sotto la frase «Da un grande potere derivano grandi responsabilità». Qui trovi il metodo e i prompt per rifare una scena iconica di un film con il tuo volto, fotogramma dopo fotogramma.In the Reel a comic-book movie scene: the superhero in a web-patterned suit lying in tall grass at sunset, mask pulled halfway up, under the line "With great power comes great responsibility". Here are the method and prompts to recreate an iconic film scene with your face, frame by frame.

Materiale: 2-3 tue fotoMaterial: 2-3 photos of youInquadrature: 3-5Shots: 3-5Costo: secondo il tuo piano/creditiCost: depends on your plan/credits
  • Scegli la scena del film e scrivi in 3-5 righe cosa si vede in ogni inquadratura: luogo, luce, posa, costume, movimento di camera.Pick the film scene and write in 3-5 lines what each shot shows: place, light, pose, costume, camera movement.
  • Carica 2-3 tue foto nitide (viso frontale e di tre quarti) e crea il fotogramma di ogni inquadratura con il PROMPT 1.Upload 2-3 sharp photos of you (front and three-quarter face) and create the keyframe of each shot with PROMPT 1.
  • Anima ogni fotogramma con il PROMPT 2 in un generatore immagine-video (per esempio Higgsfield), una clip da 3-5 secondi per inquadratura.Animate each keyframe with PROMPT 2 in an image-to-video generator (for example Higgsfield), one 3-5 second clip per shot.
  • Monta le clip in ordine, aggiungi musica e una frase celebre della scena in sovrimpressione, come nel Reel.Edit the clips in order, add music and a famous line from the scene as on-screen text, as in the Reel.

Ti è piaciuta questa risorsa? Nel percorso completo The AI Creator System (14 moduli, oltre 5 ore) impari a usare le AI come un fenomeno, passo per passo.Liked this resource? In the full The AI Creator System program (14 modules, over 5 hours) you learn to use AI like a pro, step by step.

Vai al corso completo →Go to the full course →

Diventa il protagonista di una copertina in stile GTA
Risorsa gratuita dal ReelFree resource from our Reel

Diventa il protagonista di una copertina in stile GTABecome the star of a GTA-style cover

Nel Reel una foto diventa un'illustrazione in stile videogioco GTA: tu di spalle sul lungomare al tramonto, grattacieli, palme, un motoscafo e un elicottero nel cielo viola. Qui trovi i passaggi e i prompt per crearla con ChatGPT partendo dalla tua foto.In the Reel a photo becomes an illustration in GTA video game style: you seen from behind on the waterfront at sunset, skyscrapers, palm trees, a speedboat and a helicopter in the purple sky. Here are the steps and prompts to create it with ChatGPT from your photo.

Strumento: ChatGPT (immagini)Tool: ChatGPT (images)Tempo: 5 minutiTime: 5 minutesMateriale: 1 tua fotoMaterial: 1 photo of you
  • Scegli una tua foto nitida a figura intera, meglio se con vestiti ben visibili (maglietta, pantaloncini, scarpe).Choose a sharp full-body photo of you, ideally with clearly visible clothes (t-shirt, shorts, shoes).
  • Caricala in ChatGPT e incolla il PROMPT 1, sostituendo le parti tra parentesi quadre.Upload it to ChatGPT and paste PROMPT 1, replacing the parts in square brackets.
  • Se vuoi più immagini della stessa serie, usa il PROMPT 2 per cambiare scena mantenendo lo stesso stile.If you want more images in the same series, use PROMPT 2 to change the scene while keeping the same style.
  • Per il Reel, anima le immagini con un generatore immagine-video (per esempio l'elicottero che passa e l'acqua che si muove) e aggiungi una musica anni '80.For the Reel, animate them with an image-to-video generator (for example the helicopter flying by and the water moving) and add 80s-style music.

Ti è piaciuta questa risorsa? Nel percorso completo The AI Creator System (14 moduli, oltre 5 ore) impari a usare le AI come un fenomeno, passo per passo.Liked this resource? In the full The AI Creator System program (14 modules, over 5 hours) you learn to use AI like a pro, step by step.

Vai al corso completo →Go to the full course →
Il prezzo del successo: crea un corto emotivo con l'AI
Risorsa gratuita dal ReelFree resource from our Reel

Il prezzo del successo: crea un corto emotivo con l'AIThe price of success: create an emotional short film with AI

Nel Reel un piccolo corto senza parole: l'auto, il lusso, la vista sul mare… e un tavolo apparecchiato per due con una sola persona seduta. Tutto creato con l'AI, senza attori né set. Qui trovi i passaggi e i prompt per scrivere la tua storia in 5 scene, creare i fotogrammi e animarli.In the Reel a short wordless film: the car, the luxury, the sea view… and a table set for two with only one person sitting there. All made with AI, no actors or set. Here are the steps and prompts to write your own story in 5 scenes, create the frames and animate them.

Strumento: chatbot + immagini AI + image-to-videoTool: chatbot + AI images + image-to-videoTempo: 45 minutiTime: 45 minutesMateriale: un'emozione da raccontareMaterial: an emotion to tell
  • Scegli UNA emozione e un contrasto forte (es. avere tutto ma essere soli). Con il PROMPT 1 fatti scrivere la scaletta in 5 scene, senza dialoghi.Pick ONE emotion and a strong contrast (e.g. having everything but being alone). Use PROMPT 1 to get a 5-scene outline, no dialogue.
  • Crea il fotogramma di ogni scena con il PROMPT 2 in un generatore di immagini (es. ChatGPT). Usa sempre la stessa descrizione del protagonista e la stessa luce, così le scene sembrano lo stesso film.Create each scene's frame with PROMPT 2 in an image generator (e.g. ChatGPT). Always use the same description of the main character and the same light, so the scenes look like one film.
  • Anima ogni fotogramma con il PROMPT 3 in uno strumento image-to-video (clip da 5 secondi, movimenti di camera lenti).Animate each frame with PROMPT 3 in an image-to-video tool (5-second clips, slow camera moves).
  • Monta le clip in ordine, aggiungi una musica lenta e 3-4 frasi brevi a schermo. L'ultima scena (il tavolo per due) deve arrivare per ultima: è lei che dà il significato.Edit the clips in order, add slow music and 3-4 short on-screen lines. The last scene (the table for two) must come last: it gives the meaning.

Ti è piaciuta questa risorsa? Nel percorso completo The AI Creator System (14 moduli, oltre 5 ore) impari a usare le AI come un fenomeno, passo per passo.Liked this resource? In the full The AI Creator System program (14 modules, over 5 hours) you learn to use AI like a pro, step by step.

Vai al corso completo →Go to the full course →
Tu e la tua auto in ogni clip: storyboard coerente con Higgsfield
Risorsa gratuita dal ReelFree resource from our Reel

Tu e la tua auto in ogni clip: storyboard coerente con HiggsfieldYou and your car in every clip: a consistent storyboard with Higgsfield

Nel Reel una persona reale e una Nissan GT-R NISMO restano identiche in tutte le clip: stesso volto, stesso outfit, stessa auto. È stato fatto con Higgsfield (Seedance 2), usando foto di riferimento della persona e dell'auto e uno storyboard. Qui trovi il metodo per mantenere la coerenza, la struttura dello storyboard e i prompt.In the Reel a real person and a Nissan GT-R NISMO stay identical in every clip: same face, same outfit, same car. It was made with Higgsfield (Seedance 2), using reference photos of the person and the car and a storyboard. Here are the method to keep consistency, the storyboard structure and the prompts.

Strumento: Higgsfield (Seedance 2)Tool: Higgsfield (Seedance 2)Tempo: 1 oraTime: 1 hourMateriale: tue foto + foto dell'autoMaterial: your photos + car photos
  • Prepara i riferimenti: 3 foto tue (fronte, profilo, figura intera con l'outfit che userai) e 2-3 foto dell'auto (davanti, dietro, lato). Usa sempre gli stessi file in tutte le clip.Prepare the references: 3 photos of you (front, profile, full body in the outfit you'll use) and 2-3 photos of the car (front, rear, side). Always use the same files in every clip.
  • Con il PROMPT 1 fatti scrivere lo storyboard: 6 inquadrature brevi, ognuna con luogo, azione, camera e luce. Tieni la stessa ambientazione e la stessa ora del giorno.Use PROMPT 1 to get the storyboard: 6 short shots, each with location, action, camera and light. Keep the same setting and the same time of day.
  • In Higgsfield genera una clip per inquadratura con il PROMPT 2, caricando ogni volta le foto di riferimento della persona e dell'auto. Ripeti in ogni prompt la stessa descrizione fissa di volto, outfit e auto.In Higgsfield generate one clip per shot with PROMPT 2, uploading the person and car reference photos every time. Repeat the same fixed description of face, outfit and car in every prompt.
  • Scarta le clip dove cambiano volto, colore o dettagli dell'auto e rigenerale. Poi monta in ordine sul ritmo della musica.Discard clips where the face, colour or car details change and regenerate them. Then edit them in order to the beat of the music.

Ti è piaciuta questa risorsa? Nel percorso completo The AI Creator System (14 moduli, oltre 5 ore) impari a usare le AI come un fenomeno, passo per passo.Liked this resource? In the full The AI Creator System program (14 modules, over 5 hours) you learn to use AI like a pro, step by step.

Vai al corso completo →Go to the full course →

Traduci ebook e documenti lunghi con l'AI, senza perdere il formato
Risorsa gratuita dal ReelFree resource from our Reel

Traduci ebook e documenti lunghi con l'AI, senza perdere il formatoTranslate ebooks and long documents with AI, keeping the formatting

Nel Reel traduciamo libri e file digitali da migliaia di pagine in pochi minuti. Il segreto è dividere il documento in parti e dare all'AI le stesse regole per ogni parte: qui trovi il metodo e il prompt.In the Reel we translate books and digital files thousands of pages long in a few minutes. The secret is to split the document into parts and give the AI the same rules for each part: here are the method and the prompt.

Strumento: ChatGPT o ClaudeTool: ChatGPT or ClaudeFormati: PDF, DOCX, EPUBFormats: PDF, DOCX, EPUBCosto: anche gratisCost: free plan works too
  • Dividi il file in capitoli o blocchi da 10-20 pagine: i file troppo lunghi vengono tradotti a metà.Split the file into chapters or 10-20 page blocks: files that are too long get translated only halfway.
  • Prima di tutto crea il glossario con il PROMPT 1: nomi, termini tecnici e tono restano uguali in tutto il libro.First create the glossary with PROMPT 1: names, technical terms and tone stay the same across the whole book.
  • Traduci ogni blocco con il PROMPT 2, incollando sempre lo stesso glossario.Translate each block with PROMPT 2, always pasting the same glossary.
  • Rileggi almeno le prime pagine e i titoli: per un libro da vendere serve sempre un controllo umano.Proofread at least the first pages and the headings: a book you sell always needs a human check.

Ti è piaciuta questa risorsa? Nel percorso completo The AI Creator System (14 moduli, oltre 5 ore) impari a usare le AI come un fenomeno, passo per passo.Liked this resource? In the full The AI Creator System program (14 modules, over 5 hours) you learn to use AI like a pro, step by step.

Vai al corso completo →Go to the full course →
Rooftop sullo skyline con fuochi d'artificio, senza volare a Bangkok
Risorsa gratuita dal ReelFree resource from our Reel

Rooftop sullo skyline con fuochi d'artificio, senza volare a BangkokRooftop over the skyline with fireworks, without flying to Bangkok

Nel Reel un rooftop con cupola dorata sopra lo skyline di Bangkok all'ora blu, gente sulle scale illuminate e i fuochi d'artificio nel finale: tutto creato al 100% con l'AI, senza drone, troupe o permessi. Qui trovi i passaggi e i prompt per creare la tua scena di viaggio cinematografica.In the Reel a golden-dome rooftop above the Bangkok skyline at blue hour, people on the lit stairs and fireworks at the end: all made 100% with AI, no drone, crew or permits. Here are the steps and prompts to create your own cinematic travel scene.

Strumento: immagini AI + image-to-videoTool: AI images + image-to-videoTempo: 20 minutiTime: 20 minutesMateriale: una tua foto (facoltativa)Material: a photo of you (optional)
  • Scegli la città e il momento: l'ora blu (subito dopo il tramonto) dà le luci della città accese e il cielo ancora colorato, come nel Reel.Choose the city and the moment: blue hour (just after sunset) gives you city lights on and a sky still full of colour, like in the Reel.
  • Crea l'immagine di partenza con il PROMPT 1 in un generatore di immagini. Se vuoi esserci tu, carica una tua foto e chiedi di mantenere il tuo volto.Create the starting image with PROMPT 1 in an image generator. If you want to be in it, upload a photo of you and ask to keep your face.
  • Anima l'immagine con il PROMPT 2 in uno strumento image-to-video: movimento di camera lento, persone che si muovono in modo naturale.Animate the image with PROMPT 2 in an image-to-video tool: slow camera move, people moving naturally.
  • Per il finale usa il PROMPT 3: stessa scena con i fuochi d'artificio sullo skyline. Monta le due clip una dopo l'altra.For the ending use PROMPT 3: same scene with fireworks over the skyline. Edit the two clips one after the other.

Ti è piaciuta questa risorsa? Nel percorso completo The AI Creator System (14 moduli, oltre 5 ore) impari a usare le AI come un fenomeno, passo per passo.Liked this resource? In the full The AI Creator System program (14 modules, over 5 hours) you learn to use AI like a pro, step by step.

Vai al corso completo →Go to the full course →
La schermata «scegli il personaggio» di un videogioco che non esiste
Risorsa gratuita dal ReelFree resource from our Reel

La schermata «scegli il personaggio» di un videogioco che non esisteThe "character select" screen of a video game that doesn't exist

Nel Reel una schermata cyberpunk da videogioco: il protagonista in un vicolo al neon, il nome del gioco in grande e la scheda con classe, origine, stato e livello di minaccia. Niente studio, niente motore grafico: solo prompt. Qui trovi i passaggi e i prompt per creare la tua, anche con il tuo volto.In the Reel a cyberpunk video game screen: the hero in a neon alley, the game title in big letters and a card with class, origin, status and threat level. No studio, no game engine: just prompts. Here are the steps and prompts to make your own, even with your face.

Strumento: generatore di immagini AITool: AI image generatorTempo: 10 minutiTime: 10 minutesMateriale: una tua foto (facoltativa)Material: a photo of you (optional)
  • Decidi il tuo personaggio: nome, classe (es. hacker, mercenario, pilota), città di origine e stato (ricercato, leggendario...). Sono le righe della scheda, come nel Reel.Decide your character: name, class (e.g. hacker, mercenary, pilot), home city and status (wanted, legendary...). These are the lines of the card, like in the Reel.
  • Crea la schermata con il PROMPT 1. Se vuoi esserci tu, carica una tua foto e chiedi di mantenere il tuo volto identico.Create the screen with PROMPT 1. If you want to be in it, upload a photo of you and ask to keep your face identical.
  • Controlla che il testo della scheda sia scritto giusto. Se una parola esce sbagliata, usa il PROMPT 2 per correggere solo quella.Check that the card text is spelled right. If a word comes out wrong, use PROMPT 2 to fix only that.
  • Vuoi farla muovere? Usa il PROMPT 3 in uno strumento image-to-video: pioggia, neon che sfarfallano e personaggio che si gira verso la camera.Want it to move? Use PROMPT 3 in an image-to-video tool: rain, flickering neon and the character turning to the camera.

Ti è piaciuta questa risorsa? Nel percorso completo The AI Creator System (14 moduli, oltre 5 ore) impari a usare le AI come un fenomeno, passo per passo.Liked this resource? In the full The AI Creator System program (14 modules, over 5 hours) you learn to use AI like a pro, step by step.

Vai al corso completo →Go to the full course →
Il menu di un videogioco inesistente, con te sulla moto futuristica
Risorsa gratuita dal ReelFree resource from our Reel

Il menu di un videogioco inesistente, con te sulla moto futuristicaThe menu of a video game that doesn't exist, with you on a futuristic bike

Nel Reel «APEX HUNTER»: logo cromato, menu (New Game, Continue, Missions...) e il protagonista con tuta bianca su una moto argentata futuristica in autostrada. Tutto creato con l'AI, senza grafici 3D né programmatori. Qui trovi i passaggi e i prompt per creare la schermata del tuo gioco e animarla.In the Reel "APEX HUNTER": chrome logo, menu (New Game, Continue, Missions...) and the hero in a white suit on a silver futuristic bike on a highway. All made with AI, no 3D artists or programmers. Here are the steps and prompts to create your own game screen and animate it.

Strumento: immagini AI + image-to-videoTool: AI images + image-to-videoTempo: 15 minutiTime: 15 minutesMateriale: una tua foto (facoltativa)Material: a photo of you (optional)
  • Scegli il nome del gioco (corto, d'impatto) e il veicolo del protagonista: moto, auto, astronave.Pick the game name (short and punchy) and the hero's vehicle: bike, car, spaceship.
  • Crea la schermata titolo con il PROMPT 1. Carica una tua foto se vuoi essere tu il protagonista e chiedi di mantenere il volto.Create the title screen with PROMPT 1. Upload a photo of you if you want to be the hero and ask to keep the face.
  • Anima la schermata con il PROMPT 2 in uno strumento image-to-video: la strada scorre, i fari brillano, il menu resta fermo.Animate the screen with PROMPT 2 in an image-to-video tool: the road flows, the headlights shine, the menu stays still.
  • Per un finale da trailer usa il PROMPT 3: il cursore seleziona «New Game» e la moto parte a tutta velocità.For a trailer-style ending use PROMPT 3: the cursor selects "New Game" and the bike speeds off.

Ti è piaciuta questa risorsa? Nel percorso completo The AI Creator System (14 moduli, oltre 5 ore) impari a usare le AI come un fenomeno, passo per passo.Liked this resource? In the full The AI Creator System program (14 modules, over 5 hours) you learn to use AI like a pro, step by step.

Vai al corso completo →Go to the full course →

Personaggi cartoon in stile film d'animazione nella tua foto vera
Risorsa gratuita dal ReelFree resource from our Reel

Personaggi cartoon in stile film d'animazione nella tua foto veraAnimated-movie style cartoon characters in your real photo

Nel Reel una foto reale con una volpe cartoon appoggiata sulla spalla e un pulcino giallo sull'altra, che si muovono e reagiscono: tutto creato con l'AI, senza studio 3D né green screen. Qui trovi i passaggi e i prompt per farlo con la tua foto.In the Reel a real photo with a cartoon fox leaning on one shoulder and a yellow chick on the other, moving and reacting: all made with AI, no 3D studio or green screen. Here are the steps and prompts to do it with your own photo.

Strumento: immagini AI + image-to-videoTool: AI images + image-to-videoTempo: 15 minutiTime: 15 minutesMateriale: una tua foto a mezzo bustoMaterial: a half-body photo of you
  • Scegli una tua foto a mezzo busto, con sfondo semplice e luce morbida: è quella che rende il risultato credibile.Pick a half-body photo of you with a plain background and soft light: that's what makes the result believable.
  • Carica la foto in un generatore di immagini e usa il PROMPT 1: aggiunge i personaggi senza cambiare il tuo volto.Upload the photo to an image generator and use PROMPT 1: it adds the characters without changing your face.
  • Anima l'immagine con il PROMPT 2 in uno strumento image-to-video: i personaggi si muovono e reagiscono, tu resti quasi fermo.Animate the image with PROMPT 2 in an image-to-video tool: the characters move and react, you stay almost still.
  • Cambia animali e situazione nelle [parentesi] per fare una serie: un personaggio diverso ogni volta.Change the animals and situation in the [brackets] to make a series: a different character every time.

Ti è piaciuta questa risorsa? Nel percorso completo The AI Creator System (14 moduli, oltre 5 ore) impari a usare le AI come un fenomeno, passo per passo.Liked this resource? In the full The AI Creator System program (14 modules, over 5 hours) you learn to use AI like a pro, step by step.

Vai al corso completo →Go to the full course →

Infinity pool al tramonto sopra la città, senza drone né viaggio
Risorsa gratuita dal ReelFree resource from our Reel

Infinity pool al tramonto sopra la città, senza drone né viaggioInfinity pool at sunset above the city, no drone, no trip

Nel Reel un uomo con occhiali da sole nell'acqua di una infinity pool, il sole arancione che tramonta e la città sterminata sotto: l'uomo, lo skyline e la luce dorata sono creati al 100% con l'AI. Qui trovi i passaggi e i prompt per creare la tua clip da vacanza.In the Reel a man in sunglasses in the water of an infinity pool, the orange sun setting and the endless city below: the man, the skyline and the golden light are 100% AI. Here are the steps and prompts to create your own vacation clip.

Strumento: immagini AI + image-to-videoTool: AI images + image-to-videoTempo: 15 minutiTime: 15 minutesMateriale: una tua foto (facoltativa)Material: a photo of you (optional)
  • Scegli la città sotto di te e l'ora: il tramonto dà il sole basso e i riflessi arancioni sull'acqua, come nel Reel.Choose the city below you and the time: sunset gives a low sun and orange reflections on the water, like in the Reel.
  • Crea l'immagine di partenza con il PROMPT 1. Se vuoi esserci tu, carica una tua foto e chiedi di mantenere il tuo volto.Create the starting image with PROMPT 1. If you want to be in it, upload a photo of you and ask to keep your face.
  • Anima l'immagine con il PROMPT 2 in uno strumento image-to-video: acqua che si muove, sole che scende piano.Animate the image with PROMPT 2 in an image-to-video tool: moving water, sun slowly going down.
  • Per un secondo stacco usa il PROMPT 3: camera che si alza e mostra la piscina e tutta la città dall'alto. Monta le due clip in sequenza.For a second shot use PROMPT 3: the camera rises and shows the pool and the whole city from above. Edit the two clips in sequence.

Ti è piaciuta questa risorsa? Nel percorso completo The AI Creator System (14 moduli, oltre 5 ore) impari a usare le AI come un fenomeno, passo per passo.Liked this resource? In the full The AI Creator System program (14 modules, over 5 hours) you learn to use AI like a pro, step by step.

Vai al corso completo →Go to the full course →
Dal primo piano in terrazza allo stacco aereo sul mare, senza drone
Risorsa gratuita dal ReelFree resource from our Reel

Dal primo piano in terrazza allo stacco aereo sul mare, senza droneFrom a terrace close-up to an aerial reveal over the sea, no drone

Nel Reel un uomo con occhiali da sole sulla terrazza sopra la costa, poi la camera si allontana e si alza in uno stacco aereo sul mare: tutto creato al 100% con l'AI, senza drone né troupe. Qui trovi i passaggi e i prompt per creare la tua ripresa cinematic.In the Reel a man in sunglasses on a terrace above the coast, then the camera pulls back and rises into an aerial reveal over the sea: all 100% AI, no drone, no crew. Here are the steps and prompts to create your own cinematic shot.

Strumento: immagini AI + image-to-videoTool: AI images + image-to-videoTempo: 15 minutiTime: 15 minutesMateriale: una tua foto (facoltativa)Material: a photo of you (optional)
  • Scegli il posto: una terrazza con ringhiera sopra una costa, mare e isole all'orizzonte, luce del sole forte come nel Reel.Pick the place: a terrace with a railing above a coastline, sea and islands on the horizon, strong sunlight like in the Reel.
  • Crea l'immagine di partenza con il PROMPT 1. Se vuoi esserci tu, carica una tua foto e chiedi di mantenere il tuo volto.Create the starting image with PROMPT 1. If you want to be in it, upload a photo of you and ask to keep your face.
  • Anima il primo piano con il PROMPT 2: piccoli movimenti naturali, camera quasi ferma.Animate the close-up with PROMPT 2: small natural movements, camera almost still.
  • Crea lo stacco con il PROMPT 3 partendo dalla stessa immagine: la camera arretra e sale sopra il mare. Monta le due clip una dopo l'altra.Create the reveal with PROMPT 3 from the same image: the camera pulls back and rises over the sea. Edit the two clips one after the other.

Ti è piaciuta questa risorsa? Nel percorso completo The AI Creator System (14 moduli, oltre 5 ore) impari a usare le AI come un fenomeno, passo per passo.Liked this resource? In the full The AI Creator System program (14 modules, over 5 hours) you learn to use AI like a pro, step by step.

Vai al corso completo →Go to the full course →
Fuga tra le esplosioni e uomo che si dissolve in pixel, da trailer
Risorsa gratuita dal ReelFree resource from our Reel

Fuga tra le esplosioni e uomo che si dissolve in pixel, da trailerEscape through explosions and a man dissolving into pixels, trailer style

Nel Reel un uomo corre su una passerella industriale mentre alle sue spalle esplode tutto, tra fuoco e vapore, e poi si dissolve in pixel: ogni fotogramma è generato con l'AI, senza set né attori. Qui trovi i passaggi e i prompt per creare la tua scena.In the Reel a man runs along an industrial walkway while everything explodes behind him, through fire and steam, and then dissolves into pixels: every frame is AI-generated, no set, no actors. Here are the steps and prompts to create your own scene.

Strumento: immagini AI + image-to-videoTool: AI images + image-to-videoTempo: 20 minutiTime: 20 minutesMateriale: una tua foto (facoltativa)Material: a photo of you (optional)
  • Crea il fotogramma di partenza con il PROMPT 1: passerella di metallo, tubi, esplosione arancione alle spalle del protagonista.Create the starting frame with PROMPT 1: metal walkway, pipes, orange explosion behind the main character.
  • Se vuoi essere tu il protagonista, carica una tua foto nello strumento immagini e chiedi di mantenere il tuo volto.If you want to be the main character, upload a photo of you in the image tool and ask to keep your face.
  • Anima la corsa con il PROMPT 2: camera che arretra davanti a lui, scintille e fumo che lo inseguono.Animate the run with PROMPT 2: camera tracking backward in front of him, sparks and smoke chasing him.
  • Per il finale usa il PROMPT 3 sull'ultimo fotogramma della clip: il corpo si scompone in pixel e vola via. Monta le clip in sequenza.For the ending use PROMPT 3 on the last frame of the clip: the body breaks into pixels and flies away. Edit the clips in sequence.

Ti è piaciuta questa risorsa? Nel percorso completo The AI Creator System (14 moduli, oltre 5 ore) impari a usare le AI come un fenomeno, passo per passo.Liked this resource? In the full The AI Creator System program (14 modules, over 5 hours) you learn to use AI like a pro, step by step.

Vai al corso completo →Go to the full course →

Eroe che carica energia nel deserto e tempio che esplode, VFX con l'AI
Risorsa gratuita dal ReelFree resource from our Reel

Eroe che carica energia nel deserto e tempio che esplode, VFX con l'AIHero charging energy in the desert and an exploding temple, AI VFX

Nel Reel un uomo in piedi in cima alla scalinata di un antico tempio nel deserto, controluce, carica energia e il tempio esplode in mille pezzi: una scena da supereroe creata al 100% con l'AI, senza green screen né studio VFX. Qui trovi i passaggi e i prompt per rifarla.In the Reel a man stands at the top of an ancient temple staircase in the desert, backlit, charges energy and the temple explodes into dust: a superhero scene created 100% with AI, no green screen, no VFX studio. Here are the steps and prompts to recreate it.

Strumento: immagini AI + image-to-videoTool: AI images + image-to-videoTempo: 20 minutiTime: 20 minutesMateriale: una tua foto (facoltativa)Material: a photo of you (optional)
  • Crea l'inquadratura di partenza con il PROMPT 1: camera bassa sulla pietra incisa, eroe controluce in cima ai gradini.Create the opening shot with PROMPT 1: low camera on the carved stone, hero backlit at the top of the steps.
  • Se vuoi essere tu l'eroe, carica una tua foto e chiedi di mantenere il tuo volto e il tuo fisico.If you want to be the hero, upload a photo of you and ask to keep your face and build.
  • Anima la carica con il PROMPT 2: energia [verde] attorno al corpo, polvere che si alza, terreno che vibra.Animate the charge with PROMPT 2: [green] energy around the body, dust rising, ground shaking.
  • Crea il colpo finale con il PROMPT 3: il tempio esplode in polvere. Monta le clip in sequenza e aggiungi un suono di boato.Create the final hit with PROMPT 3: the temple explodes into dust. Edit the clips in sequence and add a boom sound.

Ti è piaciuta questa risorsa? Nel percorso completo The AI Creator System (14 moduli, oltre 5 ore) impari a usare le AI come un fenomeno, passo per passo.Liked this resource? In the full The AI Creator System program (14 modules, over 5 hours) you learn to use AI like a pro, step by step.

Vai al corso completo →Go to the full course →
Match di wrestling hardcore in un'arena piena, 100% AI
Risorsa gratuita dal ReelFree resource from our Reel

Match di wrestling hardcore in un'arena piena, 100% AIHardcore wrestling match in a packed arena, 100% AI

Nel Reel un match di wrestling hardcore: arena gremita, sedie d'acciaio e un lottatore sollevato e schiantato sul tavolo dei commentatori. Nessun ring, nessun pubblico, nessuno stuntman: tutto creato con l'AI (nel post è citato Kling AI). Qui trovi i passaggi e i prompt per creare la tua scena.In the Reel a hardcore wrestling match: packed arena, steel chairs and a wrestler lifted and slammed onto the announce table. No ring, no crowd, no stuntmen: all made with AI (the post mentions Kling AI). Here are the steps and prompts to create your own scene.

Strumento: immagini AI + Kling AI (image-to-video)Tool: AI images + Kling AI (image-to-video)Tempo: 20 minutiTime: 20 minutesMateriale: una o due foto (facoltative)Material: one or two photos (optional)
  • Crea i due lottatori con il PROMPT 1. Se vuoi esserci tu, carica una tua foto e chiedi di mantenere il tuo volto.Create the two wrestlers with PROMPT 1. If you want to be in it, upload a photo of you and ask to keep your face.
  • Usa sempre le stesse descrizioni dei lottatori (fisico, costume, tatuaggi) in ogni prompt, così restano uguali tra una clip e l'altra.Always use the same wrestler descriptions (build, outfit, tattoos) in every prompt, so they stay the same from clip to clip.
  • Anima la presa con il PROMPT 2 in Kling AI o in un altro strumento image-to-video.Animate the lift with PROMPT 2 in Kling AI or another image-to-video tool.
  • Crea lo schianto sul tavolo con il PROMPT 3 e monta le clip con il rumore della folla sotto.Create the table slam with PROMPT 3 and edit the clips with crowd noise underneath.

Ti è piaciuta questa risorsa? Nel percorso completo The AI Creator System (14 moduli, oltre 5 ore) impari a usare le AI come un fenomeno, passo per passo.Liked this resource? In the full The AI Creator System program (14 modules, over 5 hours) you learn to use AI like a pro, step by step.

Vai al corso completo →Go to the full course →
Scena da film alla stazione: trench, folla, treno e piccione, 100% AI
Risorsa gratuita dal ReelFree resource from our Reel

Scena da film alla stazione: trench, folla, treno e piccione, 100% AIMovie scene at the train station: trench coat, crowd, train and pigeon, 100% AI

Nel Reel una donna con il trench cammina sul binario tra la folla, arriva un treno ad alta velocità e un piccione vola al rallentatore, con un movimento di camera da film. Niente telecamera, niente attori: ogni fotogramma è generato con l'AI (nel post è citato Kling). Qui trovi i passaggi e i prompt per rifarla.In the Reel a woman in a trench coat walks along the platform through the crowd, a high-speed train arrives and a pigeon flies in slow motion, with a movie-style camera move. No camera, no actors: every frame is AI generated (the post mentions Kling). Here are the steps and prompts to recreate it.

Strumento: immagini AI + Kling AI (image-to-video)Tool: AI images + Kling AI (image-to-video)Tempo: 20 minutiTime: 20 minutesMateriale: una tua foto (facoltativa)Material: a photo of you (optional)
  • Crea il fotogramma di partenza con il PROMPT 1. Se vuoi esserci tu, carica una tua foto e chiedi di mantenere il tuo volto.Create the starting frame with PROMPT 1. If you want to be in it, upload a photo of you and ask to keep your face.
  • Anima la camminata con il movimento di camera all'indietro usando il PROMPT 2 in Kling AI.Animate the walk with the backward camera move using PROMPT 2 in Kling AI.
  • Crea il dettaglio del piccione al rallentatore e del treno che arriva con il PROMPT 3.Create the slow-motion pigeon and arriving train detail with PROMPT 3.
  • Monta le clip alternando campo largo e dettagli, con il rumore della stazione e del treno sotto.Edit the clips alternating wide shots and details, with station and train sounds underneath.

Ti è piaciuta questa risorsa? Nel percorso completo The AI Creator System (14 moduli, oltre 5 ore) impari a usare le AI come un fenomeno, passo per passo.Liked this resource? In the full The AI Creator System program (14 modules, over 5 hours) you learn to use AI like a pro, step by step.

Vai al corso completo →Go to the full course →
Battaglia medievale da kolossal con un esercito intero, 100% AI
Risorsa gratuita dal ReelFree resource from our Reel

Battaglia medievale da kolossal con un esercito intero, 100% AIEpic medieval battle with an entire army, 100% AI

Nel Reel una battaglia cinematic: acciaio, fuoco, fumo e un esercito intero su un campo di battaglia avvolto nella nebbia. Niente telecamera, niente attori: tutto nato da qualche prompt (nel post è citato Kling). Qui trovi i passaggi e i prompt per creare la tua battaglia.In the Reel a cinematic battle: steel, fire, smoke and an entire army on a misty battlefield. No camera, no actors: all born from a few prompts (the post mentions Kling). Here are the steps and prompts to create your own battle.

Strumento: immagini AI + Kling AI (image-to-video)Tool: AI images + Kling AI (image-to-video)Tempo: 25 minutiTime: 25 minutesMateriale: solo promptMaterial: prompts only
  • Crea il campo di battaglia con il PROMPT 1: nebbia, fumo e i due eserciti.Create the battlefield with PROMPT 1: mist, smoke and the two armies.
  • Anima la carica con il PROMPT 2 in Kling AI o in un altro strumento image-to-video.Animate the charge with PROMPT 2 in Kling AI or another image-to-video tool.
  • Crea un primo piano di un guerriero nello scontro con il PROMPT 3, con la stessa armatura descritta prima.Create a close-up of a warrior in the clash with PROMPT 3, with the same armor described before.
  • Monta alternando campi larghi e primi piani, con spade, urla e musica epica sotto.Edit alternating wide shots and close-ups, with swords, shouts and epic music underneath.

Ti è piaciuta questa risorsa? Nel percorso completo The AI Creator System (14 moduli, oltre 5 ore) impari a usare le AI come un fenomeno, passo per passo.Liked this resource? In the full The AI Creator System program (14 modules, over 5 hours) you learn to use AI like a pro, step by step.

Vai al corso completo →Go to the full course →
Scena da blockbuster: armatura d'oro e cane di fuoco, 100% AI
Risorsa gratuita dal ReelFree resource from our Reel

Scena da blockbuster: armatura d'oro e cane di fuoco, 100% AIBlockbuster scene: golden armor and a fire dog, 100% AI

Nel Reel un uomo precipita da un cavalcavia nella landa desolata, si rialza con un'armatura d'oro e un cane randagio si trasforma in una bestia di fuoco. Niente set, niente stuntman: tutto creato con l'AI (nel post sono citati Kling e Higgsfield). Qui trovi i passaggi e i prompt per creare la tua versione.In the Reel a man falls from an overpass into the wasteland, rises in golden armor and a stray dog turns into a creature of fire. No set, no stuntmen: all made with AI (the post mentions Kling and Higgsfield). Here are the steps and prompts to create your own version.

Strumento: immagini AI + Kling o Higgsfield (image-to-video)Tool: AI images + Kling or Higgsfield (image-to-video)Tempo: 30 minutiTime: 30 minutesMateriale: una tua foto (facoltativa)Material: a photo of you (optional)
  • Crea il primo fotogramma con il PROMPT 1: l'uomo che cade dal cavalcavia. Se vuoi esserci tu, carica una tua foto e chiedi di mantenere il tuo volto.Create the first frame with PROMPT 1: the man falling from the overpass. If you want to be in it, upload a photo of you and ask to keep your face.
  • Anima la caduta e la trasformazione nell'armatura d'oro con il PROMPT 2 in Kling o Higgsfield.Animate the fall and the golden armor transformation with PROMPT 2 in Kling or Higgsfield.
  • Crea la clip del cane che si trasforma in bestia di fuoco con il PROMPT 3, usando sempre la stessa descrizione del cane.Create the clip of the dog turning into a fire creature with PROMPT 3, always using the same dog description.
  • Monta le clip in ordine (caduta, armatura, cane di fuoco) e aggiungi suoni di impatto e fiamme.Edit the clips in order (fall, armor, fire dog) and add impact and fire sounds.

Ti è piaciuta questa risorsa? Nel percorso completo The AI Creator System (14 moduli, oltre 5 ore) impari a usare le AI come un fenomeno, passo per passo.Liked this resource? In the full The AI Creator System program (14 modules, over 5 hours) you learn to use AI like a pro, step by step.

Vai al corso completo →Go to the full course →

Rissa brutale nel parcheggio sotterraneo, 100% AI
Risorsa gratuita dal ReelFree resource from our Reel

Rissa brutale nel parcheggio sotterraneo, 100% AIBrutal underground parking-garage brawl, 100% AI

Nel Reel una rissa da action movie in un parcheggio sotterraneo: luci al neon fredde, cemento, un lottatore con un taglio sul sopracciglio, pugni e sudore. Niente telecamera, niente stuntman, niente coreografo (nel post sono citati Kling e Higgsfield). Qui trovi i passaggi e i prompt per creare la tua scena.In the Reel an action-movie brawl in an underground parking garage: cold neon lights, concrete, a fighter with a cut on his eyebrow, punches and sweat. No camera, no stuntmen, no fight choreographer (the post mentions Kling and Higgsfield). Here are the steps and prompts to create your own scene.

Strumento: immagini AI + Kling AI (image-to-video)Tool: AI images + Kling AI (image-to-video)Tempo: 20 minutiTime: 20 minutesMateriale: solo promptMaterial: prompts only
  • Crea i due lottatori nel parcheggio con il PROMPT 1: stessa luce, stessi vestiti in tutte le scene.Create the two fighters in the garage with PROMPT 1: same light, same clothes in every shot.
  • Anima lo scontro con il PROMPT 2 in Kling AI o in un altro strumento image-to-video, clip da 5 secondi.Animate the fight with PROMPT 2 in Kling AI or another image-to-video tool, 5-second clips.
  • Crea il primo piano del lottatore ferito con il PROMPT 3: è il momento che tiene incollati allo schermo.Create the close-up of the injured fighter with PROMPT 3: it is the moment that keeps people watching.
  • Monta alternando colpi veloci e primi piani, con suoni di pugni, respiri e un eco da cemento.Edit alternating fast hits and close-ups, with punch sounds, breathing and a concrete echo.

Ti è piaciuta questa risorsa? Nel percorso completo The AI Creator System (14 moduli, oltre 5 ore) impari a usare le AI come un fenomeno, passo per passo.Liked this resource? In the full The AI Creator System program (14 modules, over 5 hours) you learn to use AI like a pro, step by step.

Vai al corso completo →Go to the full course →
Il trailer di un film vigilante al neon, con villain cyborg
Risorsa gratuita dal ReelFree resource from our Reel

Il trailer di un film vigilante al neon, con villain cyborgA neon vigilante movie trailer with a cyborg villain

Nel Reel il trailer di un film mai girato: strade bagnate al neon rosso, un eroe mascherato che combatte contro dei teppisti e un villain cyborg. Nessuna telecamera, nessun attore: ogni inquadratura è generata con l'AI. Qui trovi come costruire il tuo trailer in 4 inquadrature.In the Reel the trailer of a movie that was never shot: wet streets in red neon, a masked hero fighting thugs and a cyborg villain. No camera, no actors: every shot is generated with AI. Here is how to build your own trailer in 4 shots.

Strumento: immagini AI + image-to-videoTool: AI images + image-to-videoTempo: 30 minutiTime: 30 minutesMateriale: solo promptMaterial: prompts only
  • Crea l'eroe mascherato con il PROMPT 1 e usa sempre quella immagine come riferimento, così resta uguale.Create the masked hero with PROMPT 1 and always use that image as reference, so he stays the same.
  • Crea il villain cyborg con il PROMPT 2.Create the cyborg villain with PROMPT 2.
  • Anima la scena di combattimento con il PROMPT 3 in uno strumento image-to-video (per esempio Kling AI).Animate the fight scene with PROMPT 3 in an image-to-video tool (for example Kling AI).
  • Chiudi con il faccia a faccia del PROMPT 4 e monta tutto come un trailer: tagli rapidi, musica che sale, uno schermo nero con il titolo alla fine.End with the face-off from PROMPT 4 and edit it all like a trailer: fast cuts, rising music, a black screen with the title at the end.

Ti è piaciuta questa risorsa? Nel percorso completo The AI Creator System (14 moduli, oltre 5 ore) impari a usare le AI come un fenomeno, passo per passo.Liked this resource? In the full The AI Creator System program (14 modules, over 5 hours) you learn to use AI like a pro, step by step.

Vai al corso completo →Go to the full course →

«Eclipse of the Dead»: una città deserta sotto un'eclissi di sangue
Risorsa gratuita dal ReelFree resource from our Reel

«Eclipse of the Dead»: una città deserta sotto un'eclissi di sangue"Eclipse of the Dead": an empty city under a blood eclipse

Nel Reel la parte 1 di «Eclipse of the Dead»: una città con strade vuote, auto abbandonate, fumo e carte per terra sotto un'eclissi di sangue, e un solo sopravvissuto. Niente set, niente attori, fatto da una persona sola con l'AI. Qui trovi i passaggi e i prompt per creare il tuo inizio di film apocalittico.In the Reel part 1 of "Eclipse of the Dead": a city with empty streets, abandoned cars, smoke and paper on the ground under a blood eclipse, and a single survivor. No set, no actors, made by one person with AI. Here are the steps and prompts to create your own apocalyptic movie opening.

Strumento: immagini AI + image-to-videoTool: AI images + image-to-videoTempo: 25 minutiTime: 25 minutesMateriale: solo promptMaterial: prompts only
  • Crea la città abbandonata dall'alto con il PROMPT 1: è l'inquadratura d'apertura.Create the abandoned city from above with PROMPT 1: it is the opening shot.
  • Anima il volo lento tra i palazzi con il PROMPT 2 in uno strumento image-to-video.Animate the slow flight between the buildings with PROMPT 2 in an image-to-video tool.
  • Crea il sopravvissuto con il PROMPT 3 e tienilo uguale in tutte le scene usando la stessa immagine di riferimento.Create the survivor with PROMPT 3 and keep him the same in every scene using the same reference image.
  • Monta con un suono di vento, sirene lontane e silenzio: chiudi sull'eclissi e chiedi nei commenti se vogliono la parte 2.Edit with wind sound, distant sirens and silence: end on the eclipse and ask in the comments if they want part 2.

Ti è piaciuta questa risorsa? Nel percorso completo The AI Creator System (14 moduli, oltre 5 ore) impari a usare le AI come un fenomeno, passo per passo.Liked this resource? In the full The AI Creator System program (14 modules, over 5 hours) you learn to use AI like a pro, step by step.

Vai al corso completo →Go to the full course →

In volo sulla scogliera con l'effetto selfie-pole, poi il tuffo in mare
Risorsa gratuita dal ReelFree resource from our Reel

In volo sulla scogliera con l'effetto selfie-pole, poi il tuffo in mareFlying over the cliff with the selfie-pole effect, then the dive into the sea

Nel Reel una persona vola a braccia aperte sopra una strada costiera e una scogliera, ripresa come con un bastone da selfie, poi ruota e si tuffa verso il mare. Niente drone, niente telecamera, niente stuntman: solo prompt. Qui trovi come rifarlo partendo da una tua foto.In the Reel a person flies with open arms over a coastal road and a cliff, filmed as if with a selfie stick, then rolls and dives towards the sea. No drone, no camera, no stuntman: only prompts. Here is how to remake it starting from your own photo.

Strumento: una tua foto + image-to-videoTool: your photo + image-to-videoTempo: 15 minutiTime: 15 minutesMateriale: 1 foto del voltoMaterial: 1 face photo
  • Scegli una foto del tuo volto ben illuminata, guardando in camera.Pick a well-lit photo of your face, looking at the camera.
  • Crea il fotogramma di partenza con il PROMPT 1 caricando la tua foto come riferimento.Create the starting frame with PROMPT 1, uploading your photo as reference.
  • Anima il volo con il PROMPT 2 in uno strumento image-to-video (per esempio Kling AI), clip da 5-10 secondi.Animate the flight with PROMPT 2 in an image-to-video tool (for example Kling AI), 5-10 second clip.
  • Aggiungi il suono del vento forte e uno splash finale: l'effetto «sembra vero» viene dall'audio.Add strong wind sound and a final splash: the "looks real" effect comes from the audio.

Ti è piaciuta questa risorsa? Nel percorso completo The AI Creator System (14 moduli, oltre 5 ore) impari a usare le AI come un fenomeno, passo per passo.Liked this resource? In the full The AI Creator System program (14 modules, over 5 hours) you learn to use AI like a pro, step by step.

Vai al corso completo →Go to the full course →
Il trailer d'azione tra le dune: quad, rovine e fuoristrada, 100% AI
Risorsa gratuita dal ReelFree resource from our Reel

Il trailer d'azione tra le dune: quad, rovine e fuoristrada, 100% AIThe action trailer in the dunes: quad bikes, ruins and getaway trucks, 100% AI

Nel Reel un inseguimento tra le dune al tramonto: quad che saltano, rovine antiche, fuoristrada in fuga. Niente deserto, niente troupe, niente telecamera: ogni fotogramma è generato con l'AI. Qui trovi come costruire il tuo trailer clip dopo clip, con lo stesso protagonista in ogni scena.In the Reel a chase through the dunes at sunset: jumping quad bikes, ancient ruins, getaway trucks. No desert, no crew, no camera: every frame is generated with AI. Here is how to build your own trailer clip by clip, with the same hero in every scene.

Strumento: generatore di immagini + Kling / HiggsfieldTool: image generator + Kling / HiggsfieldTempo: 30-40 minutiTime: 30-40 minutesMateriale: 4 prompt, 1 personaggioMaterial: 4 prompts, 1 character
  • Crea il protagonista con il PROMPT 1 e salvalo: lo userai come riferimento in tutte le scene.Create the hero with PROMPT 1 and save it: you will use it as reference in every scene.
  • Genera i fotogrammi delle 3 scene (quad, rovine, fuoristrada) con il PROMPT 2, sempre con il riferimento del protagonista.Generate the frames of the 3 scenes (quad, ruins, truck) with PROMPT 2, always with the hero reference.
  • Anima ogni fotogramma con il PROMPT 3 in Kling o Higgsfield: clip da 5 secondi, camera in movimento.Animate each frame with PROMPT 3 in Kling or Higgsfield: 5-second clips, moving camera.
  • Monta le clip con tagli veloci, musica epica e suoni di motore e sabbia; chiudi con un cartello «continua…».Edit the clips with fast cuts, epic music and engine and sand sounds; end with a "to be continued…" card.

Ti è piaciuta questa risorsa? Nel percorso completo The AI Creator System (14 moduli, oltre 5 ore) impari a usare le AI come un fenomeno, passo per passo.Liked this resource? In the full The AI Creator System program (14 modules, over 5 hours) you learn to use AI like a pro, step by step.

Vai al corso completo →Go to the full course →

Scavalca la barriera e corri in campo in uno stadio pieno, con l'AI
Risorsa gratuita dal ReelFree resource from our Reel

Scavalca la barriera e corri in campo in uno stadio pieno, con l'AIJump the barrier and run onto the pitch in a packed stadium, with AI

Il sogno di ogni bambino: saltare la barriera e correre sul prato davanti a uno stadio pieno. Nel Reel non c'era nessuno stadio, nessuna folla, nessuna telecamera: è tutto generato con l'AI. Qui trovi come rifarlo con il tuo volto.Every kid's dream: jump the barrier and run onto the pitch in front of a packed stadium. In the Reel there was no stadium, no crowd, no camera: it is all AI-generated. Here is how to remake it with your face.

Strumento: una tua foto + image-to-videoTool: your photo + image-to-videoTempo: 15 minutiTime: 15 minutesMateriale: 1 foto del voltoMaterial: 1 face photo
  • Scegli una foto del tuo volto ben illuminata e a figura intera se puoi.Pick a well-lit photo of your face, full body if you can.
  • Crea il fotogramma sugli spalti con il PROMPT 1 caricando la foto come riferimento.Create the frame in the stands with PROMPT 1, uploading the photo as reference.
  • Anima la scena con il PROMPT 2 in uno strumento image-to-video (per esempio Kling AI), clip da 5-10 secondi.Animate the scene with PROMPT 2 in an image-to-video tool (for example Kling AI), 5-10 second clip.
  • Aggiungi il boato della folla e un fischio dell'arbitro: è l'audio che rende la scena credibile.Add the roar of the crowd and a referee whistle: the audio is what makes the scene believable.

Ti è piaciuta questa risorsa? Nel percorso completo The AI Creator System (14 moduli, oltre 5 ore) impari a usare le AI come un fenomeno, passo per passo.Liked this resource? In the full The AI Creator System program (14 modules, over 5 hours) you learn to use AI like a pro, step by step.

Vai al corso completo →Go to the full course →
POV: sei il primo alieno che vede la Terra. La scena sci-fi con l'AI
Risorsa gratuita dal ReelFree resource from our Reel

POV: sei il primo alieno che vede la Terra. La scena sci-fi con l'AIPOV: you're the first alien to ever see Earth. The sci-fi scene with AI

Nel Reel una navicella aliena attraversa lo spazio profondo e si avvicina alla Terra, come in un film di fantascienza. Niente set, niente telecamera, niente astronave: è stato tutto creato con l'AI da un portatile. Qui trovi le inquadrature e i prompt per rifare la tua sequenza.In the Reel an alien ship crosses deep space and approaches Earth, like a sci-fi movie. No set, no camera, no spaceship: it was all created with AI from a laptop. Here are the shots and prompts to remake your own sequence.

Strumento: generatore di immagini + image-to-videoTool: image generator + image-to-videoTempo: 20-30 minutiTime: 20-30 minutesMateriale: 3 inquadratureMaterial: 3 shots
  • Genera le 3 inquadrature con il PROMPT 1: navicella nello spazio, vista dall'oblò, Terra in arrivo.Generate the 3 shots with PROMPT 1: ship in space, view from the porthole, Earth approaching.
  • Tieni lo stesso design della navicella: usa la prima immagine come riferimento per le altre.Keep the same ship design: use the first image as reference for the others.
  • Anima ogni immagine con il PROMPT 2: movimenti lenti e maestosi funzionano meglio nello spazio.Animate each image with PROMPT 2: slow, majestic movements work best in space.
  • Monta le clip con una musica d'atmosfera e un suono basso e profondo; scrivi in sovrimpressione «POV: sei il primo alieno che vede la Terra».Edit the clips with ambient music and a deep low sound; add the on-screen text "POV: you're the first alien to ever see Earth".

Ti è piaciuta questa risorsa? Nel percorso completo The AI Creator System (14 moduli, oltre 5 ore) impari a usare le AI come un fenomeno, passo per passo.Liked this resource? In the full The AI Creator System program (14 modules, over 5 hours) you learn to use AI like a pro, step by step.

Vai al corso completo →Go to the full course →
Combattimento da cinecomic in un corridoio al neon, senza stuntman
Risorsa gratuita dal ReelFree resource from our Reel

Combattimento da cinecomic in un corridoio al neon, senza stuntmanSuperhero fight scene in a neon hallway, with no stuntmen

Nel Reel un eroe mascherato in tuta nera affronta un gruppo di scagnozzi in un corridoio illuminato di rosso. Tuta, coreografia e ambiente sono generati al 100% con l'AI: niente troupe, niente set, niente stuntman. Qui trovi come creare il tuo eroe e la sua scena di lotta.In the Reel a masked hero in a black suit takes on a group of thugs in a red-lit hallway. Suit, choreography and setting are 100% AI-generated: no crew, no set, no stuntmen. Here is how to create your hero and their fight scene.

Strumento: generatore di immagini + image-to-videoTool: image generator + image-to-videoTempo: 20-30 minutiTime: 20-30 minutesMateriale: 1 eroe, 3 colpiMaterial: 1 hero, 3 moves
  • Disegna il tuo eroe con il PROMPT 1 e tienilo come riferimento per tutte le clip.Design your hero with PROMPT 1 and keep it as reference for every clip.
  • Crea i fotogrammi dei colpi con il PROMPT 2 (pugno, calcio, schivata), sempre nello stesso corridoio.Create the frames of the moves with PROMPT 2 (punch, kick, dodge), always in the same hallway.
  • Anima ogni fotogramma con il PROMPT 3: un solo movimento per clip, 5 secondi, così la coreografia resta pulita.Animate each frame with PROMPT 3: one move per clip, 5 seconds, so the choreography stays clean.
  • Monta a ritmo con colpi secchi, whoosh e un rallenty sul colpo finale.Edit to the beat with sharp hits, whooshes and a slow motion on the final blow.

Ti è piaciuta questa risorsa? Nel percorso completo The AI Creator System (14 moduli, oltre 5 ore) impari a usare le AI come un fenomeno, passo per passo.Liked this resource? In the full The AI Creator System program (14 modules, over 5 hours) you learn to use AI like a pro, step by step.

Vai al corso completo →Go to the full course →
Diventa un mostro di fuoco: mani in fiamme e occhi che bruciano, con l'AI
Risorsa gratuita dal ReelFree resource from our Reel

Diventa un mostro di fuoco: mani in fiamme e occhi che bruciano, con l'AIBecome a fire monster: burning hands and blazing eyes, with AI

Nel Reel un ragazzo in maglietta bianca è in piedi nella giungla, davanti a templi di pietra antichi: prima compare una fiamma tra le mani, poi entrambe le mani prendono fuoco e alla fine anche gli occhi si accendono. Qui trovi i passaggi e i prompt per rifare la scena con la tua foto.In the Reel a guy in a white T-shirt stands in the jungle in front of ancient stone temples: first a flame appears between his hands, then both hands catch fire and finally his eyes ignite too. Here are the steps and prompts to recreate the scene with your own photo.

Materiale: 1 tua foto a figura interaMaterial: 1 full-body photo of youTempo: 15 minutiTime: 15 minutesCosto: secondo il tuo piano/creditiCost: depends on your plan/credits
  • Scatta o scegli una foto a figura intera, frontale, con le mani libere davanti al corpo e una luce uniforme.Take or pick a full-body, front-facing photo with your hands free in front of your body and even lighting.
  • Con il PROMPT 1 crea l'immagine di partenza: tu, stesso volto e stessi vestiti, nella giungla davanti ai templi di pietra.Use PROMPT 1 to create the starting image: you, same face and same clothes, in the jungle in front of the stone temples.
  • Carica l'immagine in un generatore immagine-video e usa il PROMPT 2: la fiamma nasce tra le mani, si allarga e alla fine si accendono gli occhi.Upload the image to an image-to-video generator and use PROMPT 2: the flame is born between your hands, grows, and finally your eyes ignite.
  • Tieni la clip corta (5-7 secondi), genera 2-3 varianti e aggiungi in montaggio un suono di fuoco che crepita e un colpo basso quando si accendono gli occhi.Keep the clip short (5-7 seconds), generate 2-3 variations and add a crackling fire sound plus a low hit when the eyes ignite.

Ti è piaciuta questa risorsa? Nel percorso completo The AI Creator System (14 moduli, oltre 5 ore) impari a usare le AI come un fenomeno, passo per passo.Liked this resource? In the full The AI Creator System program (14 modules, over 5 hours) you learn to use AI like a pro, step by step.

Vai al corso completo →Go to the full course →
Il tuo ritratto con due personaggi cartoon sulle spalle
Risorsa gratuita dal ReelFree resource from our Reel

Il tuo ritratto con due personaggi cartoon sulle spalleYour portrait with two cartoon characters on your shoulders

Nel Reel un ritratto fotografico vero con un gatto e un topo in stile cartoon che giocano sulle spalle. Si fa con una foto e un prompt: qui trovi il prompt e come animarlo.In the Reel a real photographic portrait with a cartoon-style cat and mouse playing on the shoulders. It takes one photo and one prompt: here are the prompt and how to animate it.

Materiale: 1 foto tuaMaterial: 1 photo of youTempo: 5 minutiTime: 5 minutesCosto: anche gratisCost: free plan works too
  • Usa una foto a mezzo busto con sfondo semplice e luce morbida.Use a half-length photo with a simple background and soft light.
  • Carica la foto in ChatGPT (o in un altro generatore di immagini) con il PROMPT 1.Upload the photo to ChatGPT (or another image generator) with PROMPT 1.
  • Descrivi personaggi tuoi: i cartoni famosi sono protetti e spesso il generatore li rifiuta.Describe your own characters: famous cartoons are protected and generators often refuse them.
  • Per il video, anima l'immagine con il PROMPT 2 in un generatore immagine-video.For the video, animate the image with PROMPT 2 in an image-to-video generator.

Ti è piaciuta questa risorsa? Nel percorso completo The AI Creator System (14 moduli, oltre 5 ore) impari a usare le AI come un fenomeno, passo per passo.Liked this resource? In the full The AI Creator System program (14 modules, over 5 hours) you learn to use AI like a pro, step by step.

Vai al corso completo →Go to the full course →
Da una foto a una ripresa con il drone: l'effetto del deserto
Risorsa gratuita dal ReelFree resource from our Reel

Da una foto a una ripresa con il drone: l'effetto del desertoFrom one photo to a drone shot: the desert effect

Nel Reel una semplice foto nel deserto diventa una ripresa aerea: la camera si alza e si allontana mostrando dune, montagne e cammelli. Funziona con qualsiasi foto di viaggio: qui trovi il prompt.In the Reel a simple photo in the desert becomes an aerial shot: the camera rises and pulls away revealing dunes, mountains and camels. It works with any travel photo: here is the prompt.

Materiale: 1 foto di viaggioMaterial: 1 travel photoTempo: 5 minutiTime: 5 minutesCosto: secondo il tuo piano/creditiCost: depends on your plan/credits
  • Scegli una foto verticale con tanto paesaggio intorno a te: la camera ha bisogno di spazio da rivelare.Pick a vertical photo with plenty of landscape around you: the camera needs space to reveal.
  • Caricala in un generatore immagine-video e usa il PROMPT 1.Upload it to an image-to-video generator and use PROMPT 1.
  • Se il volto si deforma, accorcia la durata a 5 secondi o fai partire la camera più da lontano.If the face distorts, shorten the clip to 5 seconds or start the camera further away.
  • Con il PROMPT 2 ottieni la versione inversa: dal cielo la camera scende fino a te.With PROMPT 2 you get the reverse version: from the sky the camera descends to you.

Ti è piaciuta questa risorsa? Nel percorso completo The AI Creator System (14 moduli, oltre 5 ore) impari a usare le AI come un fenomeno, passo per passo.Liked this resource? In the full The AI Creator System program (14 modules, over 5 hours) you learn to use AI like a pro, step by step.

Vai al corso completo →Go to the full course →
Un trailer in stile Hollywood con un solo prompt: 15 secondi, più inquadrature
Risorsa gratuita dal ReelFree resource from our Reel

Un trailer in stile Hollywood con un solo prompt: 15 secondi, più inquadratureA Hollywood-style trailer from a single prompt: 15 seconds, multiple shots

Nel Reel un solo prompt genera un mini trailer fantasy di 15 secondi: ripresa dal drone su un'abbazia in rovina tra le colline nebbiose, un vortice di energia blu e una figura incappucciata tra gli archi di pietra. Nel post sono citati Seedance 2 e Higgsfield. Qui trovi i passaggi e un prompt a inquadrature da adattare alla tua storia.In the Reel a single prompt generates a 15-second fantasy mini trailer: a drone shot over a ruined abbey in misty hills, a blue energy vortex and a hooded figure among stone arches. The post mentions Seedance 2 and Higgsfield. Here are the steps and a shot-by-shot prompt to adapt to your story.

Strumento: Higgsfield + Seedance 2Tool: Higgsfield + Seedance 2Tempo: 10 minutiTime: 10 minutesCosto: secondo il tuo piano/creditiCost: depends on your plan/credits
  • Decidi la storia in 3 momenti: luogo (inquadratura larga), evento (l'elemento magico), personaggio (il colpo finale).Plan the story in 3 beats: place (wide shot), event (the magic element), character (the final shot).
  • Apri Higgsfield, scegli Seedance 2 in modalità testo-video, durata massima disponibile e formato 9:16 o 16:9.Open Higgsfield, pick Seedance 2 in text-to-video mode, the longest available duration and 9:16 or 16:9.
  • Incolla il PROMPT 1, che descrive le inquadrature in ordine con i tempi: il modello monta i tagli dentro un'unica clip.Paste PROMPT 1, which lists the shots in order with timings: the model cuts between them inside a single clip.
  • Genera 2-3 varianti; se un'inquadratura non convince, cambia solo quella riga. Aggiungi musica epica e un titolo finale nel montaggio.Generate 2-3 variations; if one shot doesn't work, change only that line. Add epic music and a final title in the edit.

Ti è piaciuta questa risorsa? Nel percorso completo The AI Creator System (14 moduli, oltre 5 ore) impari a usare le AI come un fenomeno, passo per passo.Liked this resource? In the full The AI Creator System program (14 modules, over 5 hours) you learn to use AI like a pro, step by step.

Vai al corso completo →Go to the full course →
Dalla scogliera allo spazio: lo zoom-out fino alla Terra con il tuo volto
Risorsa gratuita dal ReelFree resource from our Reel

Dalla scogliera allo spazio: lo zoom-out fino alla Terra con il tuo voltoFrom the cliff to space: the zoom-out to Earth with your face

Nel Reel la camera attraversa le nuvole sopra una costa verde, trova un ragazzo che impila pietre sul bordo di una scogliera al tramonto e poi si allontana fino a mostrare il pianeta Terra visto dall'orbita. Qui trovi i passaggi e i prompt per rifare la scena con la tua foto.In the Reel the camera flies through the clouds above a green coast, finds a guy stacking stones on the edge of a cliff at sunset and then pulls away until planet Earth is seen from orbit. Here are the steps and prompts to recreate the scene with your own photo.

Materiale: 1 tua fotoMaterial: 1 photo of youTempo: 15 minutiTime: 15 minutesCosto: secondo il tuo piano/creditiCost: depends on your plan/credits
  • Con il PROMPT 1 crea il fotogramma centrale: tu sulla scogliera al tramonto mentre impili pietre, stesso volto della tua foto.Use PROMPT 1 to create the middle frame: you on the cliff at sunset stacking stones, same face as your photo.
  • Anima l'arrivo dall'alto con il PROMPT 2: la camera scende tra le nuvole e si avvicina a te.Animate the arrival from above with PROMPT 2: the camera descends through the clouds and approaches you.
  • Anima l'uscita con il PROMPT 3 usando lo stesso fotogramma: la camera sale senza tagli fino all'orbita e mostra la Terra.Animate the exit with PROMPT 3 using the same frame: the camera rises without cuts up to orbit and shows Earth.
  • Unisci le due clip sul fotogramma comune, così il passaggio è invisibile, e aggiungi vento e un crescendo musicale.Join the two clips on the shared frame so the transition is invisible, and add wind and a musical build-up.

Ti è piaciuta questa risorsa? Nel percorso completo The AI Creator System (14 moduli, oltre 5 ore) impari a usare le AI come un fenomeno, passo per passo.Liked this resource? In the full The AI Creator System program (14 modules, over 5 hours) you learn to use AI like a pro, step by step.

Vai al corso completo →Go to the full course →
Stesso prompt, due AI video: Kling 3.0 contro Seedance 2.0
Risorsa gratuita dal ReelFree resource from our Reel

Stesso prompt, due AI video: Kling 3.0 contro Seedance 2.0Same prompt, two AI video models: Kling 3.0 vs Seedance 2.0

Nel Reel lo stesso prompt (un uomo con il cappuccio nero tra rovine gotiche, colline nebbiose e bosco) gira su Kling 3.0 e su Seedance 2.0: Seedance tiene il personaggio molto più simile alla foto di riferimento, mentre Kling consuma meno crediti ed è comodo per provare tante scene o personaggi che non devono somigliare a un riferimento. Qui trovi il metodo per fare il confronto da solo e il prompt completo.In the Reel the same prompt (a man in a black hood among gothic ruins, misty hills and forest) runs on Kling 3.0 and on Seedance 2.0: Seedance keeps the character much closer to the reference photo, while Kling uses fewer credits and is handy for testing many scenes or characters that don't need to match a reference. Here is the method to run the comparison yourself and the full prompt.

Strumenti: Kling 3.0 + Seedance 2.0Tools: Kling 3.0 + Seedance 2.0Tempo: 20 minutiTime: 20 minutesCosto: secondo i crediti di ogni piattaformaCost: depends on each platform's credits
  • Prepara 1 foto di riferimento del personaggio (volto ben visibile, luce uniforme) e l'immagine di partenza della scena con il PROMPT 1.Prepare 1 reference photo of the character (face clearly visible, even light) and the scene's starting image with PROMPT 1.
  • Incolla lo STESSO PROMPT 2 in Kling 3.0 e in Seedance 2.0, con la stessa immagine, la stessa durata e lo stesso formato 9:16.Paste the SAME PROMPT 2 into Kling 3.0 and Seedance 2.0, with the same image, same duration and same 9:16 format.
  • Confronta le due clip con la griglia del PROMPT 3: somiglianza del volto, vestiti, movimento, crediti usati.Compare the two clips with the PROMPT 3 checklist: face likeness, clothes, motion, credits used.
  • Regola pratica dal Reel: Seedance quando il personaggio deve restare identico al riferimento, Kling per provare molte scene spendendo meno crediti.Practical rule from the Reel: Seedance when the character must stay identical to the reference, Kling to test many scenes while spending fewer credits.

Ti è piaciuta questa risorsa? Nel percorso completo The AI Creator System (14 moduli, oltre 5 ore) impari a usare le AI come un fenomeno, passo per passo.Liked this resource? In the full The AI Creator System program (14 modules, over 5 hours) you learn to use AI like a pro, step by step.

Vai al corso completo →Go to the full course →
Vola come una supereroina sopra la città di notte, con il tuo volto
Risorsa gratuita dal ReelFree resource from our Reel

Vola come una supereroina sopra la città di notte, con il tuo voltoFly like a superhero over the city at night, with your face

Nel Reel «Super Mary» vola a pochi metri dall'asfalto sopra una superstrada bagnata in mezzo ai grattacieli illuminati: arriva verso la camera a braccia tese e poi sfreccia tra le auto. Qui trovi i passaggi e i prompt per rifare la scena con la tua foto.In the Reel "Super Mary" flies a few metres above a wet highway between lit-up skyscrapers: she comes towards the camera with arms stretched out and then zooms past the cars. Here are the steps and prompts to recreate the scene with your own photo.

Materiale: 1 tua foto del voltoMaterial: 1 photo of your faceTempo: 10 minutiTime: 10 minutesCosto: secondo il tuo piano/creditiCost: depends on your plan/credits
  • Scegli una foto del volto nitida, frontale, con luce uniforme e senza occhiali da sole.Pick a sharp, front-facing photo of your face with even light and no sunglasses.
  • Con il PROMPT 1 crea l'immagine di partenza: tu in posa di volo sopra la superstrada di notte, a braccia tese verso la camera.Use PROMPT 1 to create the starting image: you in a flying pose above the highway at night, arms stretched towards the camera.
  • Carica l'immagine in un generatore immagine-video e usa il PROMPT 2 per il volo: avvicinamento alla camera e passaggio tra le auto.Upload the image to an image-to-video generator and use PROMPT 2 for the flight: approach to the camera and pass between the cars.
  • Genera 2-3 varianti da 5 secondi, tieni quella con il volto più fedele e aggiungi in montaggio un suono di vento e di auto che passano.Generate 2-3 five-second variations, keep the one with the most faithful face and add wind and passing-car sounds in editing.

Ti è piaciuta questa risorsa? Nel percorso completo The AI Creator System (14 moduli, oltre 5 ore) impari a usare le AI come un fenomeno, passo per passo.Liked this resource? In the full The AI Creator System program (14 modules, over 5 hours) you learn to use AI like a pro, step by step.

Vai al corso completo →Go to the full course →
Cadi da un portale e atterri con un guanto di energia, con l'AI
Risorsa gratuita dal ReelFree resource from our Reel

Cadi da un portale e atterri con un guanto di energia, con l'AIFall out of a portal and land with an energy gauntlet, with AI

Nel Reel un ragazzo precipita da un portale nero in un cielo in tempesta sopra una città in rovina, atterra a terra tra le macerie e il suo pugno si trasforma in un guanto corazzato che brilla di energia viola, con un cane accanto. Qui trovi i passaggi e i prompt per rifare la trasformazione con la tua foto (nel Reel: Higgsfield + Seedance 2).In the Reel a guy falls out of a black portal in a stormy sky above a ruined city, lands among the rubble and his fist turns into an armored gauntlet glowing with purple energy, with a dog beside him. Here are the steps and prompts to recreate the transformation with your own photo (in the Reel: Higgsfield + Seedance 2).

Materiale: 1 tua foto a mezzo bustoMaterial: 1 half-body photo of youTempo: 15 minutiTime: 15 minutesCosto: secondo il tuo piano/creditiCost: depends on your plan/credits
  • Scegli una foto a mezzo busto, frontale, con il volto ben illuminato e le mani visibili.Pick a front-facing half-body photo with a well-lit face and visible hands.
  • Con il PROMPT 1 crea l'immagine di partenza: tu a terra tra le macerie, sotto il portale nero, con il cane accanto.Use PROMPT 1 to create the starting image: you on the ground among the rubble, under the black portal, with the dog beside you.
  • In Higgsfield scegli Seedance 2 (immagine-video) e usa il PROMPT 2 per la caduta dal portale; poi il PROMPT 3 per la trasformazione del pugno.In Higgsfield pick Seedance 2 (image-to-video) and use PROMPT 2 for the fall from the portal; then PROMPT 3 for the fist transformation.
  • Unisci le due clip in montaggio (caduta + trasformazione) e aggiungi un colpo sordo all'atterraggio e un ronzio elettrico quando si accende il guanto.Join the two clips in editing (fall + transformation) and add a heavy thud on landing and an electric hum when the gauntlet lights up.

Ti è piaciuta questa risorsa? Nel percorso completo The AI Creator System (14 moduli, oltre 5 ore) impari a usare le AI come un fenomeno, passo per passo.Liked this resource? In the full The AI Creator System program (14 modules, over 5 hours) you learn to use AI like a pro, step by step.

Vai al corso completo →Go to the full course →
Video gratuitoFree video

Tutorial combattimento con il tuo voltoCombat tutorial with your own face

Guarda questo tutorial lampo per creare una scena di combattimento con il tuo volto protagonista in pochi passaggi, senza workflow complicati.Watch this quick tutorial to build a combat scene starring your own face in just a few steps, without complicated workflows.

Difficoltà: 0Difficulty: 0 Formato: Tutorial videoFormat: Video tutorial Tempo: velocissimoTime: very fast
  • Ti mostra il setup essenziale per trasformare una semplice reference nel protagonista della scena action.Shows the essential setup to turn a simple reference into the star of the action scene.
  • Perfetto se vuoi ottenere un effetto forte in pochissimo tempo, anche partendo da zero.Perfect if you want a strong effect in very little time, even starting from scratch.
  • Ideale da guardare e replicare subito per contenuti rapidi ma di impatto.Ideal to watch and replicate immediately for quick yet impactful content.
Video gratuitoFree video

Tutorial Il tempo si fermaTime-freeze tutorial

Guarda questo tutorial per creare un effetto in cui il tempo sembra bloccarsi attorno a te, con un workflow rapido e facile da replicare.Watch this tutorial to create a scene where time seems to freeze around you, with a fast and easy workflow to replicate.

Difficoltà: 0Difficulty: 0 Formato: Tutorial videoFormat: Video tutorial Effetto: tempo fermoEffect: time freeze
  • Ti guida nel setup essenziale per ricreare una scena in cui tutto sembra sospeso o congelato nel tempo.Guides you through the essential setup to recreate a scene where everything seems suspended or frozen in time.
  • Perfetto se vuoi ottenere un effetto cinematografico d'impatto con pochi passaggi e senza montaggi complessi.Perfect for a high-impact cinematic effect in a few steps and without complex editing.
  • Ottimo da usare come base pronta per reel, ads o contenuti visivi che devono catturare subito l'attenzione.Great as a ready-made base for reels, ads or visual content that must grab attention immediately.
Prompt Mago
Prompt gratuitoFree prompt

Prompt Mago

Utilizza questo prompt in seedance.ai andando a sostituire la foto del ragazzo con la tua così da poter essere il protagonista della scena.Use this prompt in seedance.ai by replacing the reference photo with your own so you can become the protagonist of the scene.

  • Scena dark fantasy cinematografica da 15 secondi con build-up, reveal e slow motion finale.15-second cinematic dark-fantasy scene with build-up, reveal and final slow motion.
  • Prompt strutturato in shot, suono, VFX e style settings per un risultato più guidato.Prompt structured into shots, sound, VFX and style settings for a more guided result.
  • Perfetto da usare come base pronta e poi personalizzare con la tua reference facciale.Perfect to use as a ready base and then customize with your own facial reference.